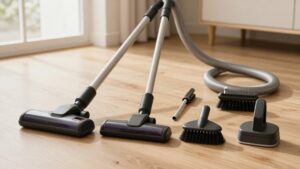
The Vacuum Cleaning and Storage Checklist: 9 Habits That Keep It Running
Keep vacuum working with nine habits: check filters monthly; wash filters only when washable and air-dry them for 24 hours; unplug before inspections; empty the canister before it fills; clear hair from the brush roll; inspect hoses and wands; use high-pile settings and gentle, overlapping passes on rugs; stop immediately for sparks or burning odors; coil the cord loosely; and refresh every season.
These steps protect airflow, belts, carpets, and safety.
You’ll find guidance below.
Vacuum Filter and Brush Care
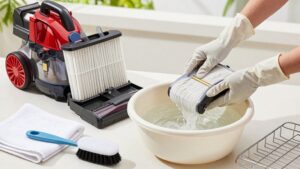
Because clogged filters restrict airflow and send dust back into the room, check your vacuum’s filter every few uses or at least monthly. If it’s washable, rinse it with cool water only, then air-dry it for at least 24 hours before reinstalling. A damp filter can damage motor and spread odors.
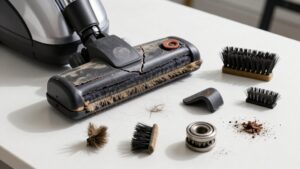
Replace HEPA or foam filters according to manufacturer’s schedule, and replace them sooner if airflow stays weak after cleaning. Remove brush roll and clear hair, string, and fibers from bristles and bearings. Buildup forces brush to work harder, increasing belt and motor strain. Replace brush roll if cleaning doesn’t restore performance.
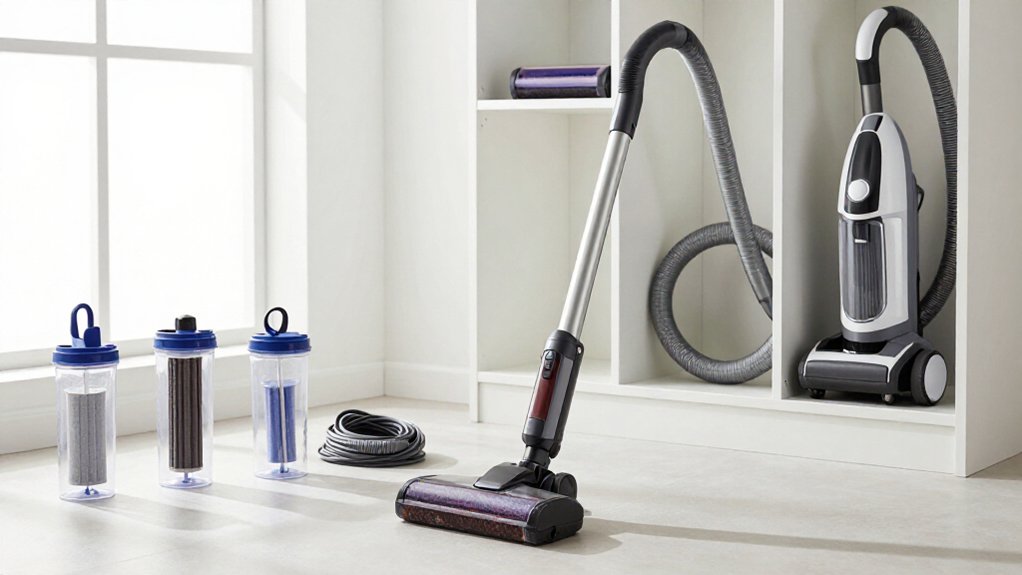
Store vacuum with floor head and container clear, and hang or coil hose and tools to prevent blockages before your next cleaning session.
Unplug Before Inspecting
After clearing the filter and brush roll, switch the vacuum off and unplug it before inspecting any internal parts.
Wait for the brushroll and tools to stop; don’t trust the power switch alone. Use a flashlight, gloves, and a clean tray, then inspect methodically:
- Check the cord, plug, grounding pin, and housing for cuts, fraying, cracks, or scorch marks.
- Examine hoses, channels, brushroll, belt, and powered attachments for blockages or damage.
- Use scissors, tweezers, a soft brush, or approved compressed air; keep fingers away from sharp edges and fans.
- Replace damaged parts before reconnecting; keep hair, jewelry, and loose clothing clear during testing.
Inspect before every use, and perform a deeper check monthly, or sooner after heavy pickup or reduced suction.
Never inspect while plugged.
Sunday Canister Emptying
Set aside Sunday to empty the vacuum’s canister or dust cup before it reaches capacity, since accumulated debris restricts airflow and weakens suction.
Work outdoors or over a lined trash bin. Release debris slowly; don’t shake the cup, which can return fine dust to the air. Check the filter during this step. If it’s washable, rinse it only as directed and let it dry completely before reinstalling. Inspect the hose and wand for blockages, then wipe the canister interior with a slightly damp cloth when the manual permits.
| Task | Standard | Benefit |
|---|---|---|
| Empty | Every Sunday | Maintains suction |
| Filter | Check and dry | Preserves airflow |
| Hose | Inspect | Prevents blockages |
| Storage | Charge and organize | Speeds next use |
Afterward, charge cordless models and return attachments to one designated location nearby.
Clear Hair From Roller
Power off and unplug the vacuum, then remove the roller according to the manufacturer’s instructions. Cut wrapped hair into small sections with scissors or a seam ripper, and pull it away without damaging the roller or bearings.
Clean the roller, intake area, and bearings, then reassemble securely and check them regularly to prevent buildup.
Power Off First
Before clearing the roller, switch off the vacuum and unplug it to prevent accidental start-ups. Don’t rely on the power switch alone: disconnecting the plug removes electrical power while you inspect tangled hair and debris. Keep your hands, clothing, and tools away from the roller until the cord is disconnected. Let the roller stop completely before you begin any cleaning.
Check that the vacuum won’t restart from a handle trigger, floor sensor, or scheduled cycle. If you’ve just collected pet hair or long fibers, make shutdown part of every cleaning session. Frequent power-off checks protect you from moving parts and help you notice unusual heat, odors, or sounds before they signal a larger problem. Restore power only after the roller area is clear and secured for normal operation.
Remove Roller Safely
With the vacuum unplugged, move it near a trash can and remove the roller according to the manufacturer’s instructions. Inspect the roller and its end caps for hair packed tightly around the bearing areas, where buildup can restrict rotation. Remove hair in small sections, working gently so you don’t tug the bearings or deform the bristles.
Check both ends again, especially beneath the end caps, and clear every visible fiber before you reinstall the roller.
Use a dry microfiber cloth to wipe the roller, then remove lint from the surrounding brush-roll housing. If cleaning solution touched any part, let it dry completely; moisture can affect bearings and encourage odor. Reattach every cover and retaining component correctly, then spin the roller by hand freely.
Cut Away Wrapped Hair
Unplug the vacuum or remove its battery, then use scissors or a seam ripper to cut long strands of hair into small sections around the roller core. Then pull the loosened hair free gently, working from both sides and around each end cap, where strands commonly tighten first.
Check the roller after every few uses if you have pets or long hair; brief weekly cuts prevent dense buildup, stalling, and weaker pickup.
If the roller is removable, take it out and clear it completely. Otherwise, follow the manual’s access-door or teardrop-tool path, and don’t force covers or components. Inspect the roller channel for remaining fibers before reassembling the brush head. Discard cut hair; confirm no strands remain around the core or either end before use.
Clean Roller Bearings
To expose the roller bearings safely, disconnect the vacuum from power or remove its battery, then remove the brush roll according to the manufacturer’s instructions. Inspect bearing housings for hair and lint wrapped there. Pull debris in strips; use scissors carefully around the edges, or a seam ripper to lift buildup from narrow gaps. Don’t force the tool against seals or the roller shaft.
Wipe the shaft and bearing areas with a dry microfiber cloth. Use a damp cloth only when permitted, and keep moisture away from electrical parts. Spin the roller by hand; it should turn smoothly without stiffness, grit, or clicking. If movement feels rough, inspect the housings again for trapped debris. Clean monthly, or sooner if pickup drops or tangles recur.
Prevent Future Buildup
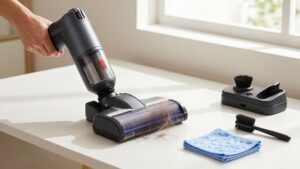
After each use, or at least weekly, clear hair from the roller so tangled strands don’t block the bristles, reduce suction, or strain the motor. Cut hair along the roller’s seam with scissors, then pull away loosened clumps to prevent re-tangling. Use a seam ripper or tweezers around both roller ends and bearings, where buildup can cause wobble, uneven cleaning, and extra resistance.
If pickup weakens, inspect for wrapped debris, especially after cleaning pet-hair-heavy floors or upholstery. For a removable roller or self-clean feature, follow the manufacturer’s steps rather than forcing components. Remove the roller when instructed, clear hidden strands, and fully dry it before reinstalling so damp residue doesn’t attract more hair.
A quick check keeps the brush rotating freely and helps preserve consistent suction.
High-Pile Carpet Settings
Set the vacuum to its highest carpet-height setting so the brushroll won’t snag or prematurely wear high-pile fibers. Use medium-high suction first, then adjust as needed to avoid loosening fibers or overloading the motor.
Check brushroll clearance and remove wrapped hair or threads before cleaning, ensuring the head stays flat without forcing it into thick rugs.
Choose Higher Height
Choose the high-pile or carpet setting before vacuuming thick carpets. Raising the brush bar creates clearance for tall fibers, preventing the roller from yanking them and helping the vacuum maintain airflow. Correct height also reduces hair and debris wrapping around the roller, which occurs more often in deep pile.
If your machine offers several modes, begin with high-pile, then lower the setting only when the vacuum fails to collect debris cleanly. Move slightly slower than you would on low carpet so the roller can lift embedded dirt without over-agitating the pile. Watch the carpet’s appearance and machine response: unevenly raked fibers or a dragging brush indicates insufficient clearance. Switch back to high-pile immediately. Check height when changing carpet types; settings won’t suit all surfaces.
Use Gentle Suction
Once the height is appropriate, use the high-pile carpet or rug mode to prevent the nozzle from dragging, snagging, or flattening thick fibers. Choose the gentlest suction setting that still lifts embedded grit; excessive suction can make the head ride over the pile instead of cleaning it.
Use slower, overlapping passes and vacuum in two directions, with and across the rug’s grain. This pattern reaches debris in deeper loops without repeatedly agitating one area. If your machine offers brushroll control, select off for very plush or delicate rugs to reduce tangling from long fibers and loose threads. Watch for smooth movement and stop if the nozzle resists.
You’ll fine-tune suction gradually, preserving pile loft while consistently maintaining strong pickup and minimizing overall motor strain.
Check Brushroll Clearance
Before you run the vacuum over high-pile carpet, inspect the brushroll and remove any hair, string, or threads wrapped around its bristles or end caps. Confirm that it spins freely and isn’t jammed before selecting the high-pile or carpet setting. The correct height won’t prevent overheating when debris restricts rotation.
Start with the manufacturer’s recommended setting, then listen for changes and watch for weak suction or reduced brush agitation. These symptoms indicate poor clearance, an obstruction, or airflow problem requiring shutdown and inspection.
After each session, check brushroll edges for wrapped fibers. Clear buildup promptly with the tool, unplugging the vacuum. Inspect pet-hair and trafficked areas more often, since dense carpet traps fibers. Maintaining free rotation supports even cleaning and reduces motor strain.
Stronger Suction on Rugs
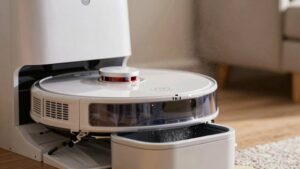
For deeper rug cleaning, use a vacuum with strong suction, such as a roughly 31,000 Pa-class robot or a high-power upright, so it can extract dirt embedded in the fibers rather than merely loosen it. Before vacuuming, clear large debris and straighten the rug so suction isn’t wasted on wrinkles. Run overlapping passes for even pickup.
For thicker pile, select the correct height and brush setting; this keeps the nozzle from floating and maintains contact with the pile. Use boost mode where pet hair and fine dust cling, then make a quick second pass against the pile grain. Empty the dustbin and clean or replace filters regularly, especially HEPA filters, because restricted airflow sharply reduces suction and deep-cleaning performance. Check the rug for remaining grit afterward.
Burning Smell or Sparks
If your vacuum emits sparks, arcs, or a burning-plastic odor, stop using it immediately and unplug it. A loose wire, worn motor brushes, or overheating from a clog can ignite debris.
After it cools, inspect the hose, dust cup or bag, and HEPA filter for blockages or overfilling. Clear the airway and replace clogged filters.
Examine the plug and power cord for discoloration, melted insulation, or heat damage; a loose outlet can create resistance, heat, and sparks.
Let the vacuum cool for 20–30 minutes. Then test it on a hard floor with a bin or bag and seated filters. If the odor or sparking returns, don’t keep testing. Contact the manufacturer or repair service, because motor or control-board failure can pose a fire hazard.
Store Cord Without Kinks
How you wrap the cord affects its service life: unplug the vacuum, then wind the cord into large, loose loops around your hand or the built-in cord hook. Sharp bends fatigue internal conductors and can crack insulation.
If the vacuum retracts its cord, guide it inward slowly; don’t let it snap back, which can strain internal connections. Keep the wrapped cord dry and free of grime to limit corrosion at metal contacts and jacket deterioration.
- Make loops broad and even, without knots or tight compression.
- Use a cord clip or cable tie only to hold loops gently.
- Store the bundled cord in the same cabinet or corner as the vacuum.
- Keep it off the floor to prevent crushing or snags.
This protects the cord.
Refresh Checklist Every Season
At the start of each season, empty the bin or replace the bag, then inspect the HEPA filter and clean or replace it according to the manufacturer’s schedule. This maintains suction and limits dust and pollen recirculation. Inspect the brush roll and intake path, removing hair and stringy debris before clogs restrict airflow. Wipe the vacuum body, and let washable parts dry completely before storage to prevent moldy odors.
Check your storage setup, too. Keep cords and attachments in a labeled spot near the cleaning area, so you’ll find everything quickly and finish the same day. Before a full pass, verify the floor setting: use the recommended height and brush mode for carpet or hard floors. Seasonal yard dust and tracked grit may require adjustments.
Conclusion
Keep your vacuum reliable by turning these tasks into a routine. Unplug it before inspection, empty the canister weekly, and remove hair from the brush roll. Adjust settings for high-pile carpet and use stronger suction only when rugs need it.
If you notice burning smells or sparks, stop immediately. Store the cord loosely, and refresh your checklist each season. These habits protect components, improve cleaning performance, and help you catch problems before they become expensive.