How to Clean a HEPA Vacuum Filter: A Safe Step-by-Step Method
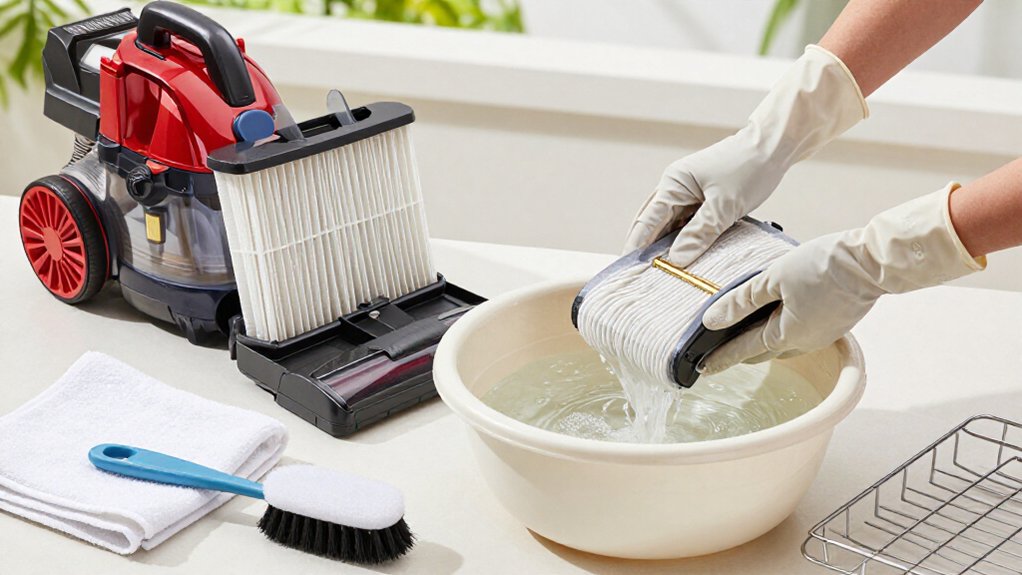
First, check your vacuum’s model and filter part number to confirm whether the HEPA element is washable. Unplug the vacuum, wear gloves and an N95/FFP2 respirator, and work outdoors over newspaper.
For non-washable filters, gently vacuum pleats with a HEPA-filtered vacuum and brush; for washable filters, rinse sides with cold water. Air-dry completely for at least 24 hours.
Wipe housing, inspect the gasket, reinstall, and test suction. Stop if odors persist; you’ll find further safety guidance below.
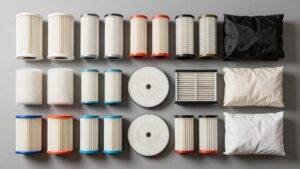
Washable vs. Non-Washable Filters
Before cleaning your HEPA filter, check the vacuum’s manual or the filter label to determine whether it’s washable or non-washable.
If it’s washable, you can rinse it gently with cold or lukewarm water. Avoid scrubbing, harsh chemicals, and forceful pressure, because these actions can damage delicate fibers and reduce filtration performance. Let the filter air-dry completely, often for at least 24 hours, before you reinstall it. A damp filter won’t filter properly and may encourage microbial growth.
If the label says non-washable, don’t expose the element to water. Moisture can permanently weaken its media. Use only dry methods: lightly tap or brush surface debris, or vacuum the exterior with a cleaner that has its own HEPA filtration. Replace the filter when buildup is heavy.
Check Filter Manufacturer Instructions
Check the vacuum’s manual and filter label to confirm whether the HEPA element is washable, rinseable, or replace-only. Find the exact model and filter part number before you proceed. Treat the product manual as the primary authority, then verify updates on the manufacturer’s support website or registered app. A frame marking such as “do not wash,” a water symbol, or a replacement code can override general cleaning advice.
- Follow approved liquids, temperatures, tools, drying times, and replacement intervals; don’t substitute solvents, bleach, alcohol, or heat.
- Check warnings about warranty, electrical isolation, filter alteration, and hazardous dust; use required gloves, eye protection, or an N95/FFP2 respirator.
- Keep an approved replacement available if the instructions prohibit washing or identify damage, contamination, or a missed service interval.
Step 1: Lay Newspaper Beneath Filter
Lay a sheet of newspaper or a disposable work mat beneath the filter before tapping or brushing it. Position the filter directly over this layer, preferably outdoors or in a well-ventilated area. The paper catches dust released from pleats and keeps particles from settling on carpets, flooring, or surfaces.
Keep the newspaper close as you gently tap or brush the filter, because HEPA media can retain fine dust, pollen, and pet dander that may become airborne during dry cleaning. Don’t shake the filter over an uncovered surface or sweep the debris afterward; those actions can redistribute contaminants.
When you’ve finished, fold the newspaper inward to contain the residue, then discard it immediately according to local waste guidance. Wipe the work area if particles escaped.
Step 2: Put on Protective Gloves
Put on protective gloves before handling the HEPA filter to prevent direct contact with trapped dust, allergens, and fine particles. Choose well-fitting nitrile or similar disposable gloves that cover your hands fully and reduce skin exposure. If the filter looks visibly dusty or heavily loaded, wear an N95 or FFP2 mask as well; disturbed particulate matter can be inhaled and may aggravate allergies or asthma.
Work in a well-ventilated area, preferably outdoors, to limit airborne contamination. Keep your movements controlled while you handle the filter, because its delicate fiber media delivers approximately 99.97% filtration for particles down to 0.3 microns.
Don’t remove your gloves until cleaning is complete and the filter is ready for reinstallation. Dispose of single-use gloves, then wash your hands thoroughly.
Step 3: Vacuum Filter Pleats Gently
With the filter held over a trash bin or outdoors, use a vacuum’s brush attachment to lift dust from the pleats with light, controlled strokes. Vacuum along each pleat in the direction of the airflow path, using minimal contact so you don’t stretch, tear, or flatten the delicate filter fibers.
If you use a soft brush, brush lightly between pleats to loosen trapped particles. Avoid aggressive scrubbing, which can damage the media and create gaps that reduce fine-particle capture efficiency.
Keep the nozzle close, but don’t let it touch the pleats; snagging can distort their structure. Stop if you see tearing, crushing, or warping, and replace the filter rather than risk bypass leakage. After cleaning, carefully inspect the seal and housing for dislodged dust.
Step 4: Rinse Washable Filter Thoroughly
Once you’ve confirmed that the filter is washable, rinse it under cool or lukewarm running water, washing both the top and bottom surfaces until the runoff runs clear. Use a gentle flow; don’t scrub, squeeze, twist, or direct a high-pressure jet into the media, because mechanical stress can deform fibers and reduce filtration efficiency. Don’t add soap, detergent, solvents, or disinfectants unless your manufacturer specifically approves them; residues or chemical damage can impair performance.
Rotate the filter as needed so water reaches each pleat without forcing it open. If the runoff remains gray, continue rinsing rather than assuming the filter is clean, since retained fine particles can restrict airflow and increase motor strain. Stop immediately if you notice tears, crushed pleats, warping, or separation.
Step 5: Air-Dry Filter Completely
Set the washable HEPA filter in a warm, well-ventilated area and let it air-dry for at least 24 hours, placing it on a rack or clean towel so air can circulate around it.
Keep the filter away from hairdryers, radiators, ovens, and direct heaters; concentrated heat can deform its delicate fiber structure and reduce filtration performance. Don’t reinstall it after a set time alone: check that it feels fully dry to the touch and looks uniformly dry.
If it feels damp or the pleats look clumped, extend drying and reassess periodically. Moisture can impair particle capture and promote mold or other microbial growth. Turn it occasionally to promote even drying.
Step 6: Wipe Housing Before Reassembly
After the HEPA filter is completely dry and the vacuum remains unplugged, wipe the filter housing and surrounding plastic with a clean, lint-free cloth. Use a slightly damp, not wet, cloth only on housing surfaces; never wipe the HEPA media or allow moisture to contact its fibers.
Inspect the seal channel, gaskets, and filter contact edges for trapped dust, hair, or grit. Remove contamination, ensuring you don’t deform sealing components. Wipe the compartment cover’s exterior as well.
With power off, perform a dry fit. Confirm the filter sits flush, faces the gasket evenly. Proper seating limits bypass leakage and helps preserve the filter’s intended approximately 99.97% capture efficiency for 0.3-micrometer particles. Don’t force the cartridge; replace damaged seals or filters according to the manufacturer’s instructions.
Test Suction After Reassembly
With the vacuum fully reassembled and the HEPA filter completely dry, plug it in and run it on a hard floor for 1–2 minutes. Check whether airflow feels strong at the nozzle and isn’t noticeably weaker than before. If your model has a suction indicator or digital status, confirm it returns to normal operation immediately.
Perform a controlled pickup test using a small, measured pinch of fine dust or debris. Verify the vacuum removes it effectively without visible leakage around the housing. Listen for whistling, rattling, or coughing air; these sounds can indicate misalignment, damage, or incomplete latching.
If suction seems weak, shut off, confirm the filter is fully dry, then reseat it in the specified orientation with tight seals before retesting the vacuum.
Resolve Burning Smell Safely
A burning smell during the test requires immediate shutdown: unplug the vacuum, then inspect the HEPA filter for heavy dust buildup that may be restricting airflow and overheating the motor. Wear a dust mask and work outdoors. Dry-clean only with a HEPA-filtered vacuum and a soft brush; don’t wet the non-washable filter media.
| Finding | Safe action | Reason |
|---|---|---|
| Heavy dust | Clean gently | Restores airflow |
| Odor remains | Stop; inspect motor pathway and brush | Prevents damage |
If your manual permits washing, rinse with cold water and air-dry at least 24 hours before reinstalling. Moisture can create odor and harm the motor.
If the smell persists after the filter is clean and fully dry, stop using the vacuum. Seek qualified service if overheating or odor returns during testing.
Inspect the Filter Gasket
Before reinstalling the HEPA filter, inspect the rubber or foam gasket around its frame for cracks, brittleness, stretching, or missing sections. Make sure the gasket sits flat and continuous with no gaps. A damaged seal can allow unfiltered air to bypass the HEPA media and reduce particle capture efficiency, often rated at 99.97% for 0.3-micrometer particles.
Check that the filter isn’t torn or deformed at the edges that contact the gasket. If debris is present, clean the gasket only with a dry, lint-free cloth or a brush. Don’t use water, solvents, or adhesive, which can compromise the material and seal.
If the gasket looks worn or the filter doesn’t seat firmly, replace the gasket or HEPA filter assembly according to the manufacturer’s guidance promptly.
Conclusion
Before you finish, confirm whether your HEPA filter is washable; don’t rinse a non-washable model. Follow the manufacturer’s instructions, wear gloves, and control dust with newspaper and gentle vacuuming. Wipe the housing, inspect the gasket, and reinstall every component correctly.
Test suction only after assembly. If you notice a burning smell, switch off and unplug the vacuum immediately, then investigate safely. Replace damaged or saturated filters rather than risking reduced filtration or potential motor damage.