How to Unclog a Central Vacuum System: A Step-by-Step Clearing Guide
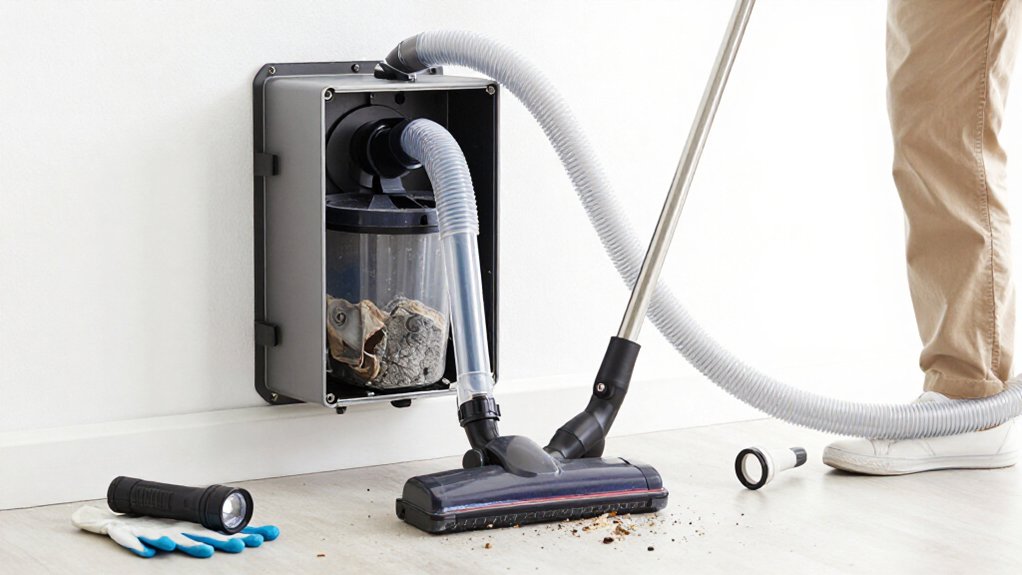
To unclog your central vacuum, test each inlet separately and note where suction weakens. Move furniture, then turn off and unplug the power unit. Wear gloves.
Check the inlet flap, remove debris, and feed a flexible rod slowly; don’t force resistance. If needed, use a wet/dry vacuum in suction mode for short bursts.
Reconnect and retest, verify debris reaches the canister, and inspect or replace its filter. The steps below guide you through it safely.
Confirm Suction at Inlets
Start by turning on the central vacuum and testing one inlet at a time while keeping all other inlets closed. If suction drops at every inlet, you’ll suspect a system-wide restriction and inspect the power unit’s bag and filter area first. Weak airflow across multiple inlets usually points beyond one room. Central units draw about 12–15 amps, so broad loss warrants checks.
Insert the hose into each inlet and listen for airflow. Confirm that the valve door opens; a partially open door can restrict suction. Disconnect the hose and listen for hissing at each valve. Noticeable hissing may indicate a valve or air leak.
After servicing the bag or filter, re-test the nearest inlet, then compare all others to pinpoint where performance declines first.
Gather a Wet/Dry Vacuum
A wet/dry vacuum can provide strong auxiliary suction to pull a clog from the main inlet or central-vacuum tubing. Choose a shop-style model with a 2.5-inch hose, high CFM, and strong sealed suction. Gather an adapter, flexible rod, towels, gloves, goggles, a mask, and debris bin.
- Select a dry-debris filter; don’t operate without the filter your manual requires.
- Check the cord, plug, tank, and hose for damage before connection.
- Keep the motor off and unplugged while fitting adapters or changing filters.
Create a near-airtight seal with a universal adapter at the main inlet or central-unit access point. If the fit leaks, wrap the joint with a towel. Use suction first; use blower mode only if model permits it and tubing can tolerate back pressure.
Step 1: Remove Furniture Near Inlets
Before connecting the wet/dry vacuum, move furniture away from every wall inlet you plan to test. Clear at least a few feet around the inlet so you can reach the cover, inspect the opening with a flashlight, and insert the hose without bending it at the connection. Keep furniture legs and rugs out of the test area; restricted access can make airflow feel weak even when the pipe is clear.
If a couch or bed blocks the inlet, reposition it before removing the cover. Inspect for hair, lint, or small objects, then lift debris with a crevice tool or brush. Have someone hold the hose securely while you observe airflow.
After testing, reposition furniture so it won’t crowd the valve or encourage debris buildup.
Step 2: Disconnect the Power Supply
Turn off the central vacuum power unit and unplug it from the outlet before touching any inlet, hose, or tubing. Confirm that the cord cannot contact the outlet accidentally, and don’t rely on the reset switch to make the system safe. Verify that the motor remains inactive before you continue.
Put on protective gloves because removed debris may contain hair, lint, sharp fragments, or material. Keep the unit unplugged while you work on one area at a time, beginning with the main inlet or hose. Don’t open another inlet or create alternate airflow paths during diagnosis. After you’ve cleared the obstruction and resealed connections, plug the unit back in.
Test suction at the nearest inlet first, then proceed to other sections if operation is.
Step 3: Feed a Flexible Cleaning Rod
With the power unit unplugged, remove the inlet cover or cleanout cap and insert a flexible cleaning rod or plumber’s snake into the affected pipe. Feed rod slowly, wiggling and rotating it as you advance. This motion helps it negotiate elbows and low points where hair, lint, or small objects commonly settle. Wear gloves and eye protection, and use a flashlight to monitor the opening.
If you feel resistance, stop advancing. Work the rod gently back and forth to loosen the obstruction; don’t force it, or you could compact the debris or damage the pipe.
When the blockage gives way, withdraw the rod carefully and inspect its tip. Refit the inlet cover or cleanout cap tightly. Restore power, then test suction at multiple inlets. Improved airflow at the affected inlet confirms progress.
Step 4: Reverse-Suction the Blocked Pipe
After you’ve switched off and unplugged the central vacuum power unit, disconnect the hose from the affected inlet. Fit a wet/dry vacuum to that inlet valve, seal the connection tightly. Set it to suction mode; don’t use the blower. Choose the inlet closest to the suspected blockage, especially if it has weak or absent suction.
Run the vacuum in short bursts, then pause to check for looser debris, improved airflow, or an audible clearing sound. Repeat only when necessary; continuous suction can compact fine hair or lint farther into the pipe. Wear eye protection and collect expelled debris safely.
Once airflow improves, switch off the vacuum, remove the seal, and reconnect the hose. Test all nearby inlets to verify suction and confirm debris hasn’t remained near the affected valve or pipe junction.
Step 5: Check Rod for Resistance
If reverse-suction doesn’t restore airflow, disconnect the hose and unplug the power unit before inserting a flexible cleaning rod into the hose end or a nearby cleanout. Wear gloves and eye protection, then advance the rod with pressure. A stop usually indicates a clog; don’t force the rod, because pressure can compact debris or damage tubing.
Use short pushes with slight back-and-forth twists to loosen hair or lint packets. Withdraw the rod and inspect its tip for hair, lint, or sock fibers. Note the depth: resistance at one point suggests a localized obstruction, while continuous resistance indicates a broader restriction. Repeat the pushes and withdrawals until the rod passes freely.
Reconnect the hose, restore power, and test suction at the inlet before checking sections.
Step 6: Wipe Inlets and Store Tools
Before cleaning the inlets, turn off and unplug the power unit. Use a flashlight to inspect each opening for dust, hair, or debris. If the inlet has a removable cover, take it off. Wipe the valve opening and surface with a soft, dry cloth.
Use a crevice brush for residue around the rim, but don’t force debris deeper into the tubing. Confirm that the inlet door moves freely and can close completely.
Clean every inlet, even if one showed reduced airflow. Label the inlets and record the date so you can perform this maintenance every six to twelve months. Keep cloths and brushes in a maintenance kit.
Prior to storage, ensure the hose and attachments are dry, clear, and free of lint or hair. Store them to prevent recontamination.
Verify Debris Reaches Canister
Start by confirming the canister or bag and filters are clean, then test suction at the inlet nearest the power unit. Keep other inlets closed, run the system, and confirm that airflow carries debris into the canister. If suction is weak, or debris backs up at that inlet, stop and treat the condition as an obstruction.
Next, insert the hose at each inlet individually and compare suction strength, working farther from the unit. Listen for reduced airflow and note where debris stops arriving. Change only one variable at a time; after replacing a bag or filter, repeat the test. Verify that suction and inlet-to-canister airflow improve at the nearest inlet before moving on. Wear eye protection and gloves, and shut down the system before service.
Inspect the Inlet Flap
Turn off and unplug the central vacuum power unit before inspecting the inlet flap. Remove the inlet cover and check for hair, dust, string, lint, or small debris.
Press the flap open. It should move freely and open fully when you insert the hose; partial opening restricts airflow and reduces suction. Clean the seating area, re-seat the flap, and secure the cover so it seals correctly.
| Condition | Check | Meaning |
|---|---|---|
| Clear | Flap opens fully | Normal airflow |
| Blocked | Debris visible | Clean and reseat |
With the hose disconnected, run the system and listen at the inlet. Normal airflow sounds steady; weak or absent airflow suggests the flap isn’t opening or sealing properly.
Test suction at this inlet before tracing the hose or pipe network for proper diagnosis.
Replace the Canister Filter
At the canister, switch off and unplug the power unit before removing the filter. If you have a cloth or inverted filter, wash away caked dirt with water, then let it dry completely before reinstalling it. Never reinstall a damp filter; moisture can damage the unit.
For a cartridge filter, replace it about every six months to maintain suction. Check the main or HEPA filter by holding it up to a light. Gently tap it over a trash bin, and inspect for gray, compacted media. Replace it if airflow appears restricted or dirt remains embedded.
Install the clean or new filter securely, reconnect the canister, and restore power. Run the system and test the nearest inlet. If suction returns, continue checking other inlets.
Conclusion
Once you’ve restored airflow, test every inlet and confirm that debris reaches the canister. If suction remains weak, stop operating the system, disconnect power, and inspect the filter, hose, piping, and motor according to the manufacturer’s instructions. Don’t force rods through tight bends or bypass safety components. Replace damaged filters or fittings before use.
If the blockage persists, contact a qualified technician; continued operation could overheat the motor or conceal a deeper obstruction inside.