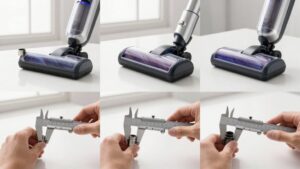
Vacuum Hose Fitment Guide by Brand: Find the Right Connector Every Time
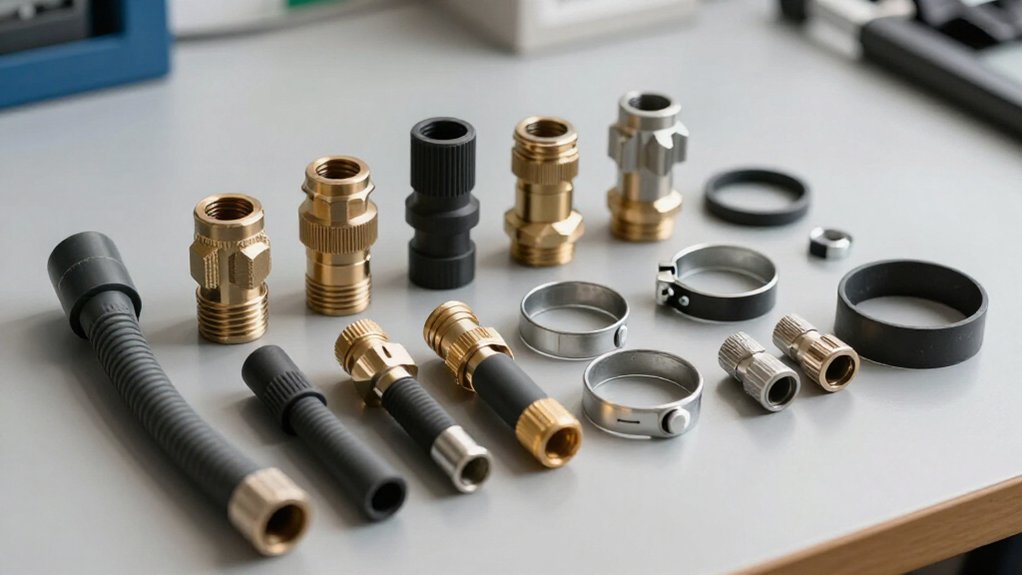
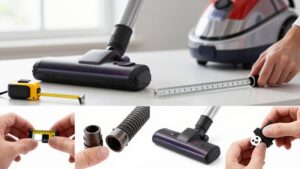
Find the right vacuum connector by measuring your tool port and hose cuff with digital calipers, then match cuff ID to port OD. Don’t rely on nominal 1-1/4-, 1-7/8-, or 2-1/2-inch labels, especially for Makita LR, LR2, and LR3 systems.
Confirm push-, taper-, or slip-over fit, gasket or O-ring compression, and NPT-versus-metric threads.
Check locking tabs, spring catches, retainer clearance, swivel orientation, and hot-vapor sealing before installation.
Brand-specific examples and conversion checks come next.
Brand-Specific Connector Lookup
When looking up a brand-specific connector, don’t rely on the hose label alone, especially with Makita LR, LR2, and LR3 dust shoes. Treat each Makita system as a separate fitment. A listing that says “~48 mm OD” may describe an LR or LR2 interface, while LR3 discussions report different dimensions. Don’t substitute a connector because it carries a familiar 1-7/8-inch or 2-1/2-inch label. Instead, identify the dust-shoe model, inspect the connector description, and verify the sealing surfaces.
Measure the hose cuff and tool port with digital calipers, then confirm whether the adapter’s relationship is cuff ID to port OD. If no part matches, select a tapered, friction-fit adapter or print one to measured dimensions. Test insertion, retention, and sealing before routing dust through the connection.
Port Diameter Compatibility Matrix
Use this port-diameter compatibility matrix to match a tool’s measured internal port diameter (ID) with the hose or adapter’s corresponding outside diameter (OD) and fit type. Measure the port with calipers; don’t trust a nominal label, because wall thickness changes actual dimensions. Select an adapter whose OD enters the port securely without forcing it, then confirm the manufacturer’s fit specification.
| Measured port ID | Target hose/adapter OD | Recommended fit |
|---|---|---|
| 32–33 mm (1-1/4 in) | Slightly smaller than ID | Push-fit or taper-fit |
| 60–64 mm (2-1/2 in) | Verify actual OD | Slip-over reducer |
For 47–48 mm (1-7/8 in), verify the brand-specific opening before ordering.
Small tubing needs exact IDs, such as 3, 4, 6, or 8 mm, and usually uses barbed or push-fit connectors. If the OD doesn’t seat firmly, stop: a loose joint leaks air and steals suction.
NPT and Metric Threads
Threaded vacuum fittings require an exact match between NPT and metric standards. NPT uses nominal sizes—1/4, 3/8, and 1/2 inch—with tapered geometry that tightens as matching threads engage. Metric fittings specify diameter in millimeters and pitch in threads per millimeter. Two metric fittings can share a diameter yet fail when pitches differ.
Before you buy an adapter, identify the thread directly from the fitting. Confirm the metric diameter and pitch or verify the NPT size; don’t convert 1/2-inch NPT to a simple 12.7-mm thread. A metric straight-thread male won’t seat correctly in an NPT female even when dimensions appear close.
Perform dry fit first, checking engagement without forcing or cross-threading. For NPT, apply PTFE tape or pipe sealant only after dry fitting.
Gasket and Seal Profiles
You’ll encounter flat gaskets, O-rings, and tapered seal edges, each requiring a different contact and compression method.
Don’t assume brand compatibility from nominal diameter alone; verify the brand-specific gasket size and actual sealing surface. Measure the contact band and apply sufficient compression to maintain an airtight seal without deforming the profile.
Flat Gasket Profiles
When two vacuum components meet at flat faces, a gasket creates the compressed seal that preserves suction without relying on a tapered friction fit.
Choose a flat profile by the sealing land, not by hose diameter alone. A gasket’s outer diameter must cover the entire sealing surface, while its inner diameter clears the airflow opening. Confirm whether the flange is flat or stepped and measure its landing width before ordering.
Match thickness carefully. Too little compression leaves a leak, but excessive thickness can’t let the parts clamp together fully. After installing an adapter, inspect the gasket for rotation or partial extrusion. If suction drops, reseat it and verify even contact around the joint before you test the vacuum under normal operating conditions.
O-Ring Seal Designs
O-ring seals use a round rubber profile seated in a groove or recessed pocket to create an airtight connection between vacuum components. Choose an adapter whose O-ring matches the port’s groove diameter and depth. The seal must compress evenly around the mating surface; insufficient compression leaves leakage paths, while excessive compression can cause extrusion or damage. Place the ring in its pocket before joining the hose cuff and inlet.
Measure the actual sealing area with calipers, not the widest decorative flange. Compare the measured ID, OD, and seat dimensions with the adapter’s specifications. Because brands use different seat geometry, a connector that “mostly” fits may still leak suction. For abrasive service, select an O-ring material that resists hardening and tearing under load. Replace damaged rings instead of compensating with added friction or sealant.
Tapered Seal Edges
Tapered seal edges create an airtight joint by wedging the hose cuff against the tool’s tapered outer surface. To verify fit, measure at the seating zone, not the flange or locking ring. Use calipers to check the hose cuff’s narrowest interior diameter and the port’s widest exterior diameter.
Even a fraction-of-an-inch difference can cause leakage when a nominal size appears correct.
Choose a gradual taper that lets you seat the parts without force. A loose joint reduces contact pressure; an overly tight joint can stop engagement before the sealing surfaces meet.
If standards differ, use a tapered friction adapter, such as a taper insert or donut-and-wedge design, to restore continuous edge contact. Test the connection under suction, then inspect for air leaks before operation.
Brand-Specific Gasket Sizes
Vacuum hose gaskets and seals vary by brand, even when nominal diameters such as 1-1/4, 1-7/8, or 2-1/2 inches appear identical. Check the sealing profile, not just the label. Measure the hose cuff ID and mating port OD with calipers, and record the gasket’s thickness, end-face shape, and seating location.
A listing for approximately 48 mm OD, such as a Makita LR3-style mount, may describe the tool-sealing outside diameter rather than a universally compatible 2.5-inch hose. Tapered connectors seal near the narrow adapter end, while straight cuffs use a different gasket profile. Locking tabs or threaded cuffs also vary in gasket geometry between brands. If dimensions or profiles don’t match, choose the manufacturer’s connector, a reducer, or a rubber coupler for an airtight interface.
Compression Seal Requirements
A reliable vacuum connection requires the gasket or O-ring to compress between correctly matched surfaces, not merely touch them. Measure the tool port’s OD and hose cuff’s ID at the sealing area on tapered ports. If you seat the gasket on a wider flange or incorrect section, it won’t compress evenly and may leak.
Match the seal profile to its mating geometry. A flat gasket needs broad, parallel faces; a rounded O-ring needs a sized groove; a tapered seal needs its matching seat. Don’t assume nominal diameters guarantee compatibility. For wet, abrasive hydro/vac service, select seals and hardware rated for conditions.
Under-compression causes suction loss, while over-compression deforms the gasket and shortens its life. If leakage occurs, reposition or replace the seal, or install an adapter.
Verify Brand-Specific Locking Tabs
Start by checking whether the hose end uses a brand-specific locking tab that clicks into place with a spring-loaded catch rather than relying on friction. Before ordering, check the connector diameter category: 1.25-inch or 2.5-inch locking-tab ends may share labels across brands while using different dimensions.
Measure with calipers, recording the outside diameter where the cuff seats on the vacuum port and the inside diameter that receives the tabbed section.
Then inspect the tab’s geometry and stop points. A hose that almost fits can still fail to lock fully, causing air leaks or reduced suction. Confirm that the spring-loaded catch moves freely and engages the groove without forcing the cuff. If labeling doesn’t establish compatibility, choose a universal adapter matched to the measured seating dimensions.
Hot Vapor Seal Compatibility
After confirming that a locking tab engages correctly, check whether the hot-vapor seal also matches, since these fittings aren’t standardized by nominal hose labels such as 1.5 or 2.5 inches. Measure the mating sealing surfaces with calipers: compare the hose cuff’s ID with the tool or port’s OD.
For a tapered port, measure the widest tool OD against the narrowest cuff ID at the seating zone, not the flange or external edge. Don’t assume a push-fit works; a slight mismatch can let hot vapor escape or loosen it. If dimensions don’t align, you can choose an adapter or spacer/taper wedge. A rubber coupler with clamps bridges minor mismatches safely. Test the connection before operation, replace any part that deforms, cracks, or fails to seat.
Dyson-to-Shop-Vac Conversions
Dyson-to-shop-vac conversions usually require an adapter because Dyson uses proprietary couplers and sealing geometries rather than standard wet/dry-vac diameters. Don’t expect a direct hose swap to seal reliably. Measure the Dyson cuff’s outside diameter (OD) and the shop-vac cuff’s inside and outside diameters (ID/OD) with digital calipers; nominal labels such as 1.5, 1.25, and 2 inches can mislead you.
If the Dyson outlet measures about 48 mm OD, select a universal adapter or flexible rubber coupler that bridges to your shop vac’s approximately 2-inch hose class. For slight diameter differences, use a snug rubber coupler and suitable clamp. Match the connector style—friction-fit, locking-tab, or tapered—so the mating surfaces seal correctly. A sound bridge prevents suction loss and supports dependable operation across the joint.
Inspect Cuff Retainer Clearance
Before ordering an adapter, measure the cuff retainer—the section that locks onto the port—and confirm it has enough clearance to seat fully without contacting the dust shoe or mounting hardware. Use digital calipers to compare the cuff’s sealing and retainer OD/ID with the mating port where retention engages; flange measurements can mislead.
You’ll verify these points before buying:
- Measure the widest tool OD and narrowest cuff ID on stepped ports.
- Dry-fit the cuff; full seating should produce firm, continuous retention.
- If it stops halfway, treat the mismatch as excessive OD or insufficient ID.
- For prototypes, print a short probe section or vary ring height incrementally.
- Seal only after the retainer clears hardware and grips without forcing the cuff.
This prevents leaks and unexpected disconnects.
Check Swivel Collar Orientation
Check the swivel collar’s orientation before connecting the hose, especially with 1.25-, 1.875-, or 2.5-inch-class cuffs. Rotate it until it moves freely without twisting the hose. A collar reversed 180° may start onto the connector, yet seat partially and leak at the cuff’s OD/ID seal.
Use calipers to confirm your cuff ID matches the collar’s specified opening; don’t trust the nominal “2.5” label alone. Then push the cuff fully to its stop so the friction fit or locking tab seals under suction. Finish with a short collar rotation test: if the hose binds, reposition it before operation. This check matters during wet or abrasive work, when movement can loosen an incomplete connection.
- Free rotation
- Correct orientation
- Caliper-verified ID
- Full seating
- Secure final leak-free test
Conclusion
With the right measurements and profile checks, you’ll match a vacuum hose connector confidently. Confirm your brand, port diameter, thread standard, gasket shape, and locking-tab geometry before ordering. Then test hot-vapor sealing, cuff-retainer clearance, and swivel-collar orientation under actual operating conditions.
For Dyson-to-Shop-Vac conversions, use a verified adapter rather than forcing a fit. If resistance or leakage appears, stop, remeasure, and select a connector designed for that interface. This prevents damage, leaks, and unsafe operation.