Robot Vacuum Edge Cleaning Issues Decision Tree
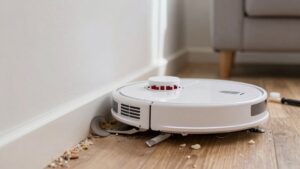
If your robot’s leaving a 1–2″ debris gap along baseboards, start with the side brush and edge tools: check bristles, mounts, RPM and clear hair.
Verify edge mode is enabled, maps and virtual boundaries don’t block edges, and bumper/sensors detect walls correctly; recalibrate if available. Clean wheels, sensors, and suction paths. Reboot and run a two‑pass test while logging improvements.
If problems persist after maintenance and firmware updates, you’ll find when to escalate to service or parts.
Quick Overview
- Verify edge-cleaning mode is enabled, run perimeter passes, and observe for consistent 1–2 inch debris gaps along baseboards.
- Inspect side brushes and edge tools for hair, bent bristles, loose mounts, and correct contact/rotation.
- Clean edge sensors, bumper, and wheels. Recalibrate or power-cycle to fix misdetection or rubbing issues.
- Review saved maps and virtual boundaries for lines intersecting baseboards. Adjust edge-navigation distance/settings.
- After maintenance, run two-pass tests and log results. Escalate with photos and cycle logs if edges still miss debris.
Quick Checklist to Confirm an Edge‑Cleaning Problem
Wondering whether your robot’s edge-cleaning is actually failing or just behaving oddly? Start with a focused checklist: look for a consistent 1–2 inch gap of debris along baseboards or corners after multiple passes; that’s your primary indicator. Verify edge-cleaning mode is enabled and not being overridden by a higher-priority pattern like spot clean.
Watch runs near edges: if the robot circles without extracting dust or leaves corner debris after a full cycle, you’ve isolated an edge-specific issue. For quick physical checks, confirm edge brush maintenance: brushes must spin freely and show no clogging or hair entanglement that prevents reach into the floor/wall junction.
Inspect suction performance at the periphery; visible leftover debris implies reduced intake. Finally, include basic sensor calibration checks: misaligned sensors can alter edge trajectories or disable edge routines. Use this data-driven checklist to decide whether to proceed to hands-on inspections or software adjustments.
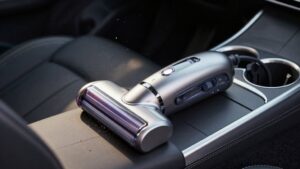
Inspect Side Brush and Edge Tools for Edge‑Cleaning Issues
Now that you’ve confirmed an edge-specific problem from the checklist, inspect the side brushes and edge tools next: look for frayed or broken bristles, bent corner brushes, clogged debris paths, or loose/wobbly mounts on motorized attachments.
- Check wear and motion: measure bristle length vs. spec and observe rotation. Uneven spin or low RPM often indicates gear or belt wear requiring replacement.
- Inspect alignment and contact: verify the side brush and edge tools sit flush to the floor and meet vertical edges consistently. Misalignment reduces sweep efficiency and leaves debris along baseboards.
- Clear and secure attachments: remove hair and packed debris from brush hubs and debris channels, then tighten mounts. A wobbly motorized edge tool cuts sweeping power significantly.
If you find frayed bristles, bent corner brushes, reduced RPM, or loose mounts, replace or service the affected component. Log findings and parts changed for trend analysis.
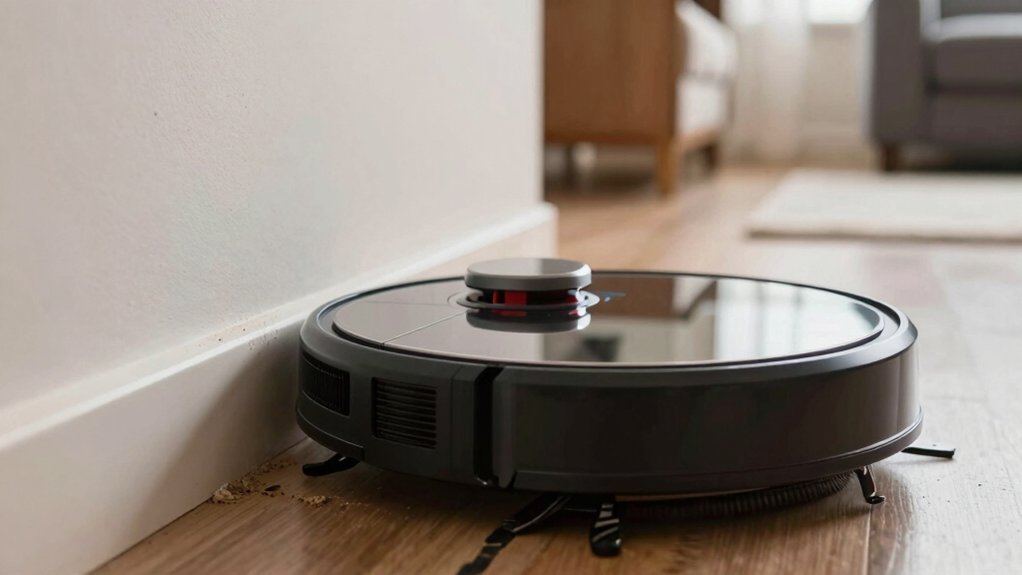
Check Sensors, Bumper, and Wheel Clearance (and Calibrate If Needed)
How well do your sensors, bumper, and wheel clearances let the robot approach edges? Start by checking edge sensors for correct detection of walls and boundaries; miscalibration often stops the robot short of edges. Inspect the bumper for deformation or trapped debris. An obstructed bumper can misread collisions and alter cleaning patterns.
Verify wheel clearance around the chassis so wheels don’t rub the housing; reduced wheel clearance cuts edge reach and invites clogs. If your model offers an automatic calibration routine, run it. Otherwise, place the robot on a level surface and follow the manual edge-cleaning calibration steps in the guide.
After adjustments, run a focused test along a corner or boundary strip and measure alignment and coverage consistency. Record before/after observations: distance from edge, sweep overlap, and any error codes. If problems persist despite correct edge sensors, bumper, and wheel clearance, escalate to hardware service or move to map and navigation checks.
Want to make sure your robot’s map and navigation settings aren’t the reason it’s skipping edges? Check the saved floor plan and edge overlays first: maps show mapped edges, restricted zones, and any recent re-maps after updates. Edge navigation modes (Edge, Smart, Eco) change how closely the unit hugs baseboards. Pick the mode that matches your cleaning goals and recommended edge-detection distance. Virtual boundaries (no-go lines) can unintentionally cut along baseboards and cause gaps, so inspect and adjust them.
- Review map accuracy: confirm learned walls match real walls and note any re-maps or odometry drift that could create edge gaps.
- Verify edge-navigation mode and millimeter distance settings against manufacturer specs to ensure consistent edge following.
- Inspect virtual boundaries: move or delete lines intersecting baseboards. Then run a targeted edge pass to validate coverage.
If maps and settings look correct but edges still miss, proceed to the next troubleshooting step.
Run First‑Pass Fixes: Clean Parts, Reboot, and Reset Basics
Ready to try a quick hands-on fix? Start with a visual inspection: Remove hair, fibers, and debris from brushes, wheels, and the suction bay. Clogged parts skew cleaning algorithms and stress hardware durability. Clean the bumper, cliff sensors, and wheel encoders to avoid false edge detection. Check for stuck obstructions near edges or under furniture that interrupt edge-brushing paths.
| Action | Purpose |
|---|---|
| Remove debris from brushes | Restore brush contact and edge sweep |
| Clean sensors & encoders | Prevent false edge/roam behavior |
| Power-cycle (60s) | Clear minor firmware glitches |
| Reset network features | Restore connection-based routines |
| Re-run edge cycle | Verify fixes under real conditions |
Power off, unplug, or remove the battery for 60 seconds. Then power back on. Perform a basic network/smart reset (keeps maps) to restore edge routines without erasing saved maps.
After these first-pass fixes, run an edge cycle to confirm improved performance and reduced wear on components.
Run a Second‑Pass Test: What to Watch For and When to Repeat
Curious whether a second pass will make a measurable difference? Run a controlled second-pass test after your first run to expose remaining edge-clearing gaps, such as lingering debris in corners or missed along baseboards. Watch for measurable improvements in debris clearance and altered behavior, such as reduced edge collision frequency or longer dwell time in cluttered zones.
- Compare metrics: suction power, brush agitation effectiveness, time-to-clean — quantify per room and note percent improvement or regression.
- Inspect high-difficulty zones, such as under furniture, behind chair legs, and along wall edges. Record leftover particles and whether the second pass reduced them to your acceptable threshold.
- Spot behavior shifts: navigation adjustments or repeated avoidance patterns that suggest the robot is compensating or struggling.
Use repeat passes selectively when patterns are inconsistent across rooms. If metrics show negligible gains, avoid unnecessary repeats. Let data guide whether additional passes improve uniform edge cleaning and acceptable debris clearance.
Update Firmware, Tweak App Settings, and Make Edge‑Specific Adjustments
If your second-pass test showed stubborn gaps along baseboards or inconsistent corner coverage, updating firmware and tweaking app settings is the next step to close those lapses. First, install the latest firmware update. Release notes often list fixes for edge-cleaning glitches that caused missed hairs or incomplete corner coverage.
After updating, recalibrate wall-following sensors and adjust bumper sensitivity to eliminate drift and restore reliable edge navigation. In the app, disable max suction at edges if that reduces bogging; enable edge cleaning mode; and set a tighter cleaning radius along walls.
Increase dwell time at corners and enable faster re-entry after turning to cut missed sections. Run a dedicated edge-cleaning test on a known perimeter (a square room) and review the path data: count gaps, overlap, and repeat passes. Use those metrics to iterate settings until gap frequency drops and corner coverage improves.
Keep changes incremental and log results for comparison.
When to Accept Limits or Contact Support (Parts, Service, Replacements)
When should you stop tweaking settings and call support? If you’ve updated firmware, cleaned brushes/wheels, and run a two-pass test but corners or baseboards still miss debris consistently, it’s time to escalate. Use data (repeat failures, noise, vibration) to guide the request.
- When to request parts: If side or edge-sweeping brushes, seals, or visible wear persists after maintenance and two-pass verification, request replacements. Include photos and cycle logs to speed warranty eligibility review.
- When to schedule service: If sensors seem misaligned, suction underperforms despite cleaning/resets, or abnormal vibrations or noise recur across cycles, schedule diagnostics. These symptoms suggest mechanical or sensor faults beyond user fixes.
- When to accept limits: For rare edge case layout constraints (tight corners, inaccessible gaps) where multiple adjustments still miss debris, document attempts and consider manual spot cleaning or a targeted accessory rather than replacement.
Contact support with clear evidence to shorten resolution time and clarify warranty or return options.
Frequently Asked Questions
Can I Replace the Side Brush With an Aftermarket Alternative?
Yes, you can often replace the side brush with an aftermarket alternative if your model supports replaceable brushes and the aftermarket compatibility is confirmed.
Check dimensions, mounting type, and rotation direction. Compare RPM and bristle stiffness to maintain performance. Look for reviews or test data showing similar debris pickup and wear rates.
If specs match and users report success, installing an aftermarket brush is usually safe and cost-effective.
Will Edge Cleaning Drain the Robot’s Battery Faster?
Yes, edge cleaning can drain the robot’s battery faster. You’ll see lower edge efficiency because the vacuum spends extra time and power navigating along walls and repeatedly brushing debris.
The battery tradeoffs depend on mode, brush type, and mapping: aggressive edge modes use more suction and runtime. Expect shorter overall run times and potentially more recharge cycles. Balance cleaning thoroughness versus battery conservation for best results.
Do Attachments for Better Edge Cleaning Exist for My Model?
Yes, attachments for better edge cleaning often exist for many models, but you’ll need to check attachment compatibility. Search your model number on the manufacturer’s site or in user forums to confirm available edge brushes, side-wind adapters, or specialized skirts.
Compare specs (part numbers, mounting style, voltage if powered) and read test data or user reports on effectiveness. Order OEM parts when possible; third-party options can work but vary in fit and performance.
Can I Schedule Edge-Focused Cleaning Only Along Walls?
Yes, you can often schedule edge-focused cleaning only along walls. Check your app for an “edge cleaning” or “wall following” mode and set a recurring schedule or zone that hugs room perimeters.
If your model lacks dedicated edge scheduling, create virtual no-go lines in the app to limit coverage and run standard cleans near boundaries. You can also use manual start times when you want concentrated edge cleaning sessions.
Will Edge-Cleaning Mode Damage Delicate Baseboards or Trim?
Generally no, edge-cleaning mode won’t damage delicate baseboards if you take precautions. You’ll minimize wear by checking edge durability specs, reducing suction or brush force, and adding bumper protection.
Expect slight battery impact from prolonged edge runs; so factor runtime into scheduling. Monitor first few sessions for scuffs, adjust settings, and use temporary edge barriers if needed. Data shows cautious setup prevents most trim damage while keeping performance steady.
Conclusion
If your robot still misses edges after you follow the checklist, inspect brushes, sensors, wheels, maps and settings, clean parts, reboot, and update firmware. You’ll usually see improvement within two test runs. If problems persist, collect timestamps, map screenshots, and error logs. Then contact support or arrange parts/service.
Accept that some models have physical limitations. Consider a different model if edge performance is critical. Document fixes and outcomes to speed future diagnostics and warranty claims.