How to Find the Right Vacuum Filter for Your Model: A 3-Step Match Guide
Find the right vacuum filter in three steps.
First, copy the brand, full model number, suffix, and serial details from the label, then verify the OEM part number in the manual.
Second, match filtration to your needs: choose True HEPA for allergens, pet-rated layers for hair, or foam and cloth for pre-filtration.
Third, measure the filter, gasket, and mounting interface precisely, and confirm washable or disposable care requirements.
The guide below clarifies fit and care.
HEPA or Standard Filter?
Choose a true HEPA filter if you have allergies or asthma, since it can remove up to 99.995% of 0.3-micron particles when the vacuum has properly sealed airflow. If fine allergen control isn’t your goal, choose a standard foam or pleated filter for dust collection. It won’t provide HEPA-grade capture, but it may suit use.
Verify the replacement matches your vacuum model, filter family, and wet/dry requirements. For allergy-focused cleaning, use HEPA as secondary filtration behind a pre-filter, so the HEPA media receives cleaner air and loads slowly. Look for a HEPA rating, certification marking, or serial details; avoid vague “HEPA-like” claims. Plan replacement according to model guidance: HEPA filters last six to twelve months, while pre-motor foam filters need replacement at twelve months.
Account for Pet Hair
If your vacuum handles pet hair, select a multi-layer or pet-rated filter that captures dander and fine hair fibers more effectively than basic foam. If it uses a pre-motor filter, choose the correct size and filter type for that application. An overloaded or unsuitable pre-motor filter can collect hair, restrict airflow, and reduce suction.
Pair this stage with high-efficiency secondary filtration, such as HEPA or True HEPA when supported, because allergens travel on particles much smaller than visible hair.
Monitor the filter and replace it on a tighter schedule, especially during heavy shedding. A HEPA filter commonly lasts six to twelve months, but replace it sooner if dust escapes or allergy symptoms worsen. Don’t wash disposable media unless the manufacturer allows it as directed.
Verify the Model Label
Before selecting a replacement filter, where can you find the vacuum’s model label? Check under the motor head, on the canister’s back or bottom, or inside the dust-bin compartment. Occasionally, you’ll find it on the filter or bag.
| Label field | What to record | Why it matters |
|---|---|---|
| Brand | Manufacturer name | Narrows fitment |
| Model | Full letters, numbers, and suffixes | Matches exact parts |
| Serial code | Batch or revision | Flags regional updates |
Copy every character, including hyphens, then compare it with the manual or OEM fitment guide. Don’t rely on a similar-looking model: suffixes can change mounting, dimensions, or accessory compatibility. Confirm the listed part number, voltage or regional designation, and seals. If the label is worn, photograph it and measure the filter envelope and mounting interface.
Foam, Cloth, or HEPA
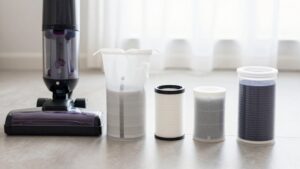
Choose a washable foam filter for wet pickup and routine pre-filtration, or a durable cloth filter for reusable capture of larger debris. Select a true HEPA filter when you need high-efficiency control of allergens and fine particles, provided your vacuum seals correctly.
Match the filter to your model, cleaning needs, airflow requirements, and maintenance schedule.
Foam Filter Basics
Foam filters provide washable secondary filtration in many bagless and canister vacuums, capturing residual dust after the primary separator removes larger debris. You’ll install one before the exhaust path, where its open-cell structure traps residual particulate. However, foam isn’t a True HEPA filter and usually carries no validated 0.3-micron performance. If you need high allergen capture, choose a certified HEPA final stage instead.
Treat “HEPA-like” claims without certification details cautiously; they may describe standard foam filtration.
Check your model’s manual for wet/dry compatibility, dimensions, sealing method, and cleaning procedure. In moderate use, inspect and wash the foam about every one to two months. Rinse thoroughly and let it dry fully before reinstalling. Clogged foam reduces airflow and suction, so clean it promptly as needed.
Cloth Filter Benefits
Cloth filters offer durable secondary filtration for larger debris and particles, making them practical for many canister and commercial-style vacuums. Choose one when you need reusable protection against coarse dust without the recurring cost of disposable media. Verify the filter’s model number, diameter, collar, flange, and gasket before installation; correct sealing prevents bypass and preserves suction. Cloth works best for dry pickup and debris, but it isn’t a substitute for a filter designed for wet pickup unless the manufacturer approves it.
After use, rinse the cloth filter according to the vacuum maker’s instructions, then let it air-dry before reinstalling. Residual moisture can restrict airflow, encourage growth, or damage the media. Inspect seams and seals and replace the filter when washing no longer restores airflow or capture.
HEPA Filtration Power
For maximum filtration power, a true HEPA secondary filter outperforms foam or cloth by capturing up to 99.995% of airborne particles ≥0.3 microns. Foam and cloth typically serve as lower-to-mid filtration stages: they trap larger dust and help protect your vacuum, but they don’t match verified HEPA capture rates.
A HEPA secondary filter is especially valuable when you’re targeting allergens, mold, or fine particulate matter. To confirm performance, look for “HEPA” or “True HEPA” wording with a specific rating or certification on the filter or packaging; “HEPA-like” claims aren’t verification.
Finally, inspect the gasket and housing seal carefully. Even high-quality media can lose effectiveness if air leaks around it, allowing particles to bypass filtration. Install it with the prescribed pre-motor foam filter for protection.
Choosing Your Filter Type
Start by matching the filter type to your vacuum’s filtration stage and cleaning needs. Foam filters work well as prefilters in low-dust homes, trapping larger particles before finer filtration. Choose a washable or disposable foam element according to your model’s specification and whether you’ll clean or replace it.
Cloth filters suit sturdier bagless and wet/dry vacuums, capturing debris and dander. Rinse cloth media only when the manufacturer permits it, then let it dry completely before reinstalling to prevent moisture-related problems.
Choose a True HEPA filter for allergies or fine dust. It can capture up to 99.995% of airborne particles measuring ≥0.3 microns, provided your vacuum seals properly. Verify True-HEPA certification; HEPA-style claims don’t guarantee performance.
In multi-stage systems, match each filter to its designated position.
Washable vs. Disposable Filters
Choose a washable filter if you’ll clean it thoroughly and air-dry it for 24 hours before reuse. Choose a disposable filter if you prefer scheduled replacement, typically every 6–12 months depending on use and dust levels.
Compare long-term cost and filtration performance, and confirm that either filter matches your vacuum model.
Cleaning And Reuse
Before cleaning a vacuum filter, confirm whether it’s washable: foam, cloth, mesh, and some cartridge filters may be rinsed, while pleated paper and True-HEPA filters generally require replacement. Check the material and model documentation before rinsing; a washable label matters more than appearance. Remove loose dust outdoors, rinse washable media with cool water, and air-dry it fully for about 24 hours.
Don’t use solvents, aggressive brushing, or high heat. Squeeze foam gently without twisting, and never reinstall a damp filter: moisture restricts airflow, promotes microbial growth, and can damage the vacuum.
Treat disposable pleated-paper and True-HEPA filters as non-washable. Water can collapse pleats, degrade media, and compromise airtight seal required for particle capture. Match each replacement to your model, dimensions, filtration class, and sealing surfaces.
Replacement Frequency
Because filter life depends on media type and dust load, follow the manufacturer’s interval as your baseline: replace disposable filters, including many HEPA and foam-cartridge types, about every 6–12 months, while washing reusable foam or cloth filters every 1–2 months.
If your vacuum uses multiple stages, clean the washable pre-filter on its schedule, but replace the disposable HEPA stage separately. After washing, let reusable media air-dry completely, up to 24 hours, before reinstalling it; moisture can cause odors, mold, and restricted airflow. Replace any washable filter that’s torn, warped, or unable to dry fully, because it may leak dust or increase resistance. Bagless models need careful interval tracking: loaded primary filters can reduce suction and release more dust during bin emptying. Record changes and inspect seals.
Cost Over Time
When you compare filters over their service life, washable models can cost less because you rinse and air-dry them every 1–2 months instead of buying replacements.
Fully dry each filter for 24 hours before reinstalling it; otherwise, moisture can cause odor and reduce performance.
Disposable foam or pre-filters usually cost $5–15 and need more frequent replacement, especially in high-dust or pet households. HEPA filters cost more, often $20–50 per pack, and commonly require replacement every 6–12 months.
For bagged vacuums, include bag purchases in your cost estimate. Bagless models shift that expense toward filter cleaning or replacement. Use the correct HEPA, foam, or felt filter specified for your model; proper sealing prevents premature replacement caused by suction loss. Track purchases and maintenance to compare costs accurately.
Filtration Performance
Washable filters are practical for routine dirt capture, but they generally don’t match the fine-particle performance of disposable HEPA filters, which can capture up to 99.995% of particles at 0.3 microns. They suit debris and wet pickup when your vacuum permits, but you must rinse them and air-dry them for about 24 hours before reinstalling. This prevents odors and performance loss caused by moisture.
Disposable filters provide consistent fine-particle control, but you’ll replace HEPA models every 6–12 months, following manufacturer guidance. In bagged vacuums, the disposable bag traps dust as the primary filter; bagless systems use a washable pre-filter and replaceable secondary filter.
Match efficiency to your vacuum’s airflow design: higher resistance can reduce suction or overheat the motor. Check seals to prevent bypass.
Match Filter Dimensions Precisely
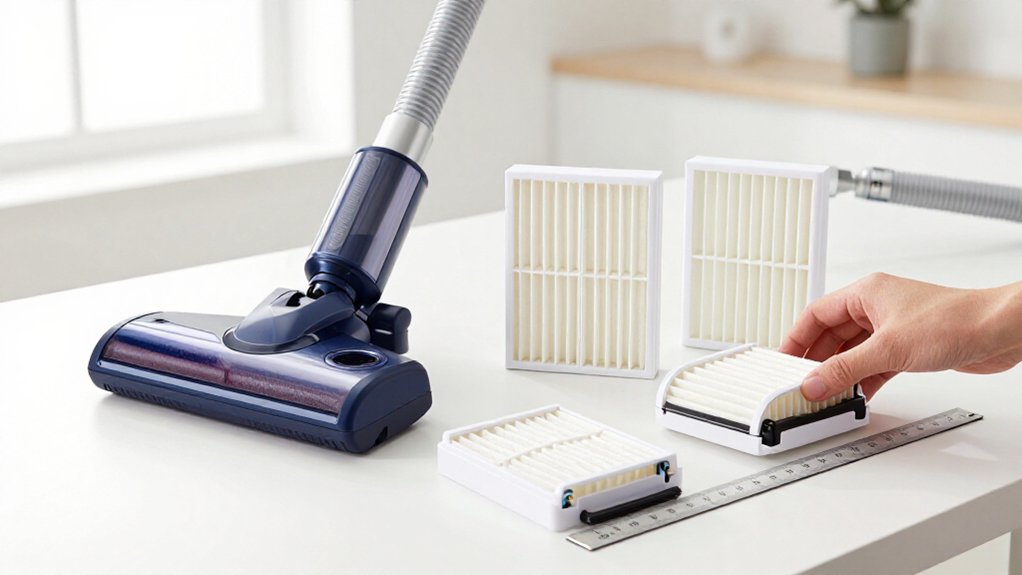
Start by measuring the old filter’s external length, width, and thickness, including its frame and pleats, in inches or millimeters. Match these measurements precisely instead of relying on shape alone. For a round foam pre-filter or cartridge, record inside and outside diameters.
For a cartridge housing, measure frame depth because even thickness differences can restrict airflow.
Next, check pleat direction and airflow arrows on HEPA or pleated cartridges. Compare gasket or edge-seal dimensions to prevent dust bypass along the perimeter. Measure mounting tabs, holes, or clip spacing so the replacement locks securely without gaps.
If exact measurement isn’t possible, photograph the filter label and confirm the model-number-based replacement dimensions before ordering. Verify clearance around the housing, lid, latches, and components to ensure unobstructed installation.
Estimate Yearly Filter Costs
Use your vacuum’s exact model number to identify the correct filter type and estimate replacement frequency and annual cost. A HEPA filter typically costs $20–$50 and lasts six to 12 months, placing annual HEPA spending near $20–$50 under normal use.
Confirm the manufacturer’s interval, then adjust it for heavier dust loads.
Foam filters usually cost $5–$15. If washable, you might rinse them every one to two months, so your yearly expense may be minimal; replacement frequency and spare-filter purchases can change that total. Add one pre-motor filter per year when your model uses one.
To calculate quickly, multiply each filter type’s unit price by the number replaced annually, then add the categories. Track purchases and change dates to refine your estimate and forecast ownership costs.
Avoid Cracked Filter Frames
After estimating yearly filter costs, inspect the old filter frame before ordering a replacement. Look for cracks, warping, and gaps around the perimeter. A damaged frame breaks the seal, allowing fine dust to bypass filtration and re-enter the airflow.
- Press lightly around every corner and edge; visible movement or separation signals poor contact.
- A wrong shape or thickness won’t seal even when its media is HEPA or foam.
- During installation, seat the frame evenly, not only at the center, so gasketed surfaces touch the housing continuously.
- If you find damage, stop using the vacuum and replace the frame promptly; continued leakage can coat internal components with dust and reduce suction.
A perimeter protects airflow, preserves filtration performance, and prevents avoidable motor contamination during operation.
Confirm Manufacturer Part Number
Which identifier confirms that a replacement filter will fit your vacuum? The manufacturer part number provides the most reliable match. Find it on the old filter label, usually beside “Part #,” then compare every letter, digit, and suffix with the replacement.
- Read label: Record the complete OEM number before discarding the old filter.
- Check the documentation: If it’s missing, consult your manual or model-specific parts diagram for the filter line item.
- Respect revisions: Don’t overlook suffixes; an update can change dimensions, gasket placement, or media type, even when your vacuum model stays the same.
- Verify before installing: Choose a listing that names your part number, not “fits most.” Keep your filter until delivery, then compare both numbers.
This check prevents returns and poor sealing.
Conclusion
Choosing the right vacuum filter starts with your model label and ends with a precise fit. Confirm the manufacturer’s part number, match the filter dimensions, and select HEPA or standard media based on your cleaning needs.
If you’ve got pets, account for hair load and replacement frequency. Check whether the filter’s washable, inspect its frame, and estimate annual cost. Then install it securely to maintain airflow and protect your vacuum motor effectively over time.