Vacuum Charger Not Working? 7 Causes and the First Thing to Check
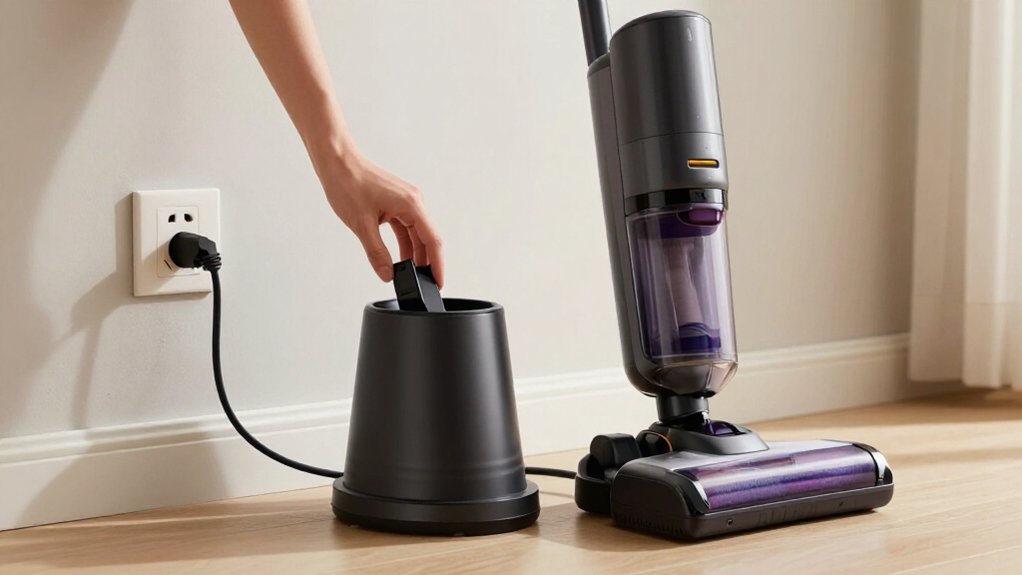
If your vacuum charger isn’t working, check the dock LED first: no light points to the outlet, cord, adapter, or dock.
A solid green light confirms dock power, not necessarily battery charging.
Next, clean and reseat the contacts, verify battery compatibility, and match adapter voltage, polarity, and current.
Test a known-good battery, but never charge a swollen or leaking pack.
Turn the vacuum off and let a hot battery cool completely before docking; details follow.
Check Dock LED First
Start by checking the dock’s LED before testing the vacuum or opening any components. This first check tells you whether the base gets power. If the LED stays off, confirm the power cord is fully inserted, then test the outlet with another device. Check any wall switch and reset a tripped breaker if necessary.
If the LED looks normal but the vacuum shows no battery level, reseat the vacuum. Remove debris or objects that prevent complete seating, then ensure its charging connectors align with the dock contacts firmly. Don’t judge charging by warmth or sound alone.
After seating the vacuum, watch the dock and vacuum indicators for a response. If neither indicates charging, stop before disassembly and investigate the outlet, adapter, cable, or dock connection.
What a Solid Green Light Means
A solid green light usually means the dock has power and is either ready, fully charged, or actively charging, depending on the model. It confirms that the adapter is supplying voltage to the dock’s power rail, but it doesn’t prove that charging current reaches the vacuum’s battery.
Check your model’s manual because some stations use solid green for charging, while others use it for standby or charge completion. Blinking green may indicate active charging, whereas red or orange can signal charging or a fault; these conventions aren’t universal.
If the vacuum still won’t charge, verify the adapter’s labeled DC output with a multimeter and compare it with the manufacturer’s specification. Adapter output must match your model’s stated voltage. Confirm the vacuum is powered on.
Inspect Charging Contacts Carefully
If the dock’s green light is on but the vacuum still isn’t charging, inspect the charging contacts next. Unplug the charger or dock before touching the pins. Check the vacuum’s metal pads and the stand’s contacts for dust, oxidation, moisture, or residue. Wipe both surfaces gently with a clean, dry cloth or cotton swab.
Don’t use abrasive tools or return the vacuum until the contacts are dry.
Next, reseat the vacuum squarely on the stand. Remove debris and confirm that the connectors meet fully; even a misalignment can interrupt charging. Afterward, watch the charging light, display, or indicator for a change. If charging remains inactive, inspect for bent pins, cracks, or corrosion. Damaged contacts may require dock or component service before charging can resume.
Battery Model Compatibility
Check the battery’s exact model and part number against your vacuum’s specifications. Confirm that the charger matches the battery’s required voltage and connector, and replace it only with a compatible original pack.
If you’ve recently changed the battery and charging still fails, verify compatibility before testing other components.
Check Battery Model
Your vacuum may not charge when the installed battery isn’t the exact model specified for your unit. Check the battery label against the model number in your manual, not its appearance or connector shape. Incompatible packs may fit yet fail to dock, communicate, or permit charging. If removable, switch off the vacuum, remove the battery, and reseat it firmly so its contacts align. Don’t force it or test a swollen, leaking, damaged, or unidentified pack.
If a replacement still won’t charge, stop using it and verify its part number with the manufacturer or an authorized retailer. Use the approved battery listed for your exact vacuum. After confirmation, charge at room temperature, about 41°F–95°F; extremes can activate battery safety protection during every normal charging attempt.
Match Charger Specifications
Once the battery model is confirmed, match the charger to the vacuum’s exact model and battery specifications. Check voltage, connector type, polarity, and charging interface against the manufacturer’s label or manual. Don’t assume a plug fits electrically: incorrect voltage can stop charging, eliminate LEDs, or damage the battery. Use the original charger or a manufacturer-approved replacement rated for your exact vacuum model.
For removable packs, confirm the charger’s contacts align with the pack and that the pack seats fully in the vacuum’s charging interface.
| Specification | What you should confirm |
|---|---|
| Model | Exact vacuum and battery designation |
| Voltage | Manufacturer-specified output |
| Connector | Correct plug, polarity, and pin layout |
| Interface | Aligned charging contacts and secure seating |
If charging still fails, test the outlet and adapter before deeper diagnosis.
Verify Compatible Batteries
Start by verifying that the vacuum uses the correct removable battery or charging-stand system for its model. Check the battery label and match its model number exactly to the vacuum’s model, not merely the connector shape. Electrolux and Tineco vacuums often require model-specific packs, so don’t substitute another brand, voltage, or capacity.
If the battery is removable, switch off the vacuum, remove the pack, and inspect the contacts for damage or debris. Reseat the approved Tineco or Electrolux replacement firmly until it locks and its contacts align. Don’t force an incompatible pack or use an unapproved charger; different voltage and charging chemistry can prevent startup or create a safety hazard. If the matched battery still won’t charge, test charger’s output and consider battery failure.
Check Adapter Output Rating
Check that your adapter’s voltage matches the vacuum’s required input. Verify its output amperage meets the specified rating, then read the adapter label to confirm both values.
If either rating is wrong or unclear, don’t use the adapter; replace it with an original or model-authorized unit.
Match Voltage Requirements
Before testing the vacuum or dock, compare the adapter’s output rating with the voltage and current requirements printed on the vacuum, charging port, or manufacturer label.
Read the adapter label for its output voltage, shown in volts (V). Compare that number with the vacuum’s specified voltage. The values must match exactly; a higher or lower voltage can stop charging, trigger protection, or damage the vacuum’s charging circuit or battery.
If the numbers don’t match, don’t connect the adapter, even if the plug fits. Don’t rely on a similar-looking charger or a generic replacement. Use the manufacturer-specified charger, or an OEM or certified equivalent with the correct rating. If either label is missing, unclear, or different, stop troubleshooting and replace the adapter before testing again.
Verify Output Amperage
Could the adapter’s current rating be preventing the vacuum from charging? Confirm that your adapter’s rated output current meets the vacuum’s requirement. An adapter marked 2 A or 3 A must provide sufficient current for the charging circuit; an undersized unit can cause slow charging, repeated charge interruptions, or no charging at all.
Don’t assume a physically compatible replacement is electrically suitable. If the adapter isn’t original or its rating is unclear, compare its output specifications with the vacuum manufacturer’s requirements before connecting it. Also verify that the output is DC and that the plug and polarity match; an amperage match won’t overcome an incompatible connection. If charging fails, use a multimeter to check output under load, then replace it with a certified replacement.
Read Adapter Label
Once you’ve confirmed the adapter can supply enough current, read its label to verify the output voltage and polarity match the vacuum’s requirements. Compare the label’s output with the charging specification in your vacuum’s manual or on its dock. Look for “Output,” “DC,” the voltage in volts, and the current in amps.
The voltage must match exactly; don’t substitute a higher or lower value because either can stop charging or damage electronics.
Ensure the polarity symbol matches the vacuum’s requirement, especially when the connector fits physically. A compatible plug doesn’t prove electrical compatibility. If you’re using another adapter, confirm its label lists the correct output rating, not merely the same connector. If the label is missing or unclear, find model specifications before connecting it.
Test With Spare Battery
If your vacuum uses a removable battery, install a spare or known-good battery to isolate the fault. Reseat it firmly, then place the vacuum squarely on its stand so the charging connectors meet fully.
Use the result to narrow the diagnosis:
| Test | Result | Likely fault |
|---|---|---|
| Spare | charges | Original battery |
| Spare | won’t charge | Base, power, or contacts |
If the spare charges and the LED or display behaves normally, the original battery likely has a fault or has entered a safety state. Charge the spare, press Power or +/−, and confirm that your vacuum reports a battery level.
Then run it. Normal runtime supports a battery diagnosis; failure points toward the base, outlet, adapter, or contacts before replacing any other components.
Do Not Charge Swollen Batteries
Before you continue testing with a spare battery, inspect the original for swelling, bulging, leaks, or deformation. A distorted case, raised seam, or electrolyte residue signals possible cell failure, so don’t dock the vacuum or connect its battery to a charger. Charging can intensify overheating and cause venting, fire, or damage.
Stop using the unit immediately, and move it away from heat, direct sunlight, and flammable materials without squeezing, puncturing, or disassembling the pack.
Only continue diagnostics—such as cleaning contacts or performing a reset—after you confirm the battery has no swelling or leakage. If it shows any warning sign, isolate it in a location and arrange replacement through the retailer or manufacturer. For disposal, use your local hazardous-waste or e-waste program as directed.
Leaving the Vacuum Powered on
Often, a cordless Tineco vacuum won’t enter charging mode correctly when you leave it powered on in the dock. An active vacuum may draw power faster than the charger replenishes it, making a working charger look faulty. Turn it off before docking, then verify the charging connection.
After docking, check that the vacuum’s contacts meet the stand’s contacts and that the charging light appears. If the display stays blank or battery percentage doesn’t rise, remove it, turn it off, and reseat it.
- Switch the power off before docking.
- Seat it until the dock clicks.
- Confirm the charging indicator illuminates.
- Check whether the battery percentage increases.
- Retry docking after removing active operation.
Repeatedly leaving it powered on can mask faults and drain the battery.
Let Battery Cool Completely
An overheated battery may enter a temporary safety mode that blocks charging. Let your vacuum rest in a cool, shaded area for at least 30 minutes before you test the charger again. Heat can trigger the battery management system to prevent current until the cells return to a safe temperature.
Recharge only when the vacuum and battery are approximately 41°F to 95°F. Do not keep reseating the vacuum or repeatedly pressing the charging button while it’s hot; repeated attempts won’t get around this protection and may delay diagnosis.
After cooling, reseat the vacuum carefully in its dock. Make sure the base sits level, the contacts align completely, and no debris blocks the connection. Confirm the dock shows its normal charging indicator. If charging still fails, proceed.
Conclusion
If your vacuum charger isn’t working, start with the dock LED, then inspect the contacts, adapter rating, battery compatibility, and battery results. Turn the vacuum off and let a warm battery cool before charging.
Don’t charge any swollen, cracked, or leaking battery; replace it safely. These checks isolate whether the fault lies with power delivery, contact resistance, battery condition, or the dock itself. If charging still fails, stop testing; contact the manufacturer or technician.