Shop Vac Losing Suction? 10 Causes and the Fastest Fix for Each
Your shop vac loses suction when a float shuts off airflow, a filter clogs, or a foam/cartridge filter is wrong.
Unplug it, clear debris, and reseat or replace the filter.
Check the exhaust for blockage, then clear a clogged dryer vent.
Inspect the drum, lid gasket, and inlet collar for cracks or leaks; reseat damaged seals.
Finally, remove impeller debris after isolating power.
Check hose and attachments.
The steps show how to pinpoint faults.
Check the Float Shutoff First
Start with the float shutoff, since a partially stuck float can restrict airflow even when the hose and filter look clear. Remove the lid and locate the water-stop ball or float assembly beneath its dome. Inspect it for debris, misalignment, or binding in its guide.
Clean the float and channels where it travels; don’t force the mechanism or deform its guide. Reinstall the lid and confirm the assembly sits correctly before testing. Detach the hose and place your hand over the base inlet. Strong suction there points toward a hose or attachment restriction; weak suction indicates an internal fault. If suction remains weak, inspect the float seat again before deeper disassembly. Unplug the vac whenever you clean or inspect this assembly, and keep the lid secure.
When the Float Rises
When the float rises, it seals the vacuum inlet to keep liquid from reaching the motor, causing a sudden, nearly complete loss of suction while the motor continues running. You’ll often hear airflow change to a whistle or choking sound, but motor pitch may remain normal. Stop pickup and disconnect power before inspecting the float cage.
Check for splashing, foam, sludge, or dense wet debris that may lift the float prematurely. Also look for debris lodged beneath it, a warped float, or a damaged seat that prevents closure from releasing. Clear contamination and verify that the float moves freely and nests squarely in its seat.
If it stays raised with little liquid present, compare the mechanism with your model’s manual and replace damaged parts. Never bypass this shutoff; it protects the motor from hydrolock.
After Emptying the Drum
After emptying the drum, inspect the filter first, since a dirty or improperly seated filter commonly causes continued low suction. Remove it, check for clogging or damage, clean it, and reinstall it securely. If the coarse sponge filter shifted, became bypassed, or trapped debris, service it before testing again.
Then unplug the hose and check suction at the tank inlet. Weak suction there confirms the drum wasn’t the cause and points to a filter bypass, internal blockage, or motor strain.
Listen for louder motor noise. Straining suggests restricted airflow or an overloaded motor. If the inlet produces little suction with a confirmed-good filter and clear hose, inspect the lid and chamber for a blockage. You may need to disassemble the unit; disconnect electrical power first.
Foam Versus Cartridge Filters
Use a foam filter for wet pickup protection, since it handles water flow without the restrictions of a dry cartridge. For dry debris, install a cartridge filter, choosing a HEPA or high-efficiency model for fine dust such as drywall particles or cold ashes.
If suction drops or dust blows back, inspect the filter for damage, confirm it’s seated correctly, and replace it when necessary.
Wet Pickup Protection
For wet pickup, fit the manufacturer-approved foam sleeve because it handles water without clogging like a dry filter. A cartridge filter is typically for dry debris; during wet work, trapped moisture can restrict airflow unless your model approves that setup. Match the filter to the task to prevent motor strain and suction loss.
| Check | Diagnostic action |
|---|---|
| Foam sleeve | Install for water pickup; verify coverage |
| Cartridge filter | Use wet pickup only when the manual permits |
If you’re collecting wet material mixed with fine particles, use a high-efficiency disposable or HEPA bag to reduce loading. Afterward, switch off and inspect the filter. Rinse or clean it as directed, let components dry, and reseat the filter securely. A seal can create bypass airflow and weaken suction.
Dry Debris Filtration
When you’re collecting dry debris, install the correct filter: a foam sleeve is intended primarily for wet pickup, while a cartridge filter—preferably HEPA or high-efficiency—is better for fine dust such as drywall dust or cold ashes.
If suction drops during dry pickup, inspect the cartridge for a packed dust layer; loading restricts airflow and can strain the motor. Turn off and unplug the vac, then clean or replace the filter according to its instructions. Don’t reinstall a washable filter until it’s completely dry.
Check the media for tears, holes, or a distorted seal. Dust blowback points to damaged media or poor seating, so verify that the filter locks securely against its gasket. If fine dust still exits the blower, use a high-efficiency disposable or HEPA collection bag when your model supports one. A cartridge/HEPA system typically doesn’t need a bag, but never omit its specified filter before operating, or you’ll risk bypass filtration and renewed suction loss during dry operation.
Choosing The Right Filter
Once the filter is clean and properly seated, match it to the material you’re collecting. Use a foam sleeve for wet pickup; it’s designed to handle water while sealing in the housing. For wet debris such as stones or glass, add a tear-resistant wet/dry collection bag. It traps solids, while water passes through, keeping the foam from clogging.
For dry pickup, choose general filtration for large or medium debris, but use a cartridge, HEPA, or high-efficiency disposable bag system for fine dust. Drywall dust and cold ashes can rapidly load a lower-grade foam filter, reducing airflow or causing blowback at the exhaust. If suction drops quickly, inspect the filter for loading, bypass gaps, or incorrect fit. Replace it with the manufacturer’s specified type only.
Inspect the Exhaust Port
Check the exhaust port for dust buildup or other blockages, and clear any restriction you find. Confirm that air exits in the correct direction and flows freely while the motor runs.
If the port is clear but suction remains low, inspect the filter for damage or improper seating, then check the hose and fittings.
Check For Blockages
Start at the blower/exhaust port on the back of the Shop-Vac, which is often left open. Check now for air leaks or dust at the port. Dust at this port suggests filtration failure, such as a torn or poorly seated filter, rather than normal exhaust.
Next, remove the hose and feel for suction at the tank inlet. Strong inlet suction with normal exhaust points to a blockage in the hose, wand, attachment, or a poor connection. Little or no inlet suction, combined with abnormal exhaust airflow or dust, suggests an internal clog or filter bypass.
Reseat the filter and inspect its surface and seal for tears, gaps, or misalignment. If the filter checks out, the blockage likely lies inside the vacuum, not the hose system.
Clear The Exhaust
If the hose and tank inlet are clear, inspect the blower/exhaust port on the back of the Shop-Vac. Stop the vacuum and examine this port for escaping dust. The port usually remains open because it supports blowing; debris exiting during normal vacuuming indicates a filtration failure, not an exhaust cap problem.
Check the filter for rips, holes, poor seating, or a missing retainer cap. Reinstall it firmly according to your model’s configuration, ensuring every retaining ring or clamp sits correctly. Replace any damaged filter immediately.
If dust still reaches the port after you’ve corrected installation, use a HEPA or high-efficiency cartridge filter. For drywall dust, cold ashes, or similarly fine particles, add a compatible high-efficiency collection bag. Retest suction and inspect the exhaust.
Verify Airflow Direction
Where air exits helps identify the fault: a Shop-Vac should draw air through the tank inlet and discharge it through the rear blower/exhaust port. With the hose unplugged, switch on the vac and feel the tank inlet for inward suction. Check the rear port: it should push air outward, and it must remain unobstructed. A cap, attachment, or blockage there can starve inlet airflow. Use this quick diagnosis:
| Observation | Likely meaning |
|---|---|
| Inlet sucks; exhaust blows | Normal airflow direction |
| Dust exits exhaust | Filter damaged or mis-seated |
| Weak inlet and exhaust | Restriction or motor fault |
Reseat or replace the filter, using compatible HEPA setup when needed. Inspect for holes and verify seals.
Test again; if direction remains correct but suction stays weak, check hose, filters, and motor.
Clear a Clogged Dryer Vent
A clogged dryer vent restricts airflow, trapping heat and moisture and increasing the risk of overheating or fire. Disconnect power, pull the dryer away from the wall, and clean the lint trap housing plus the first few inches of the vent connection.
Disconnect the vent hose, and use a vent brush or rod to loosen lint, pulling it toward the outside cap. For fastest results, run your shop vac with a crevice tool at both the dryer end and exterior termination while brushing. Recheck outside airflow.
If exhaust remains weak, inspect for crushed or kinked duct sections and gaps at the wall cap. Replace damaged ducting before operating the dryer again. This confirms the vent path is open and reduces recurring suction complaints afterward.
Check for a Cracked Drum
Inspect the Shop-Vac’s drum for leaks that can divert air and weaken suction. Unplug the unit, remove the hose, and examine the tank, especially its bottom, seams, and impact areas. Look for hairline cracks, warping, or damaged plastic. Confirm the lid sits evenly; inspect its gasket for gaps, pinching, hardness, or missing sections.
| Finding | Action |
|---|---|
| Crack or warp | Replace drum |
| Seal issue | Reseat or replace gasket |
To isolate the fault, cover the tank inlet with your hand while the hose remains removed. Little or no suction indicates a drum leak or seal problem. Reseat the lid and retest.
Replace the gasket if it’s damaged; replace the drum if cracked, because cleaning the filter won’t restore a tank. Don’t operate the vacuum until the leak is corrected.
Clear Impeller Debris
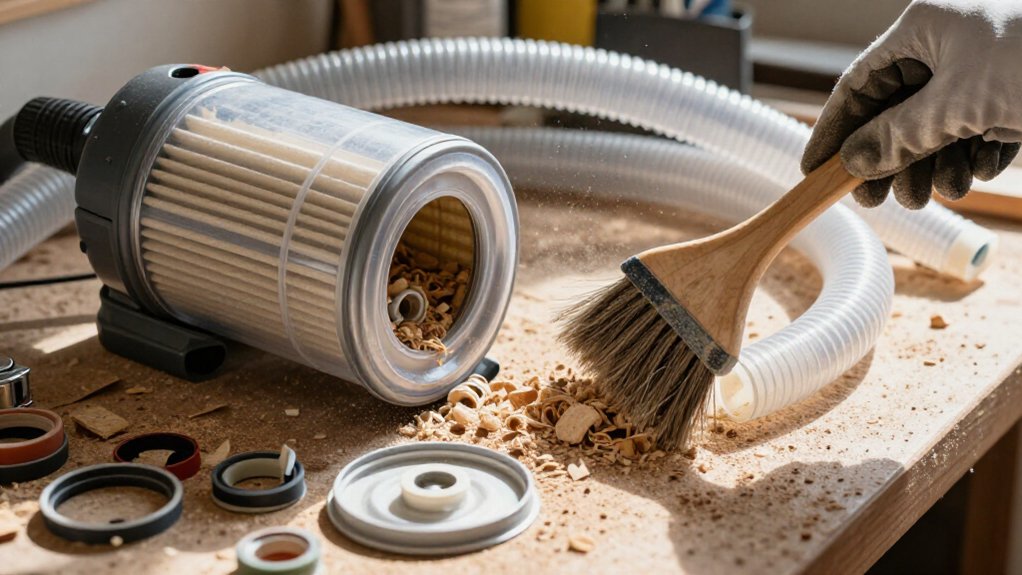
Once the drum and lid seal check out, unplug the shop vac and check the impeller chamber for debris. A failed or poorly sealing filter can let grit bypass filtration and partially clog the impeller. Remove the lid, often easiest with the vacuum inverted, then remove the screws securing the lid and internal access points.
- Under the dome near the water-stop ball, remove the additional screws.
- Lift out the coarse sponge-style filter and clean it and the exposed chamber.
- Reinstall the filter and secure every retainer cap or piece firmly.
Clear fragments without damaging blades or seals. Reassemble the housing, then test suction. If airflow remains weak, lodged debris may remain, or the motor may struggle; inspect the chamber further before diagnosing motor faults.
Seat the Inlet Collar
Before testing the motor, unplug the shop vac and check the inlet collar, the gasketed fitting where the hose enters the tank, for cracks, missing parts, or a loose fit.
Press the collar fully into the tank opening until it seats evenly and seals tightly. Connect the hose completely, checking for gaps or misalignment at the collar. A small leak here can bleed air and sharply reduce airflow, even with a clean filter.
For a quick diagnostic, unplug the hose and place your hand over the tank inlet. Strong suction at the inlet points to a collar or hose seal problem rather than a motor fault. If reseating restores suction, inspect the collar whenever you reinstall the hose. Repeated bumps can loosen it and recreate leak.
Conclusion
When your shop vac loses suction, start with the simplest restriction: check the float, empty the drum, and inspect the filter and exhaust port. Next, clear the hose and dryer-vent blockage, then examine the drum for cracks.
If airflow still remains weak, remove debris from the impeller and reseat the inlet collar. Test the vacuum after each correction. This process isolates the fault quickly and helps you restore reliable suction without replacing working parts unnecessarily.