Vacuum Filter Cleaning and Replacement Schedule: A Simple Chart by Filter Type
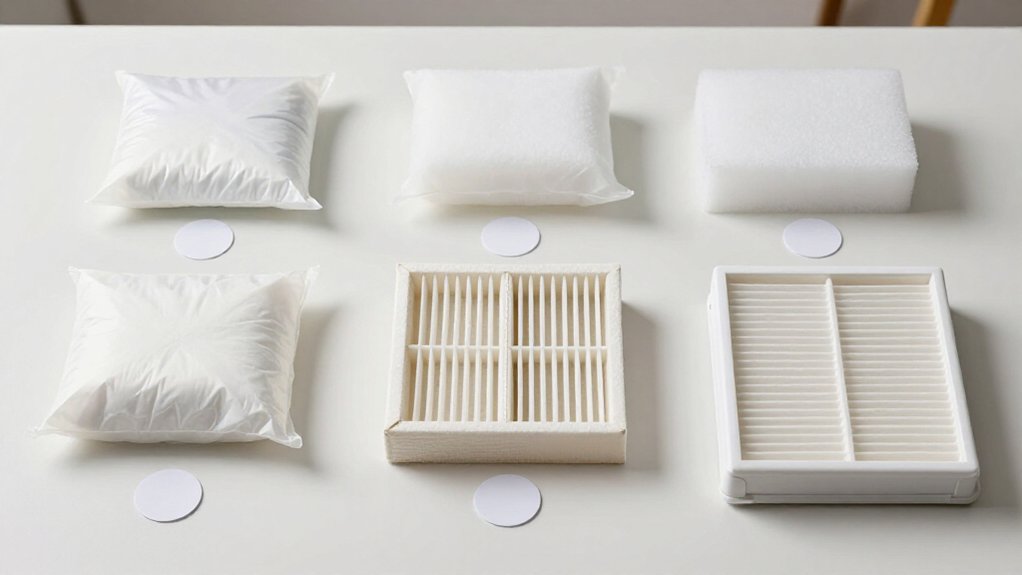
Use this simple schedule: inspect foam, mesh, HEPA, pleated, and carbon filters monthly; inspect weekly in homes with multiple pets.
Wash foam or washable pleated filters every 1–3 months, replacing them every 6–12 months.
Replace HEPA cartridges every 9–18 months and carbon filters every 3–12 months.
Don’t wash HEPA or paper media unless the manual permits it.
Unplug first, air-dry washable filters 24 hours, confirm model numbers, and check for safe, clean operation; more guidance follows.
Foam, HEPA, Pleated Filters
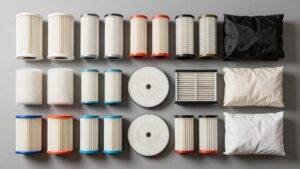
Foam, HEPA, and pleated filters require different care, so check your vacuum’s manual before cleaning. Rinse a washable foam pre-motor filter with cool or lukewarm water, squeeze gently, and air-dry it for at least 24 hours. Reuse it for roughly 6–12 months, but replace it sooner if it cracks, deforms, or suction remains weak after drying.
Treat HEPA exhaust filters as non-washable unless instructions specifically permit rinsing; water can damage filter media. Plan replacement about every 12–18 months, or sooner in dusty or pet-heavy homes. Don’t wash pleated paper cartridges. For washable pleated filters, rinse through the pleats carefully and dry completely for 24 hours or longer.
Never reinstall any damp filter: moisture can restrict airflow, promote odors, and damage the motor and housing.
Confirm Filter Model Number
Before placing a replacement, confirm the vacuum’s exact filter model number to guarantee the part fits correctly and delivers the intended filtration. Power off and unplug the vacuum; remove the battery from cordless units. Locate the device model and serial on its base or beneath the dust bin. Remove the filter and read its stamped or printed part number.
Verify these details:
- device make and model;
- manufacturer part number and OEM designation;
- filter dimensions, shape, seal, tabs, holes, and rating.
Measure length, width, and depth, then photograph the filter and housing. Use the manufacturer’s parts lookup first; cross-check the matching MPN against reputable retailer listings, including the UPC, ASIN, or SKU. If markings conflict or remain absent, contact support with device model and photo.
Monthly-to-Annual Filter Intervals
Once you’ve matched the filter to your vacuum’s model number, set a recurring inspection schedule rather than relying on suction loss alone. Check monthly, then clean or replace by filter type and workload. A written log prevents missed maintenance and protects airflow, motor life, and indoor air quality.
| Filter | Interval |
|---|---|
| Foam or washable pleated | Clean every 1–3 months; replace 6–12 months. |
| HEPA cartridge | Inspect monthly; replace 9–18 months. |
| Carbon/odor | Inspect periodically; replace 3–12 months: washing won’t restore saturation. |
Increase frequency for pets, fine dust, or commercial use. Follow the manual when intervals differ. Don’t wash paper HEPA or carbon media. For washable elements, rinse only when approved, inspect for damage, and allow complete drying before reuse; a compromised filter can release contaminants and strain the motor.
Unplug Before Filter Removal
Turn off the vacuum, disconnect it from the outlet, and remove any battery pack before you remove the filter. This prevents accidental startup, electrical shock, and contact with moving parts.
Verify that no power source remains connected before proceeding.
Turn Off Power First
Switch off the vacuum and unplug it before removing or cleaning any filter to prevent electric shock and accidental motor or brush movement. Keep hands clear of the brush and moving parts while you service the machine. Remove the filter outdoors or over a trash bin so trapped dust won’t recirculate indoors.
Inspect the filter compartment, gasket, and housing for damage that could cause an air leak. For a washable filter, follow its approved cleaning method and air-dry it for at least 24 hours. Moisture can create odors, restrict airflow, or damage the motor.
Reinstall the filter in the correct airflow direction, seat it evenly, and close the cover firmly to maintain the seal and suction. Don’t operate it with wet or damaged filters.
Disconnect From Outlet
Unplug the vacuum from the outlet before removing, cleaning, or replacing any filter. This step prevents electrical shock and stops an accidental motor start while you work. Don’t rely on the power switch, standby mode, or an inactive vacuum; disconnect the cord from the outlet completely.
Keep the plug removed while you open the filter compartment, inspect the housing, and handle components near the motor intake or airflow path. If you’ve just used the vacuum, let it cool before touching parts. Check for tears, damaged seals, or debris, then reinstall the filter in the correct direction according to the manual. Never reconnect power until every component is seated and the compartment is closed.
This procedure protects you, the motor, and filter assembly during maintenance.
Remove Battery Packs
After disconnecting a corded vacuum, remove the battery pack from a cordless model before opening the filter compartment. Switch off the vacuum completely, then follow the manufacturer’s procedure to detach the pack. Removing the pack isolates power and protects the battery housing while you work near the motor.
If your vacuum has pre-motor and post-motor filters, remove and handle them one at a time. Keep the pack out while you inspect, clean, or replace each element, and ensure every filter sits correctly before closing the compartment. For washable filters, wait at least 24 hours for full air-drying; don’t reinstall a damp element.
Reinsert the battery only after the cover is firmly secured and all components are dry. Keep the removed battery pack dry.
Prevent Accidental Startup
Cut power before opening the filter compartment: unplug corded vacuums, or turn off cordless models and remove their battery packs. Keep the motor and floorhead completely stopped and cooled before you release latches or handle foam, HEPA, paper, or cartridge filters. Connected power can allow an unexpected startup, pulling fingers, clothing, or loose debris into moving components.
After disconnecting power, move filter work outdoors or over a trash bin, particularly when handling dusty pleated media. Remove the filter gently, following the manufacturer’s sequence; don’t force a cover or reach past guards. During reassembly, seat the filter in its guides, check that its gasket and edges align, and close the housing firmly and completely. Don’t operate the vacuum with a loose, damaged, wet, or missing filter.
Verify Power Is Disconnected
Before you touch or remove any filter, disconnect the vacuum from power: unplug corded models and remove the battery from cordless models. This step prevents electric shock and stops the motor from starting unexpectedly. If your vacuum has separate pre-motor and post-motor or HEPA exhaust filters, disconnect power before accessing either compartment.
You can’t inspect, clean, or lift a filter housing while the vacuum runs; restricted airflow can increase motor strain and risk.
After unplugging, move a bagless or upright vacuum outdoors, or place it over a trash bin before opening the housing. Lift the filter carefully to limit dust release, and check seals without forcing them. Reinstall a washable filter only after it has dried completely. Follow manufacturer’s instructions for every filter type.
Homes With Multiple Pets
Homes with multiple pets generate more hair and dander, so you’ll need shorter filter-cleaning intervals.
Inspect pre-motor filters weekly and replace disposable or HEPA filters every 2–4 months, or sooner if suction drops, motor noise increases, or exhaust releases dust.
Unplug the vacuum before servicing, and dry washable filters completely—at least 24 hours—before reinstalling.
Higher Hair And Dander
With multiple pets, inspect every vacuum filter weekly, especially during shedding season, because hair and dander can quickly restrict pre-motor and exhaust airflow. Check every filtration stage, not just the primary element: a restricted exhaust or HEPA filter can weaken suction even when the pre-motor filter looks acceptable.
For heavy hair loads, plan disposable-filter replacement about every two to four months, or sooner if suction falls or dust and odors escape the exhaust. If your manual permits washing, tap or rinse foam or felt filters gently, then air-dry them for at least 24 hours. Never reinstall a damp filter, and replace any element with holes, thinning, or distortion. In allergy-sensitive homes, use the shortest manufacturer-approved HEPA interval and keep OEM spares available on hand.
Shorter Cleaning Intervals
Multiple pets can clog pre-motor and post-motor filters faster, so inspect both every 1–4 weeks and check them weekly during heavy shedding. Clean washable foam or mesh pre-motor filters about every 1–3 months, or sooner when hair mats over the surface, airflow drops, or suction weakens. Empty the dust cup or bag before 75% capacity to reduce loading and strain.
Disconnect power before opening the vacuum; follow your model instructions carefully. Tap non-washable media outdoors; don’t rinse HEPA or paper. Rinse washable filters with lukewarm water; air-dry them completely for at least 24 hours. Never reinstall a damp filter; moisture can damage motor components or encourage mold. Clean both stages, since a blocked exhaust filter can restrict airflow even when the pre-motor filter looks clear.
Frequent Filter Replacement
When several pets shed heavily, inspect every vacuum filter weekly because hair and fine dander can clog both pre-motor and post-motor stages. Replace disposable filters, particularly carbon and post-motor HEPA or exhaust filters, every two to four months. Replace them sooner if suction drops or a gray or black coating appears.
Inspect secondary filters, too; blockage there can mimic primary-filter failure and strain the motor.
Clean washable foam or felt pre-motor filters every one to three months. Tap them over a trash bin; rinse only if your manual permits. Air-dry them for 24 hours before reinstalling. Replace filters after six to twelve months, depending on loading.
Never rinse non-washable HEPA filters; water damages their media. Follow manufacturer specifications, and you’ll keep replacement filters ready.
Less Dust on Floors
A clean pre-motor foam or felt filter helps maintain airflow and prevents dust from being blown back onto floors.
If your manual approves washing, tap-rinse the filter and let it air-dry for at least 24 hours before reinstalling it. Never wash a HEPA paper cartridge; tap or brush off surface dust and replace it when suction falls, typically every 12–18 months. For bagless HEPA or pleated filters, check monthly and plan replacement every 6–12 months.
Activated carbon filters don’t clean effectively, so replace them on schedule to prevent saturated media from releasing odors and particles. In homes with pets, shedding, or fine dust, check filters every 2–4 weeks and replace them about every 2–6 months, or sooner when pickup weakens or exhaust leaves residue.
Inspect for Filter Tears
Inspect your vacuum filter monthly, or every 1–4 weeks if you have pets or allergies, for tears, rips, loose edges, and cracks that could let dust bypass the filter media.
Turn off and unplug the vacuum before removing the filter. Examine pleated HEPA or mesh filters under bright light, focusing on folded seams, where creases can split. Check foam or felt pre-motor filters around the outer frame and corners for splits, worn spots, or gaps in the seal.
A damaged filter can’t protect the motor or control airborne dust reliably. Replace it immediately if you find a hole, tear, crack, thinning, deformation, or loose edge; don’t try to restore damaged media through cleaning. After cleaning, reinstall it only after 24 hours of drying.
Avoid Over-Washing HEPA Filters
Before you rinse a HEPA filter, confirm that the manufacturer labels it washable; many paper or cartridge HEPA filters aren’t, and water can collapse their fine media and permanently reduce filtration. For a washable model, rinse with cool or lukewarm water only.
Don’t use soap, hot water, brushes, or compressed air; these can damage pleats. Over-washing also wears media, and some washable HEPA filters tolerate only three to six cycles.
- Disconnect power before removing the filter and work outdoors or in a ventilated area.
- For a non-washable HEPA, tap the casing gently or use low-suction cleaning on the outer surface; never rinse it.
- Air-dry a washable filter for at least 24 hours; moisture causes odors and restricts airflow, so never reinstall it while damp.
Record Suction on the First Saturday
On the first Saturday of each month, run the vacuum at its normal setting after emptying the bin and attaching the floorhead, then record suction as strong, medium, or weak, or measure pickup on the same test strip.
If suction is weaker than your last entry, inspect the pre-motor foam or felt filter first; clogging can cut suction by roughly 30–50% even when the motor sounds normal. Clean washable filters as directed, then air-dry them for at least 24 hours; thick foam may need 48. Reinstall and retest.
Never rinse non-washable HEPA, cartridge, or carbon filters. Use dry tapping or low-suction cleaning. Log results beside your filter schedule. Check every one to four weeks for pets or allergies, and disconnect power before opening the machine.
Conclusion
Keep your vacuum’s filter schedule visible, and match every service interval to the manufacturer’s model guidance. Unplug the machine before you remove, wash, dry, or replace any filter. Inspect foam, pleated, and HEPA media for damage; don’t reuse torn or damp filters.
If pets or dust increase, shorten the interval. Record suction monthly so you’ll catch restriction early, protect the motor, and maintain cleaner exhaust air safely. Use the chart to schedule timely replacement decisions.