Robot Vacuum Not Charging Decision Tree
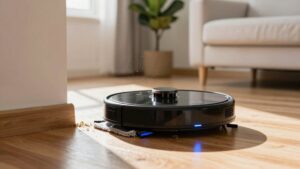
Start with quick checks: Make sure the dock and robot are plugged in, the power light is on, and the robot’s seated squarely with a finger-width gap. Clean metal contacts on both sides with a dry cloth; use alcohol for stubborn grime. Then manually place the vacuum on the dock and watch for charging lights.
If it still won’t charge, inspect the battery for swelling or corrosion and test/replace it. If problems persist, check dock wiring and firmware. Keep going to learn specific steps.
Quick Overview
- Verify power: Ensure dock and vacuum are plugged in, the outlet works, and the dock indicator light is on.
- Confirm alignment: Place robot squarely on dock with a finger-width gap and watch for charging lights.
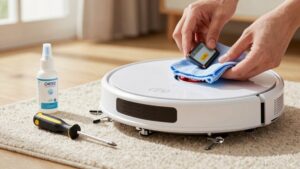
- Clean contacts: Wipe metal pads on robot and dock. Use alcohol on stubborn grime and let dry before docking.
- Inspect battery: Check for swelling, corrosion, loose connectors, or rapid drain. Replace if defective.
- Update and escalate: Reset or update firmware, re-test charging. Then contact support or pursue warranty/repair if unresolved.
Quick Checks to Get Your Robot Vacuum Charging Again
Having trouble getting your robot to charge? Start with a quick, structured routine: Ensure the robot is turned on and place it squarely on the dock with about a finger-width clearance so charging can begin.
Next, verify both the vacuum and base are plugged in and showing power. As you’re designing a troubleshooting checklist, include visual checks for damage or buildup on the docking base and pads.
Don’t skip user education: Teach yourself where the contacts sit and how alignment looks when correct. Inspect contacts for film or debris and clean dust gently with a soft dry cloth; use a cotton swab with rubbing alcohol only if the manufacturer allows.
Confirm the robot’s alignment precisely. Even slight misalignment can stop charging. If everything looks fine and charging still won’t start, perform a quick software reset or apply any firmware updates per the manufacturer’s instructions to rule out glitches before moving to deeper diagnostics.
Clean Charging Contacts and Check Dock Alignment
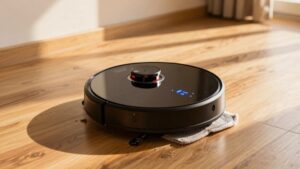
Want the simplest way to fix a non-charging robot? Start by cleaning charging contacts and checking dock alignment. Wipe the metal pads on both the vacuum and dock with a soft dry cloth; use a cotton swab with rubbing alcohol for stubborn grime. Then let everything fully dry before re-docking. Inspect the base station for debris that could block connection.
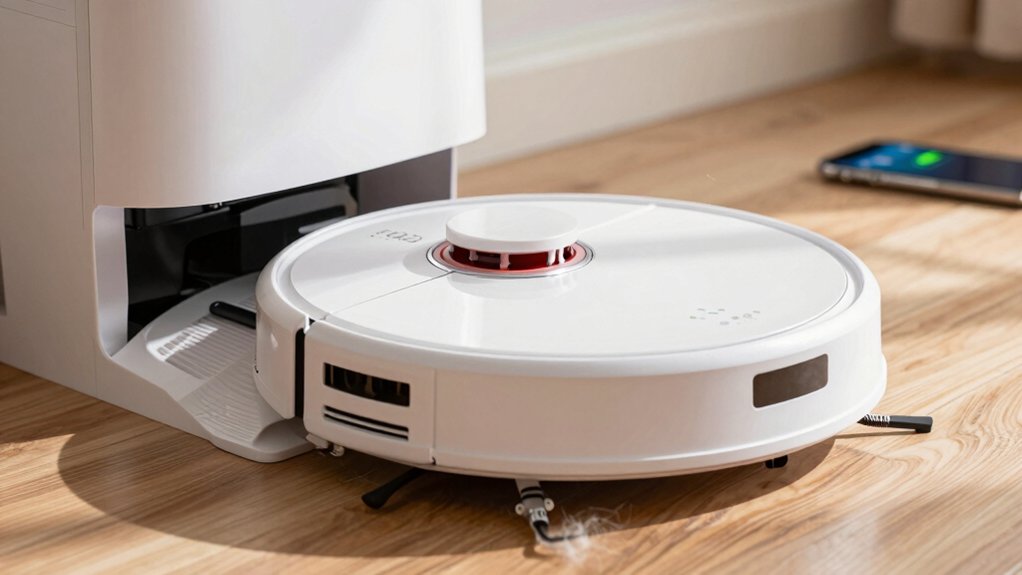
- Manually place the robot on the dock and watch for charging indicator lights to confirm contact.
- Center the vacuum with a finger-width gap for consistent dock alignment; remove obstacles and mark the floor if needed.
- Clean pads regularly, remove visible dust, and repeat manual testing until charging reliably starts.
These steps protect battery health by ensuring consistent charge cycles and reduce false charging faults that prompt unnecessary firmware reset attempts. If cleaning and alignment don’t restore charging, proceed to the next diagnostic step rather than immediately replacing components.
Test and Replace the Battery (How to Tell It’s Dead)
If your robot won’t hold a charge or the battery looks swollen, it’s time to test and likely replace the cell. Start by powering off, opening the battery cover, and inspecting the pack for swelling or corrosion. If it drains quickly after a full charge, the cell has failed and needs battery replacement.
Disconnect the old battery by gently loosening connectors and checking for damage. Install the new pack by aligning connectors, seating it firmly, and reassembling the cover.
| Symptom | Action |
|---|---|
| Swollen battery | Stop use; handle carefully; replace |
| Rapid drain | Test full charge; replace if it won’t hold |
| Corroded connector | Clean or replace connector before install |
| New battery, no charge | Check for charging onset; consider internal fault |
| Loose fit | Reseat battery; ensure firm connector alignment |
After replacement, test for charging onset. If the new battery still won’t charge, the fault may be internal; wiring or motherboard may need deeper repair or unit replacement.
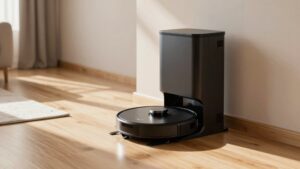
Inspect Dock Power, Wiring, and Visible Damage
Curious why your robot won’t charge even with a fresh battery? Start by confirming dock power: verify the base station and charger are plugged in, the outlet works, and the dock’s power light is on. If the light’s off, try a different outlet before blaming the battery.
Check wiring and visible damage carefully. Look for frayed or loose cords, bent prongs, cracks in the dock casing, or loose connectors; any of those can interrupt power delivery. Inspect charging contacts on both the vacuum and dock for dust, film, or corrosion. Clean gently with a soft dry cloth or a cotton swab with rubbing alcohol.
Re-seat the robot on the dock to ensure alignment and secure contact. Ensure there’s roughly a finger-width clearance around the dock so the robot centers properly. If the dock shows no visible damage but still won’t charge, remove and replace the robot to confirm contact. Consider rebooting the dock.
Reset Firmware, Update Software, and When to Seek Repair
Start by performing a full reset of your robot using the exact steps in the manufacturer’s manual to clear software glitches that can prevent charging recognition. After resetting, check and install any available firmware updates for both the robot and, if applicable, the docking station. Updates often fix charging-recognition bugs and improve dock communication.
Confirm the robot sits correctly on the dock and observe status lights or error codes. Refer to the manual to interpret them and distinguish firmware faults from sensor or hardware problems. If charging still fails after resets and updates, re-run diagnostics and document error indicators, firmware versions, and steps taken.
If problems persist despite correct placement, current firmware, and clear error guidance, proceed with repair escalation: contact manufacturer support, provide diagnostics and logs, and request warranty or paid-service options.
Consider replacement only when professional diagnosis confirms irreparable or uneconomical hardware failure. Follow support instructions closely to avoid voiding warranty.
Frequently Asked Questions
Can I Charge the Robot Vacuum With a Universal Charger?
You can sometimes use a universal charger, but you shouldn’t unless it matches the vacuum’s voltage, polarity, and connector type. Check the manual and specs to protect battery health and follow charging etiquette: never force a mismatched plug; avoid overvoltage; and monitor the first charge.
Using the wrong charger can shorten battery life or cause damage. When in doubt, use the manufacturer’s charger or a recommended equivalent to ensure safe and reliable charging.
Does Charging Behavior Change With Different Floor Types?
Yes, charging behavior can change with different floor types. You’ll notice charging contacts and docking alignment work best on hard, flat floors. Carpets or rugs can raise the robot, causing poor connection or misalignment.
For consistent charging, keep the dock on hard flooring and clear the “two word discussion idea1” zone. Also, tidy edges and cords in the “two word discussion idea2” area so the robot docks reliably every time.
Can Pets or Fur Interfere With Charging Contacts?
Yes, pet fur can block charging pads and prevent proper contact. You should inspect pads and vacuum contacts regularly, wiping away hair and debris with a soft cloth or brush.
Brush guards and filters help reduce loose fur buildup. Keeping pets groomed lowers risk. If charging still fails, check alignment and charger function. You’ll want to test after cleaning to confirm reliable charging.
Is It Safe to Use a Third-Party Battery in My Model?
You can, but you shouldn’t assume every third-party battery is safe. Check battery compatibility with your model; confirm specifications match, and buy from a safe supplier with good reviews and warranty. Avoid cheap knockoffs that risk overheating or damaging electronics.
Install carefully; watch for heat or odd odors on first use. Keep the original battery until you’re sure the replacement performs reliably. Consider manufacturer-approved replacements when possible.
Will Extreme Temperatures Permanently Damage Battery Capacity?
Yes, extreme temperatures can permanently reduce battery capacity. If you expose the battery to prolonged heat, it will degrade chemical cells and lose capacity faster. Severe cold can temporarily cut capacity and stress the battery, causing long-term harm after repeated cycles.
To protect battery capacity, store and operate the device within manufacturer temperature ranges. Avoid direct sunlight or freezing conditions, and let the battery return to normal temperature before charging.
Conclusion
You’ve gone through the key steps to get your robot vacuum charging: quick checks, cleaning contacts, testing or replacing the battery, inspecting dock power and wiring, and trying resets or updates. Start with the easy fixes (clean contacts, align dock). Then move to battery tests and power checks.
If those don’t work, update firmware and contact support or a repair service. Follow this decision order to save time and avoid unnecessary expense.