Robot Vacuum Makes Loud Noise Troubleshooting
If your robot vacuum makes loud noise, start by turning it off and flipping it over to isolate the sound. Listen near brushes, wheels, fan and dustbin. Remove and clean brush rolls, side brushes, wheel axles and bearing caps for hair or debris.
Empty the bin, clean or replace filters, and check the fan housing. Tighten loose screws or mounts and test drive. Try lower suction or eco mode and proper dock placement for less vibration. More steps below will help further.
Quick Overview
- Power off and flip the robot to inspect the main brush, side brushes, wheels, and undercarriage for tangles or debris.
- Cut and remove hair from brush rolls and bearings. Then spin brushes by hand to check for catching or worn bristles.
- Empty and clean the dustbin and filters. Rinse washable filters and ensure they are completely dry before reinstalling.
- Tighten loose screws, reseat mounts and brush housings, and replace worn wheels, belts, or bearings causing rattles or wobble.
- Reduce noise by using eco or lower-suction modes, scheduling runs when away, and placing the dock on a flat, hard surface.
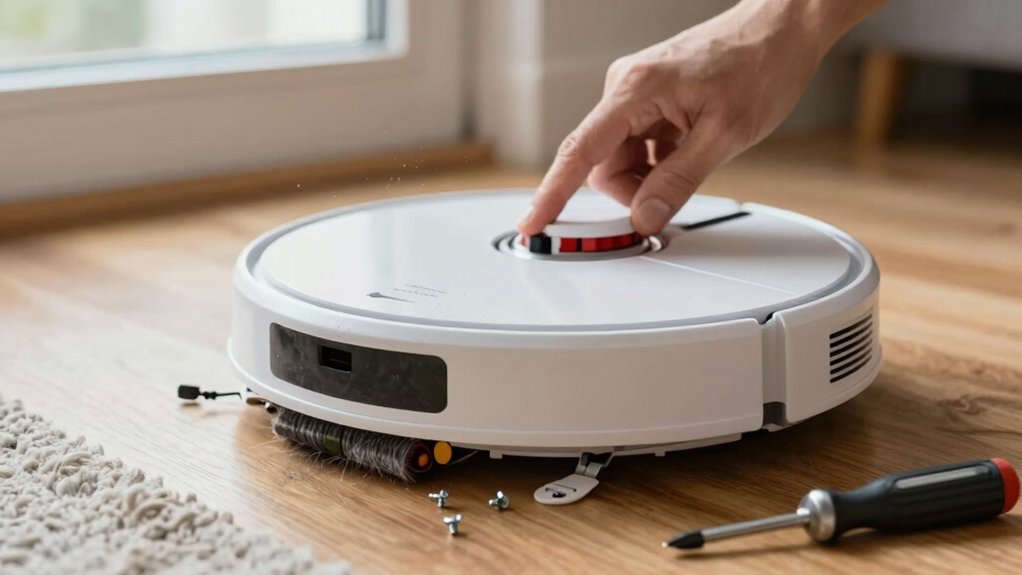
Quick Triage: Pinpoint Where the Robot Vacuum Noise Comes From
Where’s that noise coming from? You’ll start by powering off and flipping the robot to inspect the main brush, wheels, and underbrush: that’s the fastest triage step. Look for hair or debris tangled in the brush or wheel axles; grinding or clicking usually means obstruction or a misaligned wheel.
Rattling or shaking points to loose screws, a loose dustbin, or a loosely connected brush housing; tighten mounts and reseat the bin. If you hear a constant motor or airflow whine, check filters and brush condition: clogged filters or worn brushes raise motor strain.
For noise isolation, run the robot on carpet versus hard floor to see if sound changes. Try an alternative troubleshooting path by rebooting via the app or checking for firmware updates. If firmware seems linked to the change, update and reboot. Consider a factory reset only after you’ve ruled out physical obstructions and loose parts.
Clean Brushes and Wheels to Stop Grinding & Clicking
Now that you’ve isolated the sound to the undercarriage, focus on the brushes and wheels. Most grinding or clicking comes from hair, string, or debris wrapped around the main brush or stuck in wheel housings. Remove the brush roll, cut and pull away tangles, and replace a worn or frayed brush. Replace every 6–12 months depending on use. Clean brushes after each run to prevent motor stress and recurring noise.
Spin the brush by hand; if it catches, re-clean or replace it.
| Symptom | Action |
|---|---|
| Grinding from brush | Remove brush, clear tangles, spin by hand |
| Clicking while moving | Inspect wheels and housings for debris |
| Resistance or wobble | Reseat or replace wheel; check alignment |
When you inspect wheels, clear trapped debris. Reseat loose wheels and test drive the robot slowly. If noise stops after cleaning, the brush or wheel was the source. If not, proceed to other subsystems.
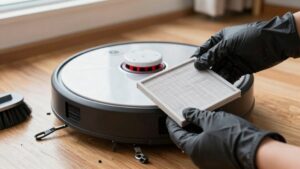
Clean/Replace Dustbin Filters and Fans to Fix Motor Whine
Wondering why your robot sounds like it’s straining? A clogged or full dustbin and dirty filters force the motor to work harder, raising motor whine. Start dustbin maintenance by emptying the bin after every few runs; do not wait until it’s full. Remove visible debris and wipe the compartment so air can flow freely.
Next, address filters. Replace non-washable filters per the manufacturer’s schedule and perform filter replacement every 2 to 3 months under heavy use. For washable filters, rinse with cold water, squeeze gently, and let them air dry completely before reinstalling. Never run the robot with damp filters.
If noise persists after cleaning and replacing filters, check the fan housing for dust buildup; a blocked fan still causes strain. Clean fan blades with a soft brush and consider replacing worn filters or the motor assembly if cleaning does not reduce whine. Regular dustbin maintenance and timely filter replacement keep airflow steady and motor noise down.
Fix Rattles: Tighten Mounts, Replace Worn Parts, Inspect Bearings
A rattling robot usually means something’s loose or worn. Start with a careful underside inspection and tighten any visible screws, dustbin locks, and mounts so parts sit snugly. Work methodically: remove the brush roll and check for hair or debris in bearing caps, then clean and reattach.
Spin side brushes and wheels by hand to detect wobble or drag; worn wheels or misaligned brushes often create intermittent rattles and should be replaced.
Check bearings and the drive belt for roughness, dryness, or stretch. Lubricate appropriate bearings per manufacturer guidance and replace any that feel gritty. After tightening mounts and replacing worn parts (brushes, belt, wheels), run the vacuum on hard floors and carpet to confirm the noise’s gone.
Note cosmetic details like chassis color only when ordering exact replacement parts. Don’t overlook tire inflation-style checks on wheel clearance to ensure smooth rotation without side play.
Reduce Routine Noise: Modes, Placement, and Schedule Tips
Want to keep your robot from being the loudest thing in the house? Use eco modes and lower suction settings first: they cut dB levels without drastic loss of performance. Schedule noisy runs for when you’re out or asleep using app-based scheduling tips.
Place the dock on a hard, flat surface away from walls and furniture to limit vibrations and echoes. Clear clutter and create shorter, obstacle-free paths so the unit avoids frequent start-stop motor bursts. Use targeted zone cleaning on carpets to use lower power yet remove dirt where it matters.
| Action | Effect |
|---|---|
| Eco modes | Lower noise, less suction |
| Dock placement | Fewer vibrations, less echo |
| Clear paths | Fewer stops, lower motor strain |
| Zone cleaning | Efficiency with reduced power |
Apply these steps methodically: set eco modes, program schedules for away hours, reposition dock, then declutter and map zones. You’ll reduce routine noise noticeably.
When to Contact Support or Consider a Quieter Replacement
How do you know when it’s time to call support or shop for a quieter model? Start by ruling out simple fixes: clean the brush roll and filters, check for debris in wheels, and note any recent firmware updates. Sudden noise after an update can signal calibration or software issues support can address. If loudness persists after basic maintenance, contact manufacturer support to report symptoms and document firmware history. They will diagnose potential motor or bearing problems and advise on part replacements.
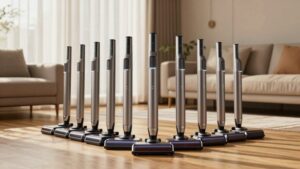
If diagnostics reveal persistent motor wear, damaged wheels, or recurrent grinding that maintenance cannot fix, consider upgrade options. Older models often get louder with age; support may recommend replacing worn parts or moving to a newer unit. When choosing a quieter replacement, target machines under 60 dB with optimized airflow and brushless motors.
Balance repair costs, expected lifespan, and noise specs to decide between repairing for short-term savings or buying a quieter, longer-term model.
Frequently Asked Questions
Can Loud Noises Void My Vacuum Warranty?
Yes, loud noises can affect your warranty if they result from misuse or unauthorized repairs. Check your manual for loud warranty exclusions: manufacturers often deny coverage for damage caused by pet interference, foreign objects, or neglect.
You should document the noise, avoid DIY fixes that void terms, and contact support promptly. Follow prescribed maintenance steps, report symptoms clearly, and request an authorized inspection to protect your claim and restore proper operation.
Can Pet Behavior Cause Sudden Loud Noises?
Yes, pet behavior can cause sudden noises. You’ll notice pets bumping, chewing, or startling the unit, which raises noise levels and can trigger clashes with accessories or mop attachments. That won’t usually affect your vacuum warranty unless damage is obvious.
Check software updates to rule out glitches; test across floor types, and detach accessories to isolate sounds. Observe pets, redirect them, and secure loose parts to prevent repeats.
Will Software Updates Affect Vacuum Noise Levels?
Yes, updating firmware can affect noise. You’ll install updates that tweak motor control, fan curves, and navigation timing, which can lower vibrations and whine.
After updating firmware, check for a new quiet mode or noise-reduction profile in the app and enable it. Test on various floors and monitor changes. If noise persists, roll back or contact support. Document firmware version and symptoms for troubleshooting.
Are Certain Floor Types Permanently Louder for My Model?
Yes, certain floor types can cause permanent loudness for your model. Hard surfaces and hollow boards change floor acoustics; they amplify motor and brush noise, while carpets absorb sound. You can’t alter the build’s inherent vibration paths.
However, you can reduce perceived loudness: add rugs, use door thresholds, tighten loose panels, and choose softer wheel replacements. Regular maintenance helps, but it won’t fully eliminate acoustics tied to the floor type.
Can Accessories (Mop Attachments) Increase Noise?
Yes, mop attachments can increase noise. You’ll notice extra vibration and motor load if the accessory isn’t secure or lacks accessory compatibility with your model. Poorly fitted mops cause rattling, friction, and reduced dust reduction efficiency; this makes the unit work harder and sound louder.
Check fit, tighten fasteners, clean pads, and use only approved accessories. If noise persists, remove the mop and test to isolate the source.
Conclusion
Start by locating the noise source so you don’t waste time. Clean brushes, wheels, and bearings to stop grinding or clicking. Clear hair from filters and fans to reduce motor whine.
Tighten loose mounts, swap worn parts, and lubricate where recommended to fix rattles. Use quieter modes, keep the vacuum off hard surfaces, and schedule runs when background noise is higher. If noises persist despite fixes, contact support or consider a lower-dB replacement.