Robot Vacuum Mop Streaks and Residue Troubleshooting
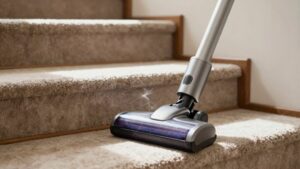
If your robot mop leaves streaks, start with a dry pass to lift dust and grit so they won’t smear.
Fit a fresh, dry mop pad each cycle and use only the manufacturer-recommended cleaner or plain water at the exact capful; too much solution causes residue.
Worn pads or nonstandard cleaners disrupt moisture distribution and make lines.
Repeat a focused extra pass with a new pad for stubborn streaks.
Check model-specific guidance for further tweaks if you want more fixes.
Quick Overview
- Run a dry-pass first to lift dust and grit that would otherwise smear during wet mopping.
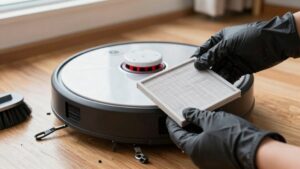
- Fit a fresh, undamaged mop pad before each cycle to avoid transferring residue or streak patterns.
- Use only the manufacturer-recommended cleaning solution: exact capful per tank or clean water to prevent residue buildup.
- Ensure mop pads aren’t damp between cycles and that the floor is mostly dry after the dry pass for even moisture distribution.
- If streaks persist, swap to a new pad and run an extra targeted cycle. If unresolved, contact model support.
Stop Streaks in 3 Steps
If your robot leaves streaks, start by running it in Dry Mode to pick up loose dust and debris that otherwise smear when wet. Then attach a fresh mop pad and use only the manufacturer-recommended cleaning solution or clean water, making sure the floor is mostly dry after the dry pass. If streaks persist, run one more cycle with a fresh pad to lift remaining residue.
Step 1: Dry-pass first to remove particulates and reduce the load on the wet cycle; this single change improves streak prevention immediately.
Step 2: Fit a new pad and measure the solution according to the manual: too much or the wrong liquid defeats moisture management and leaves marks.
Step 3: Check that the floor is largely dry before you mop. Excessive surface moisture causes streaks and uneven drying. If you still see lines after a second wet pass, swap pads again and repeat only the affected zones.
These three steps cut residue transfer, control moisture, and make results repeatable.
Why Streaks Happen: The 6 Common Causes
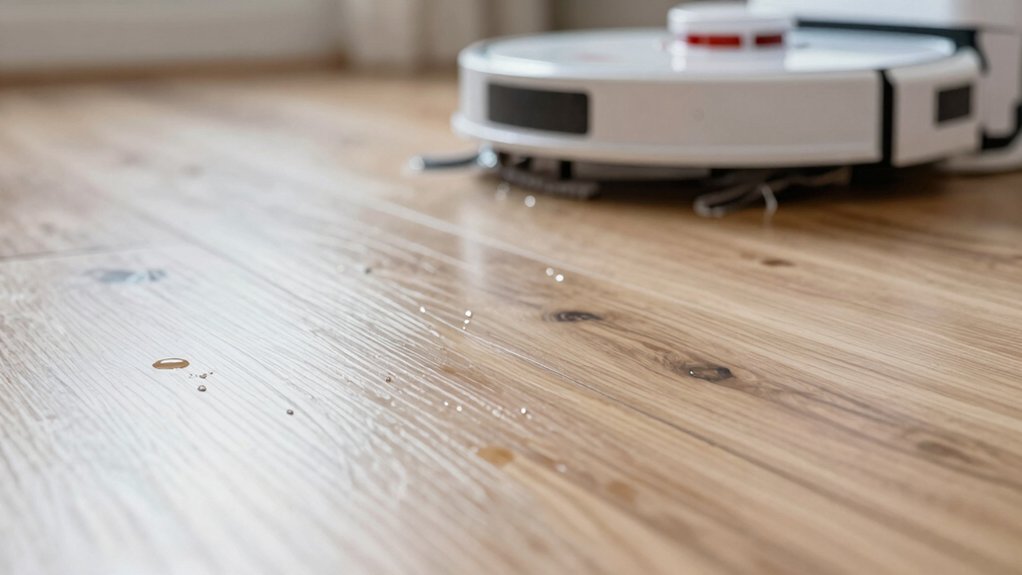
Why are you still seeing streaks when your robot finishes a mop cycle? First, low water levels cause uneven cleaning pressure on absorbent or textured floors; this is a primary streak cause. Second, a dirty or worn roller mop disrupts moisture distribution and leaves visible lines as the unit rolls.
Third, using pads that aren’t fully dry between cycles or are merely damp transfers moisture unevenly and produces water marks. Fourth, floor type matters: tile, LVP, and porous surfaces absorb and disperse liquid differently; thus, streaks show up on some materials more than others.
Fifth, skipping a dry-first pass lets grit smear and exaggerates lines during wet cleaning. Sixth, mixing cleaners or using ones not approved by the manufacturer can leave residues that become streaky when wet mopped.
Address each cause systematically: inspect water level and pad condition, note floor material, and avoid unapproved solutions to narrow the source of streaks.
Adjust Water, Cleaner, and Mop Pad to Prevent Streaks
Wondering how to stop streaks before they start? Adjust the water level to match floor type: set it high for absorbent or textured floors so moisture spreads evenly and cleaning pressure stays consistent.
Use only the manufacturer’s recommended cleaner type and measure a single capful per tank. Excess solution leaves residue that causes streaks. Always load a fresh mop pad for each cycle and keep clean spares in the docking station so you’re not transferring dirt between rooms.
Run the robot in Dry Mode before Wet/Mopping Mode to remove dust and loose debris that would otherwise smear. Increase maintenance frequency on rollers and the mop head; trapped gunk disrupts water distribution and creates streak lines.
Together, these steps address water management, correct cleaner type, and mop pad hygiene for effective residue prevention. Follow them systematically and you’ll reduce streaks without guessing or unnecessary adjustments.
Model Checks and Tweaks (Roomba, Roborock, Ecovacs, BISSELL)
How should you approach model-specific checks and tweaks to stop streaks fast? Start by confirming model compatibility for cleaning solutions and replacement pad materials: manufacturers vary.
For Roomba Combo Series (j5+, i5+, j7+, j9+, 10 Max), run a dry cleaning pass first to remove dust and debris. Then fill the tank to the exact recommended volume and use only the manufacturer-approved solution in the capful amount. Use a fresh mop pad for each cycle; worn or dirty pads transfer residue and create water marks.
If streaks persist, swap to a new mop head or run an extra wet cycle. Check model-specific dispensing and pad handling guidance since some variants meter liquid differently. Don’t use harsh cleaners that leave film. Record which pad materials and solution volumes worked best for your unit so you can repeat the successful configuration. Consult the model’s support notes before trying nonstandard cleaners or pads.
Maintenance Checklist That Keeps Floors Streak‑Free
Want streak-free floors every time? You’ll follow a tight maintenance schedule: run Dry Mode first to lift dust, load a fresh mop pad for each cycle, and use only the manufacturer-recommended solution at the exact capful. Empty and dry the dust bin after vacuum passes. Then wipe its interior: dust bin care prevents redepositing grime during mopping.
| Task | Why it matters |
|---|---|
| Dry Mode first | Removes loose debris that causes streaks |
| Fresh mop pad | Prevents residue transfer and streaking |
| Exact solution amount | Avoids soap residue and streak patterns |
Check pads and tanks on your routine: inspect pads for wear, clean tanks between uses, and schedule deep cleans per model instructions. If streaks persist after these steps, perform an extra mopping pass. This checklist keeps performance consistent, reduces trial-and-error, and helps you diagnose when parts or support might be needed without wasting time.
Replace Parts, Run Extra Cycles, or Contact Support
If you’ve followed the maintenance checklist and streaks keep appearing, it’s time to consider parts, extra cycles, or support. You should run extra cycles to pick up lingering residue and improve coverage. One additional pass often removes watermarks missed on the first run. Perform simple model checks and tweaks: inspect mop pads, dustbin seals, and solution dosing to confirm correct capfuls and recommended detergent.
- Replace worn mop pads between cycles and use a fresh pad each time to cut streaking risk.
- Empty, dry, and wipe the dustbin interior after use to prevent damp residues transferring to floors.
- Schedule routine deep-cleaning per brand guidance and clear debris from nozzles, sensors, and brushes.
If streaks persist after these actions, contact support to diagnose hardware faults or request replacement parts.
Follow this sequence: run extra cycles, replace parts as needed, and contact support when DIY steps don’t resolve the issue.
Frequently Asked Questions
Can Streaks Indicate Floor Finish Damage From the Robot?
Yes, streaks can indicate varnish wear and potential floor finish damage. You should inspect affected areas for dull spots, scratches, or changes in sheen where the robot runs.
Test by gently buffing a small streak: if it lightens, the finish is worn. Check cleaning pads, solution concentration, and wheels for grit; reduce run frequency until you repair or refinish the floor. Document progression to confirm ongoing varnish wear.
Will Streaks Appear on All Floor Types Equally?
No, streaks won’t appear equally on all floors. You’ll see streaks on tile less if it’s sealed and textured. However, glossy tile shows marks more. You’ll often get streaks on laminate because it’s sensitive to excess water and certain cleaners.
You should adjust moisture, cleaner type, and pad material for each surface. Test a small area, dry quickly, and use manufacturer-recommended products to minimize streaking across different floor types.
Can Using Homemade Cleaners Void My Robot’s Warranty?
Yes, using homemade cleaners can void your robot’s warranty if the warranty terms restrict liquids, non-approved solutions, or chemical exposure.
Check the warranty terms and cleaner compatibility lists before using homemade mixes. If the manufacturer specifies approved solutions or dilution ratios, stick to them. Document approvals in writing; otherwise, damage from incompatible cleaners may not be covered.
When in doubt, use manufacturer-recommended products to keep coverage intact.
Do Pet Hairs Trapped in Pads Cause Streaking Later?
Yes, pet hair trapped in pads can cause streaking later. You’ll notice pad clogging reduces water pickup and smear resistance. Hair holds moisture and debris against the floor.
Clean pads after each pet-heavy run; remove hair and rinse thoroughly. Replace worn microfiber pads on schedule. Regularly inspect pad attachment points to prevent buildup. This keeps mopping performance consistent and minimizes streaks and residue.
Is Streaking Worse in High-Humidity Climates?
Yes, humidity impact makes streaking worse. You’ll notice mop pads stay wetter longer in high-humidity climates, spreading soil and trapping moisture that leaves residue.
Increase cleaning frequency and wring or replace pads more often to reduce buildup. You should also dry floors faster with fans or open windows when possible. Monitor pad condition and adjust cleaning solutions and schedules so humid conditions don’t degrade results or create persistent streaks.
Conclusion
You’ve got simple, practical options: stop streaks in three quick steps, check six common causes, and tweak water, cleaner, or mop pad to match your floor.
Inspect model-specific settings (Roomba, Roborock, Ecovacs, BISSELL), run extra cycles, replace worn parts, and keep a maintenance checklist handy. If problems persist after adjustments and fresh supplies, contact support.
Follow this routine and you’ll cut streaks, residue, and repeat cleanings.