How to Check If a Vacuum Attachment Fits Your Model: A 3-Step Verification
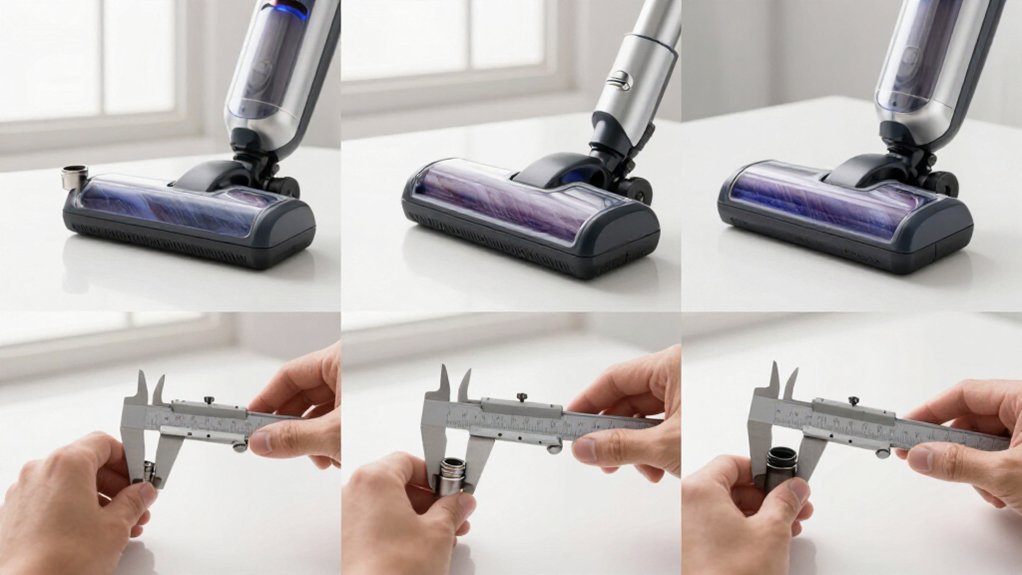
To check whether an attachment fits, follow three steps. First, find your vacuum’s model number and confirm the attachment listing names that exact variant.
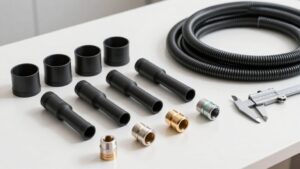
Second, measure the attachment opening and your wand or port with calipers, recording inner and outer diameters, connector diameter, and insertion length.
Third, compare tapered sections, locking tabs, grooves, and sealing surfaces; then dry-fit it while powered off. It should click securely without wobble, gaps, or force.
Further details follow.
Check Attachment Connector Dimensions
Start by locating your vacuum’s alphanumeric compatibility code, usually near the dustbin or on the base, and compare it with listings that name your exact model. Next, measure the attachment connector’s opening with calipers, recording both outer and inner diameters in millimeters.
Compare its shape with the worn part, including tapered or stepped sections. Check connection points, locking tabs, retaining rings, and sealing surfaces; a seemingly similar port may still fit poorly. Confirm the connector’s alignment at the wand or tool interface, ensuring mating surfaces sit squarely without gaps that could leak air and reduce suction.
Also verify that the attachment is designed for your Dyson series and category, such as a cordless stick, corded upright, or canister. These connector systems aren’t always interchangeable. If measurements differ, don’t force the attachment; use a verified adapter or choose a model-specific replacement.
Locate Model Number
Locate the vacuum’s model number before checking attachment compatibility; it’s usually printed on a label on the underside, lower back, dust cup, battery pack, or inside a removable tank compartment. Power off before removing covers or batteries; follow the manual and don’t force sealed panels. Clean grime from the label, then use bright light, a magnifier, or your phone camera to capture every character.
- Record the entry labeled “Model,” “Model No.,” “Type,” “PN,” or “Item Number”; don’t mistake the serial number for the model.
- Note the complete alphanumeric code, including suffixes that identify generation, region, or variant.
- Compare the code with the manual, manufacturer’s product page, or support database; marketing names can cover multiple designs.
- Save the label photo and code for future support.
Step 1: Detach the Current Cleaning Head
With the vacuum unplugged or switched off, press the release button or slide the latch to detach the current cleaning head from the wand or port. Hold the head firmly as you release it; don’t twist forcefully, because a keyed mount or locking tab can crack. Place the removed head on a clean surface.
Inspect the coupling end, wand port, and release mechanism for hair, dust, or other debris. Clean contact surfaces gently so residue won’t interfere with seating or sealing.
Examine the head’s shape, tabs, grooves, collar, and position, and note any wear, distortion, or missing parts. Keep this head nearby for visual comparison when the replacement arrives. Don’t install an attachment until you’ve confirmed the vacuum’s exact model number from its label.
Step 2: Gather a Measuring Tape
Before ordering an attachment, use a measuring tape to record the wand or port’s connection diameter and length at the vacuum side.
Measure the connection diameter and usable insertion length, recording millimeters rather than relying on a nominal size such as “2.5-inch.” Then measure the attachment’s overall length from its connector to farthest end. Note any necks or bends that may reduce reach or clearance.
For an angled mount, measure usable height from the bin or wand pivot to the target surface. You’ll need these measurements for low-reach and overhead cleaning. For crevice or flexi tools, measure maximum straight extension and minimum folded length. Compare every value with the listing’s dimensions, then confirm the exact model code on the vacuum’s identification label before purchase.
Step 3: Compare Locking-Tab Alignment
Check the attachment’s locking tabs against the vacuum’s exact connection points, not merely its product series. Place the attachment beside the vacuum and inspect each tab’s shape, spacing, height, and orientation. Compare it side-by-side with the existing worn or removed part; matching tab placement is the quickest way to identify a mismatch.
If the attachment has an angular or vented head section, verify that the tab pattern won’t force the head to sit off-angle. An incorrect angle can create air leaks and reduce suction. Recheck the model-number label near the dustbin or base against listings that name your exact Dyson model. Similar series names may hide different tool families and incompatible locking geometry. Don’t rely on appearance alone; confirm tabs meet their connection points.
Step 4: Click Attachment Into Place
Usually, you’ll confirm the alphanumeric code near the dustbin or base matches your exact Dyson model, then align the attachment with the wand or tool port and press until it clicks firmly into place.
Keep the vacuum powered off while you fit the tool. Match its connection points to the wand or tool port, maintaining straight alignment, and apply even pressure; don’t force a mismatched or unusually tight connection. For a crevice or flexi crevice head, verify that its angle or extension mechanism moves freely after engagement.
If the attachment has an LED or vented opening, check that the light faces the work area and no vent is obstructed. Then run the vacuum briefly for an airflow check. Weak suction suggests an incomplete seal, so stop and reseat the attachment before continued use.
Confirm the tool remains stable during movement and doesn’t restrict articulation, ensuring reliable reach and airflow throughout normal cleaning and tight-space operation without noticeable leakage.
Step 5: Inspect the Red Release Button
Once you’ve confirmed the attachment matches your exact Dyson model and wand or tool interface, locate the red release button on its connector. With the vacuum powered off, press the button to verify that the coupling is designed to disengage without force. The attachment should detach smoothly from the wand or tool, without sticking or twisting.
After you reattach it, press until you hear or feel a click. Confirm the red button returns to its position and the attachment stays secure without wobble or air gaps. Inspect the button and surrounding connector for cracks, distortion, or excessive wear; damaged release parts can prevent proper locking and sealing.
If the connection won’t lock firmly after release, stop and recheck compatibility before use.
Step 6: Remove Debris From Joint
With the attachment removed, clear loose debris from the joint or corner using the vacuum’s crevice tool so dirt doesn’t get pushed deeper into the connection. Use the tool’s 45° angled opening to direct suction into the gap, and move it slowly along the mating surfaces. If access is awkward, switch to the flexi crevice tool; its bend reaches tight spaces, while stiff nylon bristles agitate stubborn residue.
Keep an LED-lit crevice tool pointed directly at the joint so you’ll see concealed particles before finishing the pass. Pause periodically and check airflow. A noticeable reduction can indicate a blockage at the narrow opening, so stop the vacuum and inspect the tool before continuing. Don’t force the nozzle into the connection or scrape sealing surfaces.
Vacuum a Pet Bed
Before you vacuum a pet bed, verify the alphanumeric code on your Dyson’s label against the attachment’s listed model compatibility. Use a compatible crevice tool, preferably the 45° angled version, to extract hair and dander from seams and narrow gaps. If the bed sits low, or you’ll need to clean underneath, connect the low-reach adaptor and raise the wand angle up to 90°; this helps preserve suction while you work without crouching.
For dark fabric or recessed areas, choose an LED-equipped crevice tool to illuminate missed debris. If airflow weakens, check the hose and dustbin for blockages. Then inspect the filter and replace it if clogged. Test the attachment on a small section first to confirm secure seating and effective pickup before regular use.
Mini Motorized Tool Stalls
If your Dyson mini motorized tool stalls, switch it off and inspect the brush bar for hair, string, or other debris that could stop the motor. Remove every tangle before testing again.
Check the inlet at the connector, wand or crevice route, and dustbin for clogs; reduced suction can trigger stalling. Confirm the attachment fits your Dyson model, not a broad compatibility claim. An air leak can reduce power reaching the mini motor head.
| Check | Action |
|---|---|
| Brush | Clear tangles |
| Airflow | Remove clogs |
| Fit | Confirm exact model |
| Load | Reduce pressure |
Inspect the brush’s end caps and bristles for wear or misalignment; replace damaged parts if resistance persists. If stalling occurs on thick rugs, use a slower pass and reduce pressure to prevent overload during operation.
Extend Reach by 61cm
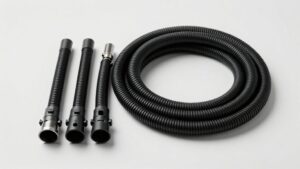
Once the mini motorized tool runs without stalling, add a Dyson extension hose for up to 61 cm of flexible reach. Before buying, confirm your vacuum is compatible: this hose is engineered for Dyson Gen5detect™ and Dyson Gen5outsize™. Match each connection point to your Dyson wand and attachment, checking that the fit is secure and airtight.
A loose joint can create an air leak and reduce suction. Pair the hose with your crevice, brush, or up-top tool to reach tight gaps and difficult spaces with less furniture moving.
Power off the vacuum and perform a dry fit first. Then run it at low power. If suction weakens, inspect the hose and dust path for blockages before deciding the attachment is incompatible. Don’t force mismatched connectors.
Conclusion
Before you buy or install a vacuum attachment, you’ll verify compatibility in three steps. Measure the connector, locate your vacuum’s model number, and compare the locking-tab positions. Detach the current cleaning head carefully, then remove debris from the joint.
Test the fit before cleaning a pet bed or using a mini motorized tool. If the tool stalls, check alignment again. A correct match prevents leaks, improves reach, and protects your vacuum and attachments. Only use adapters.