Where to Place Virtual Wall Barriers in a Home
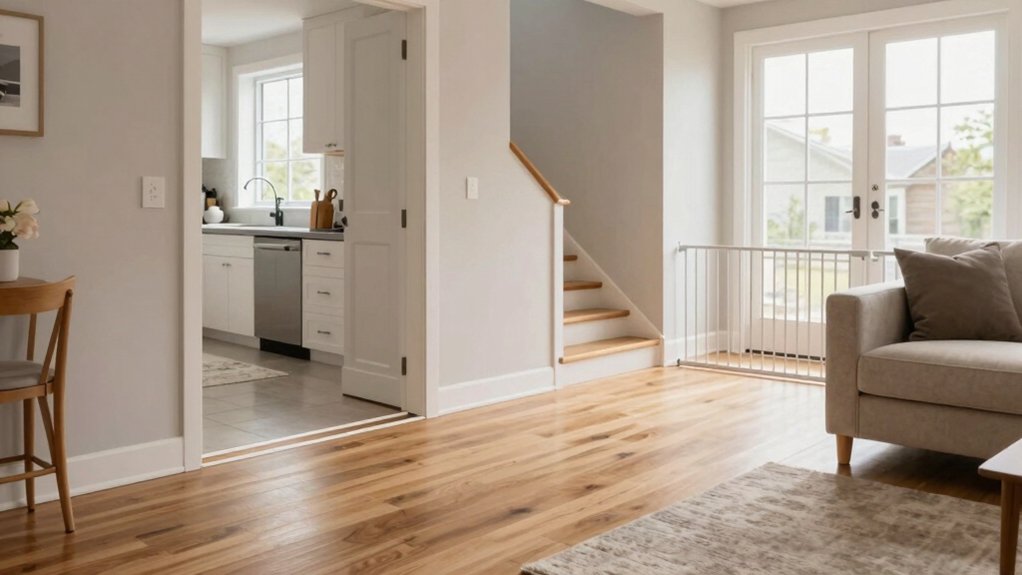
Place virtual walls across narrow entryways, thresholds, and stair edges so your robot can’t wander into other rooms or fall. Shield pet feeding zones, litter boxes, and toy or cable clusters to avoid messes and tangles.
Block off fragile furniture, fringed rugs, and mop-only areas to prevent damage. Make sure your map is current, sensors are clean, and batteries are fresh. Then run a short test cycle to confirm the barriers. Keep going to get setup tips and troubleshooting steps.
Quick Overview
- Across narrow entryways and thresholds to prevent unintended room-to-room crossings and stair falls.
- Around stair edges with an unobstructed sightline to block drop-off risks.
- Surrounding pet areas, food bowls, and litter boxes so the vacuum avoids disturbance.
- Encircling fragile furniture, cable clusters, and delicate rug edges to prevent damage.
- Around active mopping zones or under islands/tables where cleaning could be problematic.
Quick Setup Checklist for Virtual Walls (Battery, Map, Sensors)
Want a smooth setup? Start by confirming the virtual wall’s battery setup: insert fresh batteries so the device powers on reliably and broadcasts its barrier.
Next, check map accuracy in your robot vacuum’s app. Make sure the map is active, current, and reflects recent room changes before placing any virtual walls.
Clean sensors and lenses to prevent misreads that can skew navigation and cause the robot to ignore boundaries. If you need a fresh baseline, enable mapping features and let the vacuum explore uninterrupted so it builds an accurate layout.
After you place virtual walls, run a short test cleaning cycle to verify the barriers are respected. Observe any deviations and adjust wall placement or re-clean sensors if the robot crosses restricted zones.
These steps: battery setup, map verification, sensor maintenance, mapping, and testing create a concise, evidence-based checklist that minimizes misrouting and improves barrier reliability.
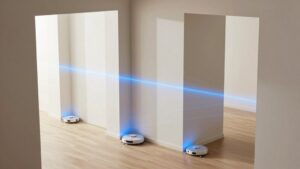
Virtual Walls for Entryways, Thresholds, and Stairs
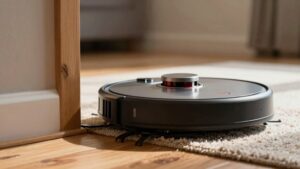
After you’ve confirmed batteries, maps, and sensors, focus virtual walls on high-risk passage points like entryways, thresholds, and stair edges to keep the robot where you want it. Place lines across narrow entryways to prevent unintended room-to-room crossings. A straight virtual wall creates a clear map-visible barrier the robot will respect. Align boundaries with threshold gaps so the robot won’t transition between carpets and hard floors unless you allow it.
For stair edges, position virtual walls with an unobstructed sightline to the drop-off so the robot reroutes safely before approaching.
Block narrow passages at entries to control flow between rooms. Set walls over thresholds to prevent unwanted surface changes. Place walls with clear visibility to stair edges; avoid clutter or under-furniture placement.
Check the map after placement to confirm visibility and adjust for reliability. These placements reduce falls and unwanted cleaning zones while keeping enforcement consistent and evidence-based.
Virtual Walls for Pets, Bowls, and Litter Areas
How can you keep your robot vacuum from disturbing pets, food bowls, and litter without fencing off whole rooms? Place virtual walls to shield feeding stations and litter areas so the robot reroutes before reaching bowls or litter. This reduces spills and scattered litter for better cleaning efficiency and pet safety.
Position boundaries close to pet zones but not directly on top of bowls so the vacuum avoids the area while still cleaning adjacent floors. Set up limits around litter boxes and crates that sit along the robot’s normal paths to minimize cross-traffic and repeated passes that scatter debris.
Align virtual walls to block under-bench clutter or cable clusters where the device could snag cords or toys; this lowers risk to pets and the robot. Create a narrow corridor around pet beds or delicate zones to guide the vacuum along safer, clutter-free routes.
Periodically adjust boundaries as feeding locations or crates move to maintain ongoing pet safety and peak cleaning efficiency.
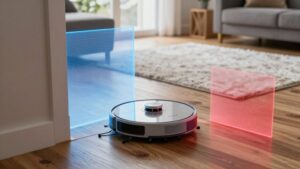
Protect Fragile Furniture, Cables, Rugs, and Mopping Zones
Where should you draw virtual boundaries to keep delicate items safe without blocking useful floor space? You’ll want to place no-go lines around fragile furniture, such as coffee tables, china cabinets, and glass screens, so the robot can’t bump or scrape them. Use straight virtual walls to seal off narrow thresholds and reduce misnavigation that leads to collisions with clutter.
Enclose clusters of cords and power strips with no-go lines for cables protection to prevent snagging and tangles. Mark rugs with fringes or delicate edges as off-limits for rug safety to avoid suction strain and edge damage. Block active mopping zones under dining tables or kitchen islands to protect finishes from moisture and manage mixed cleaning modes.
Position boundaries close enough to the item to shield it, but leave walking paths open. Check overlap so the robot won’t squeeze between gaps. These placements balance protect fragile priorities with maintaining functional floor space and reduce common damage risks.
Test Virtual Walls and Troubleshoot Common Problems
Once you’ve drawn virtual walls to protect fragile items and no-go zones, run a test cleaning cycle to confirm the robot honors those boundaries and finds alternate routes when it approaches them. Watch its path: if it stops and reroutes properly, you can be confident the setup works. If the robot crosses a boundary, redraw or extend the line in the app. Then re-run mapping to refresh the digital map.
Also test our virtual walls after any furniture changes or lighting adjustments. If boundary misbehavior persists, clean the robot’s sensors and remap the area; dirty or misaligned sensors often cause it to ignore restricted zones.
Ensure the app’s up to date and your Wi‑Fi is stable. Outdated software or connection drops can prevent virtual walls from being recognized. For inconsistent performance across rooms, remap with better lighting or a tidier layout. Reconfigure no‑go zones to account for reflective surfaces or cluttered areas to reduce errors.
Frequently Asked Questions
Can Virtual Walls Interfere With Wi‑Fi or Other Smart Devices?
Yes, can virtual walls interfere with Wi-Fi signals or other smart devices? Usually, they won’t. You’ll find most virtual wall emitters use infrared or low-power radio that doesn’t overlap common Wi-Fi bands; therefore, interference is rare.
Still, if devices sit very close, metal housings or poorly shielded transmitters can cause localized disruption. If you notice issues, move the emitter a few feet away or change device channels to reduce interference.
Can I Place Virtual Walls on Thick Carpets or Uneven Floors?
Yes, you can place virtual walls on thick carpets and uneven floors, though placement options matter. You’ll get best results when sensors have clear line-of-sight. Avoid deep piles that bury boundary emitters.
On uneven surfaces, test and recalibrate so the barrier aligns with the robot’s detection height. For carpeted flooring, use low-profile markers or physical alternatives if the virtual signal weakens. Verify performance with a trial run.
Are Virtual Walls Safe Around Children and Toys?
Yes, virtual walls can be safe around children and toys if you use them properly. You’ll position barriers to keep robots away from play areas, fragile items, and stair edges. It is important to check that emitters aren’t at child eye level or within reach.
Test placement with supervised runs; secure loose toys to avoid tripping. Follow manufacturer child safety guidelines. Evidence shows proper setup reduces collisions and keeps play zones safer.
How Long Do Virtual Wall Batteries Typically Last?
You can expect virtual wall batteries to last roughly 6–12 months under normal use. Actual battery life depends on the model, usage pattern, and battery type. Check the manufacturer’s specs and adopt a maintenance cadence of inspecting and replacing batteries every 6 months to avoid failures.
Use fresh alkaline or recommended rechargeable cells for best performance. Store spares and log replacements so you can track real-world battery life and adjust your maintenance cadence.
Can Multiple Virtual Walls Overlap Without Issue?
Yes, multiple virtual walls can overlap without issue in most systems, but check overlapping restrictions in your model’s manual. You’ll get redundant coverage, which won’t confuse the robot if the firmware supports stacked boundaries.
Be mindful of power consumption considerations: extra active emitters or longer navigation paths can slightly increase battery use. Test configurations empirically, adjust positions for efficiency, and update firmware for best evidence-based performance.
Conclusion
You’re set to use virtual walls effectively. Keep batteries charged, maps updated, and sensors clear so barriers work reliably. Place walls at entryways, thresholds, stairs, pet areas, and around fragile furniture, cables, rugs, and mopping zones to prevent accidents and extra cleaning.
Test each virtual wall from different angles and revisit problem spots. If a barrier misbehaves, reboot the robot, recalibrate the map, and adjust wall placement. Small tweaks usually fix most issues quickly.