Pet Hair Vacuum Maintenance Checklist: 10 Steps to Stop Clogs Before They Start
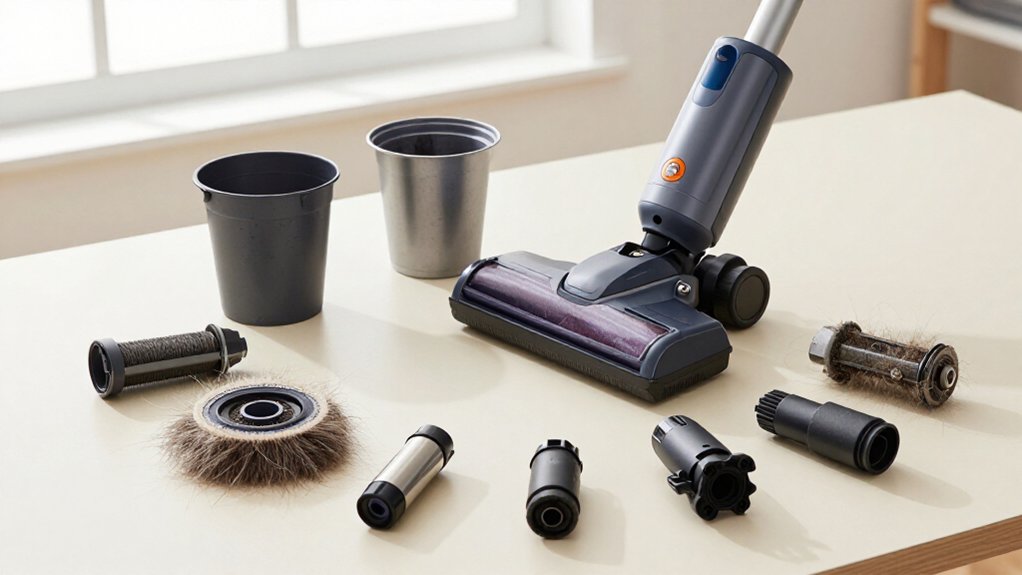
You’ll prevent clogs with this 10-step checklist: (1) empty bins at half to three-quarters full in multi-pet homes; (2) use a crevice tool; (3) inspect filters and hoses weekly; (4) unplug and clean the brush roll; (5) check the intake elbow monthly; (6) empty bags before airflow drops; (7) investigate clumps; (8) stop immediately at burning smells; (9) replace cracked or slipping belts; and (10) track recurring clogs by room.
Further practical details follow below.
For Multi-Pet Households
When you have multiple pets, empty the vacuum’s dustbin or robot bin more often because fur, dander, and fine debris can restrict airflow quickly; some models, such as the DEEBOT X9 PRO OMNI, use a 3-liter bag that may last about 90 days, depending on shedding.
Empty a bagless canister at half to three-quarters capacity; don’t wait for suction loss. Check the brush roll frequently and cut away wrapped fur before it mats with dirt. Use a silicone pet attachment on carpets and rugs to loosen embedded hair. Inspect inlet valves, hoses, and seals for restrictions, then wipe the canister clean. Follow filter schedules: clean washable filters every three to six months, replace disposables every six to twelve months, and replace HEPA filters annually.
Gather a Crevice Tool
Grab a crevice tool before vacuuming pet beds, sofa seams, baseboards, and furniture gaps. Its narrow throat concentrates suction, pulling trapped fur from spaces a floorhead can’t reach.
Choose the attachment that matches the surface and access point:
- Use a rigid, 6-12-inch nozzle for seams, edges, and baseboards.
- Select an angled or flexible tip for furniture gaps and areas behind radiators.
- Add an extension wand or brush when you need reach or loosening.
Turn off and unplug your vacuum before attaching it. Brush matted fur loose, then move slowly along each seam; repeat passes for embedded hair. Use the tool daily or every two to three days in high-shed zones. Stop if hair wraps around the inlet, and clear before continuing.
Weekly Filter-and-Hose Check
After clearing seams and furniture gaps with the crevice tool, unplug the vacuum and inspect its hose, inlet, and filter once a week. Check for kinks, hair, restricting airflow; clear blockage from hose and inlet. Examine the filter for clogging, damage, or replacement.
| Check | Action | Warning sign |
|---|---|---|
| Hose | Straighten and clear buildup | Reduced suction |
| Inlet | Remove debris | Sudden airflow loss |
| Filter | Replace or wash as specified | Heat or odor |
| Bin | Empty often | Clogged path |
Empty the bin before testing since hair fills it and blocks airflow path.
Replace disposable filters every 6–12 months, or sooner if clogged; replace HEPA filters annually. Clean washable filters every 3–6 months and reinstall only when fully dry. If suction drops, recheck hose and inlet to reduce strain and dust recirculation.
Clean Brush Roll First
Turn off and unplug the vacuum before removing the brush roll. Cut away wrapped hair, then clear debris from the bristles and bearings.
Reinstall the roll and verify that it spins freely before use.
Turn Off and Unplug
Before touching the brush roll, switch off the vacuum and unplug it to prevent accidental activation and re-tangling. Don’t rely on the power switch alone; disconnecting the plug removes electrical power while you work. If you use a cordless model, remove its battery or follow the manufacturer’s service-lock procedure. Keep the cord and plug away from wet surfaces, sharp tools, and the cleaning area.
With the vacuum isolated, stabilize it on a level, dry surface.
Clean the brush roll before checking components because wrapped fur can stop rotation, reduce pickup, and force debris into the airflow path. Cut or pull away hair, then clear threads from the bristles. Inspect the roller housing for jammed, deep-set pet hair. Even anti-tangle spiral or curved bristles require verification before you resume vacuuming.
Remove the Brush Roll
Start by removing the brush roll according to your vacuum’s manual, then inspect it for wrapped fur that can restrict rotation and reduce pickup. Unplug the vacuum before handling the assembly, and note each end-cap or bearing position for correct reinstallation. Check the bristles, fins, end shafts, bearings, and housing slots for compacted dander or debris.
Remove loose material, then wipe the roll and surrounding contact points with a dry cloth. Don’t immerse motorized components or apply lubricant unless the manufacturer permits it. Even anti-tangle designs with spiral or inward-curved bristles need regular inspection because fur can wind around individual fibers. Confirm that the roll spins freely and shows no cracked fins or damaged bearings. Re-seat it securely, close the cover, and test pickup.
Cut Away Wrapped Hair
With the vacuum unplugged, inspect the brush roll for hair wrapped tightly around the bristles, ends, and drive-belt area. Use scissors to cut along the length of each hair bundle, keeping the blades parallel to the roller so you don’t nick bristles, belts, or plastic. Work from the surface inward, then pull away loosened strands by hand.
Cut hair at both roller ends, where coils can restrict rotation and transfer strain to the drive belt. Don’t yank a knot, which can dislodge components or damage seals. After removing the wrap, check the brush housing for lint or debris and confirm that the roll turns freely.
Repeat this cut-and-clear routine if you vacuum frequently during shedding. Restore unrestricted rotation before cleaning pet-heavy carpets or upholstery.
Clear Bristles and Bearings
Unplug the vacuum and remove the brush roll according to the manufacturer’s instructions. Inspect the bristles, end caps, and bearing areas for packed fur, dander, and grit. Pull loose hair from the bristles, then use scissors or a seam ripper to cut any remaining mat along the brush’s length.
Don’t force embedded fur; excessive tension can stress or deform the bearings. Pay attention to the bristle ends, where matted clumps seize the roller.
Check your brush roll weekly during peak shedding, even if it has anti-tangle bristles. Hair accumulation can make suction seem weak because the roller no longer agitates and lifts debris effectively. Clear bearing housings and adjacent channels using a brush or cloth. Remove each strand and particle before proceeding with maintenance.
Reinstall and Test
Once the bristles, end caps, bearings, and belt are free of hair and debris, reinstall the brush roll in its guide tracks. Make sure each end seats fully, then secure the cover and restore power. Before testing, inspect the suction path behind the brush area; packed fur can restrict airflow and overload the motor. If the belt looks frayed, slipping, or stretched, replace it rather than relying on normal rotation alone.
Run the vacuum on a bare floor. Listen for smooth rotation and confirm the brush roll turns at normal speed without scraping, rattling, or stopping. Next, test carpet with a motorized pet-hair tool; verify loosened fur enters the airflow path and complete a small pickup test to confirm suction and agitation work as intended.
Check Intake Elbow Monthly
You’ll find that pet hair, dust, and dander can accumulate inside the intake elbow and restrict airflow. Inspect the elbow monthly for visible or slick buildup, and check it immediately if suction drops.
Unplug the vacuum, then gently remove the obstruction and wipe away residue without damaging the fitting.
Why Intake Elbows Clog
Because the intake elbow changes the direction of airflow, it’s a natural collection point for pet hair and fine dust. As debris enters the bend, centrifugal effects and reduced flow velocity let fibers lose momentum and settle against the elbow wall. Long pet hair then interlocks with dander, lint, and fine dust, forming a dense plug.
Moisture, oily residue, and static can make that mass adhere more strongly. The problem worsens when you vacuum large tufts, run with a nearly full dustbin, or use a restricted filter; lower airflow gives debris more time to accumulate. A sudden suction drop often means this compacted mat has narrowed the passage. That restriction forces the motor to work harder and reduces transport to the canister or bag.
Monthly Elbow Inspection
Check the intake elbow monthly for packed pet-hair “furs,” dust, and lint at the bend, where airflow changes can start restricting suction. Use the manufacturer’s access points and inspect the elbow with the vacuum switched off. Look for compacted mats along the curve, especially where debris tumbles and curls into a tight plug.
Fine particles may form a thin coating that narrows the passage before you notice a complete obstruction.
After inspection, check airflow at the hose or attachment. A weaker pull, intermittent suction, or sudden loss of debris drag across carpets and edges signals that you should recheck the elbow promptly. If you find buildup, remove it according to your vacuum’s manual and wipe the interior clean. This monthly check helps prevent restriction.
Clear Blockages Safely
With the vacuum switched off, inspect the intake elbow monthly for trapped fur, lint, and embedded hair that can narrow this common choke point. Use a flashlight to locate buildup, especially after you notice sudden suction loss or hair left behind. Don’t force rigid tools into the fitting; gently pull accessible material free to avoid cracks or distortion.
If the elbow detaches, remove it and clean the passage thoroughly so compressed hair and dander don’t restrict airflow again. Check the hose, brush roll, and filters only after you’ve cleared this restriction. Reattach the elbow securely, then run the vacuum and verify normal suction before resuming pet-hair cleaning. If airflow remains weak, switch the vacuum off and continue inspection rather than operating it.
Fewer Clumps After Runs
Often, clumps after a run signal restricted airflow rather than insufficient vacuuming. Empty the dustbin or check the auto-empty bag frequently, because pet hair fills canisters quickly. Don’t wait for airflow to slow; clumps can indicate early filter restriction, and fine dust may escape back into the air.
Keep the brush roll and anti-tangle area free of wrapped fur. Hair trapped on the roll limits pickup and encourages residue to form clumps. Inspect the hose and inlet after a suction drop; compressed hair can narrow tubing before a complete blockage develops.
Use a silicone or other friction-based pet-hair attachment to loosen fur and pull it inward during the same pass. This reduces residue and keeps later runs cleaner between routine maintenance checks.
Watch for Burning Smells
If clumps are followed by a burning smell, stop the vacuum immediately and unplug it. Inspect the hose, brush roll, filter, and, on central systems, tubing and canister for restricted airflow. Remove pet hair and debris after the vacuum is disconnected from power.
A clogged filter traps dander and fine dust, reducing suction while increasing motor heat. Hair wrapped tightly around the brush roll can stall agitation and raise resistance, producing an overheating odor.
Don’t restart the machine until you restore airflow and clean or replace the filter according to the manufacturer’s schedule. Check whether the smell returns during a test. If it persists, shut the vacuum off and arrange professional service; continued operation can strain the motor and cause costly damage.
Check Belt for Cracks
Unplug the vacuum and inspect the belt for cracks, glazing, fraying, or stiffness; a damaged belt can slip on the motor shaft, slow the brush roll, and leave pet hair behind. Remove the cover according to your model’s instructions, then assess the belt under bright light.
Replace it immediately if it’s split, stiff, or frayed; frequent pet-hair use accelerates deterioration.
- Confirm fit: The belt should sit securely around the motor shaft and brush-roll pulley, without twisting. It shouldn’t wobble.
- Test rotation: Spin the brush roll by hand. It should turn smoothly; binding may indicate belt damage or trapped debris.
- Recheck seasonally: Inspect more often during heavy shedding, when fur and dander speed wear.
Replace it before reconnecting power and resuming vacuuming.
Track Clogs by Room
Track where clogs begin by room so you can match cleaning frequency and tools to each area’s hair load. In the living room and hall, vacuum pet beds two or three times weekly; inspect the hose and brush path. In carpeted bedrooms, rugs, and stairs, use a silicone pet-hair tool, then vacuum slowly in several directions to release embedded fibers.
Use a wide upholstery attachment on sofas, chairs, and curtains, cleaning seams and cushion undersides. Check kitchen feeding areas daily, where fur, dander, and crumbs form inlet-clogging clumps. Treat entryways and vehicle carpeting as high-risk zones; loosen tracked-in debris before vacuuming.
Record the room, date, symptom, and blocked component. Then you’ll adjust schedules, change tools, and groom pets where hair production drives repeated clogs.
Conclusion
Keep your pet-hair vacuum reliable by turning these checks into a routine. You’ll prevent clogs when you clean the brush roll, inspect the crevice tool, filter, hose, intake elbow, and belt, and empty collected hair promptly. Track problem rooms and watch for burning smells; they signal restricted airflow or belt damage.
If suction drops, stop the vacuum, unplug it, and clear the blockage before continuing. Consistent maintenance protects performance, reduces wear, and keeps cleanup safer.