How to Maintain a Cordless Stick Vacuum: A 15-Minute Monthly Routine
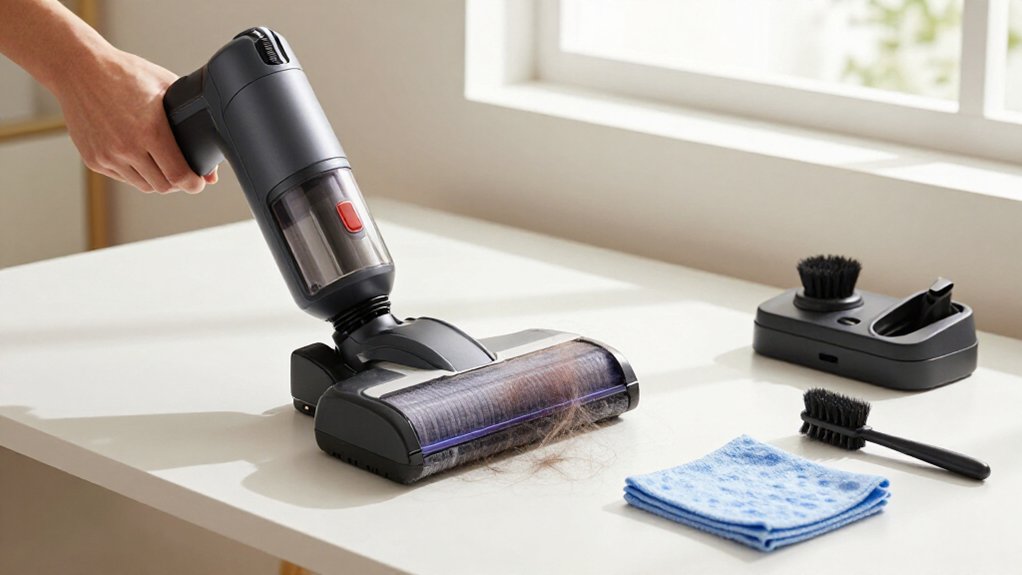
Set a 15-minute timer each month.
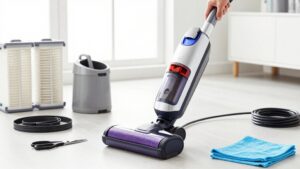
Power off, unplug, and empty the dust bin, then clear its inlet and reseat it firmly. Inspect the head, brush roll, end caps, wand, and hose; cut away hair and confirm the roll spins freely.
Check filter pleats, rinse washable filters in cool water, and air-dry them 24 hours.
Don’t reinstall them while damp. Wipe surfaces, watch for burning odors, and record runtime.
Use steps below to keep suction strong.
Monthly 15-Minute Suction Reset
A monthly 15-minute suction reset keeps restricted airflow from reducing pickup or overworking the motor. Power off and unplug the vacuum before checking the inlet, hose, and attachment ports for clogs. Remove the dust canister, tap debris into a bin, and inspect the dust outlet for material.
Clear obstructions so air can move without strain.
Inspect the main filter and any HEPA filter according to your manual. Rinse washable filters under cool water until the water runs clear, then air-dry them for at least 24 hours. Never reinstall a damp filter. Check the brush roll for hair or strings and remove tangles to restore agitation.
If suction remains weak, replace non-washable filters, commonly every 6–12 months, and confirm the canister and seals click firmly into place.
Soft Brush, Cloth, Timer
Once you’ve restored airflow, spend the remaining maintenance time cleaning the soft brush and wiping the vacuum’s contact surfaces. Power off, detach the battery, and release the head using its latch. Cut wrapped hair lengthwise with scissors; don’t pull against the roller. Remove user-serviceable end caps, clear bearings, and rinse the roller if approved.
Air-dry it for 24 hours before reassembly.
Set a 15-minute timer:
- Spend five minutes clearing and inspecting roller, drive gear, and end caps.
- Use a lint-free microfiber cloth on the housing, wand, handle, and casing.
- Wipe sensors and LED lenses with a dry cloth; don’t use paper towels or solvents.
- Use damp cloth for residue; keep moisture away from seals and contacts.
Confirm the roller spins and covers click securely.
Dust-Bin Emptying Thresholds
Empty the dust bin after every cleaning session rather than waiting for it to look full, because even a partially filled canister can restrict airflow and make the motor work harder. If the bin looks half full before you start, empty it anyway; you’ll avoid capacity loss, weaker pickup, or a protective cutoff. Remove the canister, tap it gently over the trash, and shake out fine dust settled in corners. Check the inlet and air-path opening for packed debris.
Afterward, wipe the inner rim and inlet area with a dry cloth, then re-seat the bin firmly so its seal stays airtight.
| Check | Action |
|---|---|
| After each session | Empty |
| Half-full bin | Empty |
| Weak pickup | Inspect and empty |
Use this threshold to protect airflow and reduce strain.
Brush-Roll Inspection and Clearing
Power off the vacuum, let it cool, and inspect the brush-roll intake for debris with a flashlight. Remove tangled hair, clear the end caps with tweezers or a soft tool, and check the bristles for wear or damage.
Reinstall the brush roll securely, then turn it by hand to confirm it spins freely before use.
Check for Debris
Before inspecting the brush roll, unplug the vacuum or remove its battery to prevent accidental startup. Set the floor head on a stable surface, then examine the brush roll under good lighting. Check the bristles, roller surface, end caps, and bearing areas for hair, strings, fibers, or packed dust. These deposits can restrict rotation and reduce pickup performance.
If your manual permits brush-roll removal, take it out for a clearer view beneath the housing and around both ends. Otherwise, inspect those areas in place, using the head’s access points. Note any lodged material before proceeding to the designated clearing step; don’t force the roller or pry against its housing.
Finally, spin the roll by hand. It should move smoothly and freely. Sticking or grinding indicates debris or bearing trouble.
Remove Tangled Hair
Once the vacuum is unplugged or its battery is removed, open the floor-head or brush-roll cover and inspect the roller for hair, strings, and carpet fibers wound around the bristles. Use scissors or a seam ripper to cut tightly wound strands without nicking the roller surface. Pull away loosened hair and fibers, then clear both roller ends and the surrounding channel, where buildup can restrict rotation.
If the manual requires removal, take out the roller as directed and clear each end before reinstalling it securely. Run the vacuum briefly to confirm smooth rotation. If it still sounds strained or spins unevenly, switch it off, disconnect power, and repeat the clearing step. Clear tangles monthly, or more often with long hair or pets, to reduce resistance, protect bearings, and maintain pickup performance.
Inspect Brush Bristles
Start with the vacuum powered off: unplug it or remove its battery to prevent an accidental start. Examine the brush roll. Look for shortened, flattened, or missing bristles, which can reduce agitation and leave debris behind. Check the brush housing for packed hair, string, or fibers that could restrict rotation.
Use scissors or a seam ripper to cut wrapped material; avoid nicking the bristles or roller. Pull away loosened strands by hand, then wipe the roller surface with a dry cloth. Inspect the bristle rows for uneven wear, cracks, or loose sections. Spin the roll. It should turn freely without scraping, binding, or resistance. Reinstall the brush roll according to your model’s instructions, then test the vacuum on an area to confirm pickup and airflow.
Clear the End Caps
Unclip or slide off the brush-roll end caps according to your vacuum’s instructions, keeping the appliance powered off and the battery removed. Inspect the roller ends for hair, strings, and fibers wrapped around the bearings. You can’t overlook debris inside an end-cap recess; it can restrict rotation even when the brush channel looks clear.
Use scissors to cut through tangles; pull the pieces out, then wipe roller ends and the cap interiors with a dry cloth. Remove dust from bearing seats without forcing debris deeper into the housing.
Check each end cap for cracks, distortion, or wear, and replace damaged parts. Refit every cap firmly so the brush chamber stays sealed. Loose caps can leak airflow and increase motor strain, potentially reducing overall pickup performance.
Test Brush-Roll Movement
With the floor head removed and the vacuum powered off, gently turn the brush roll by hand to verify that it spins freely without grinding, dragging, or catching. Inspect the roll for hair, strings, or fibers that can stall it and reduce pickup. Use a flashlight to inspect both ends and housing; clear accessible debris without forcing parts.
If it binds or stops under light pressure, remove it according to your manual. Clean the bearings and end caps, remove hidden buildup, and reinstall each part correctly.
Turn the roll again after reassembly. It should spin smoothly and consistently. Proper alignment keeps the roll in contact with the floor; otherwise, cleaning performance and agitation can drop noticeably during use on each pass. Check alignment carefully.
Thick-Carpet Cleaning Tweaks
On thick carpet, raise the cleaning head slightly so the brush roll maintains airflow without pulling or lifting fibers. Adjust suction to the lowest thick-carpet setting only if the head resists movement or lifts fibers; otherwise, use normal or high suction for better pickup.
Make slower, overlapping passes, and stop to clear carpet lint from the brush roll, wand, or hose if the vacuum starts pushing debris.
Raise Cleaning Head
If your cordless stick vacuum has an adjustable or removable cleaning head, raise it to the highest setting for thick carpet so the brush roll can agitate the pile without stalling the motor. Keep the head fully flat and stable as you move it, and make two or three slow passes over dense areas rather than one fast pass.
After each session, power off the vacuum and inspect the underside, inlet, and brush roll. Cut hair, strings, and fibers free with scissors, then remove compacted debris before restarting.
If the roll slows, the head overheats, or a warning appears, stop immediately and check for tangled fibers or an obstruction at the head inlet. Clear the blockage, then resume with controlled, overlapping passes as needed.
Adjust Suction Settings
Usually, you’ll get better thick-carpet pickup by switching to a higher suction setting so the vacuum can draw debris through the dense pile instead of pushing it aside. Select the highest practical setting for dense, high-pile carpet, but reserve MAX or BOOST for especially matted or clogged sections.
That extra airflow can empty the dustbin quickly and increase brush-roll and motor load, so don’t leave it enabled across every surface.
If pickup remains weak at the top setting, stop and inspect airflow before blaming the control: empty the bin when debris reaches its MAX line, check filters for clogging, and clear the wand, hose, and head inlet. Examine the brush roll for hair or string; tangles reduce agitation and make the motor work harder.
Make Slower Passes
For thick-carpet areas, make slow, overlapping back-and-forth passes so the brush roll has time to lift embedded dirt and pet hair. Keep the cleaning head steady as you move, maintaining consistent airflow over each section instead of shifting direction mid-pass.
Work in measured lanes, slightly overlapping each pass to prevent missed strips.
If pickup drops, pause over the thickest area for two or three additional passes. Don’t force the vacuum forward; let agitation and suction remove ground-in debris without overloading the motor.
Before cleaning, switch off the vacuum and remove tangled hair, strings, or fibers from the brush roll. If pickup fades, inspect the nozzle and hose for clogs. Clear blocked pathways because restricted airflow makes the motor work harder and can cause overheating.
Inspect Filter Pleats
Before inspecting the filter pleats, unplug the cordless stick vacuum and let it cool completely, then open the filter compartment and check for packed dust or clogging.
Look closely between each fold for accumulated dust; dirty pleats can restrict suction even when the dust bin is empty. If your vacuum uses a HEPA filter, inspect it just as carefully, because fine particles can settle deep inside the media.
For a washable filter, tap off loose dust, then rinse the pleats with cool water until the runoff runs clear. Don’t use soap or solvents. Set the filter in a ventilated area and air-dry it completely, typically for at least 24 hours, before reinstalling it. Replace it if the pleats tear, deform, or fail to recover.
Check for Burning Odors
If your cordless stick vacuum gives off a burning or hot-plastic odor, stop using it immediately and let the motor cool completely. Don’t restart it to “test” the smell. First, empty the dustbin and check that it isn’t packed with debris. Re-seat the canister firmly; a loose connection can restrict airflow and make the motor work harder.
Next, inspect the air inlet, wand, hose, and floor-head channels for blockages. Remove the filter and look for heavy contamination, damage, or an overdue replacement; service it according to your model’s instructions. Examine the brush roll for hair, thread, or string wrapped around its ends. Cut away tangles carefully, and check for seized bearings, cracked end caps, or other damage.
If odor returns, stop; arrange professional service.
Dry Filter for 24 Hours
Once you’ve rinsed a washable filter with cool water, leave it to air-dry in a well-ventilated area for at least 24 hours, or until all moisture has evaporated.
Don’t reinstall it after a surface check alone; moisture can remain inside pleats, trapping dampness in the vacuum. Use this checklist:
- Gently squeeze the filter; feel for dampness without twisting or crushing the media.
- Inspect every pleat and seam; don’t overlook cool, dark spots that indicate retained water.
- Keep it upright in moving air, away from heat, which can deform filter materials.
- While it dries, wipe accessible bin surfaces, then wait until the filter’s completely dry.
Premature installation can cause mildew, odor, restricted airflow, and extra motor strain. Reassemble only when no dampness remains within those pleats.
Record Battery Runtime
Track your cordless stick vacuum’s runtime monthly by using the same power setting each time, such as Normal or Max, and recording the minutes until suction noticeably slows or the vacuum shuts off. Let the battery cool for 15–30 minutes after charging before testing, then log the setting, runtime, and conditions.
If runtime suddenly drops, inspect the filter and battery air vents first. Clogged filters make the motor work harder, shortening effective runtime. Follow the 20%–80% charging habit: avoid fully draining the battery, and don’t leave it at 100% for long periods.
Store the vacuum in a dry, stable location between 50–85°F (10–29°C). Compare each result with the original runtime; a sustained decline below roughly 70% may signal battery replacement, and update your log.
Conclusion
Keep this 15-minute reset on your calendar, and your cordless stick vacuum will stay ready for routine messes. Empty the bin before debris reaches its threshold, clear the brush roll, and adjust technique on thick carpet.
Inspect pleated filters, wash them only as directed, and let them dry for 24 hours. If you notice a burning odor, stop immediately. Finally, record battery runtime so you’ll catch performance decline before it disrupts your daily routine.