Tile and Grout Cleaning Reference Guide
You can restore tile and grout quickly with a baking soda paste and a vinegar spray to fizz away grime. Then, scrub with a stiff grout brush and rinse. Keep supplies handy: grout brush, nylon pad, spray bottle, microfiber cloths, and mild detergent.
Do daily damp wipes, weekly mops, and light grout brushing. Use peroxide or stronger mixes for stains. Seal grout after deep cleaning to protect it. Keep going to learn step‑by‑step methods and stain treatments.
Quick Overview
- Use a baking soda paste and white vinegar or hydrogen peroxide to fizz and lift grime. Then scrub and rinse thoroughly.
- Start with daily damp wipes and weekly mopping, plus light grout brushing to prevent buildup.
- For deep stains, apply a baking soda/hydrogen peroxide/dish soap mixture. Wait 5–10 minutes, scrub, and rinse.
- Match cleaners to stains: alkaline for mold, low‑pH for rust, and descalers for lime deposits.
- After cleaning and drying, reseal porous grout (not epoxy) to extend time between deep cleanings.
Quick Grout-Cleaning Method (Do This Now)
Want a fast, effective way to refresh grout? Use this quick grout method: mix baking soda with water to form a thick paste and apply it generously into grout lines. Spray white vinegar over the paste to initiate vinegar fizzing; the chemical action loosens embedded grime.
Let the fizzing work for 5–10 minutes. Then begin brushing grout with a stiff grout brush or an old toothbrush, using firm circular strokes to dislodge soil without damaging edges.
After scrubbing, rinse thoroughly with warm water to remove residue. Then wipe dry with a microfiber cloth to prevent redeposition of dirt. If stubborn stains remain, repeat the baking soda paste application, trigger vinegar fizzing again, and repeat brushing until clean.
Finish by rinsing and drying the area. Once dry, consider applying a penetrating grout sealer to protect against future moisture and staining; this will extend the interval between deep cleans.
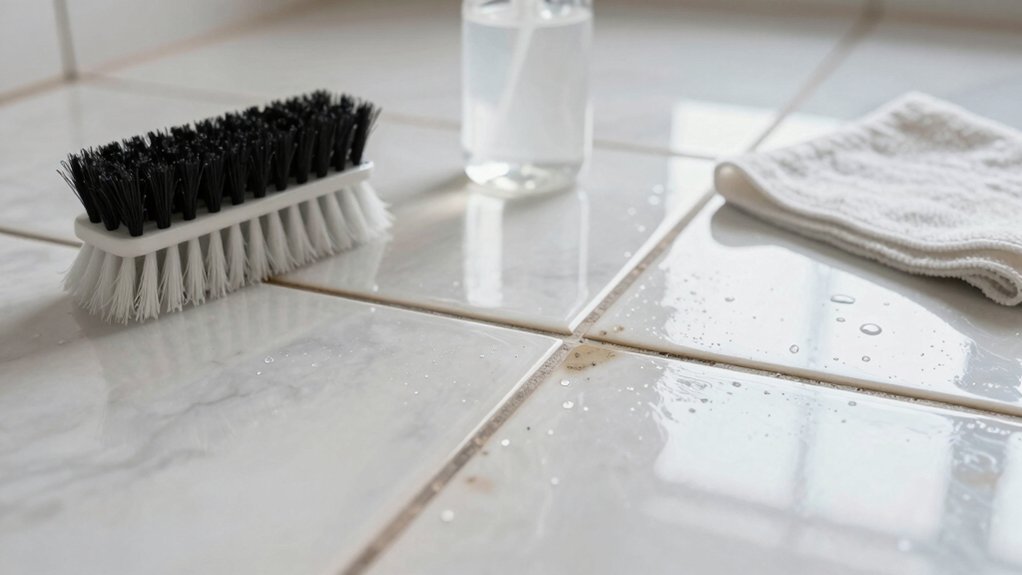
Grout-Cleaning Supplies You’ll Need
What tools and cleaners will give you reliable, efficient results? You’ll need a grout brush or old toothbrush with good tool ergonomics for controlled pressure; a nylon abrasive pad for stubborn deposits; and a spray bottle to apply solutions evenly.
Keep microfiber cloths or sponges and a damp cloth or sponge for rinsing and wiping. Use a mild detergent or dish soap solution for initial cleaning to lift surface grime before targeted treatments.
For stain removal, have baking soda (gentle abrasive), white vinegar, and hydrogen peroxide (mild bleaching agent) available. Apply them selectively and rinse thoroughly. Optional gloves protect skin during stronger treatments.
After cleaning, use a penetrating grout sealer to lock out moisture and aid stain prevention. For intensive jobs, a dedicated grout cleaner improves effectiveness without harming tile when used per instructions.
Prioritize tools that feel balanced and reduce wrist strain to maintain consistent scrubbing pressure and precision.
Weekly and Daily Grout-Care Routine
Now that you’ve gathered the right tools and cleaners, establish a simple daily and weekly routine to keep grout from deteriorating. You’ll perform quick daily actions to prevent soil migration and scheduled weekly maintenance for high-traffic zones.
Daily: Damp wipe tile to remove surface soil before it settles into grout.
Weekly: Sweep, mop with warm water and a few drops of dish soap, and light-brush grout lines in kitchens and primary bathrooms. Monitor grout color and texture to decide when to escalate to deep cleaning. After a thorough clean, apply a sealer to extend intervals between intensive procedures.
| Frequency | Action | Target area |
|---|---|---|
| Daily | Damp wipe tiles | All tiled surfaces |
| Weekly | Sweep + mop (soap) | High-traffic rooms |
| Weekly | Light grout brushing | Grout lines |
| Weekly | Inspect discoloration | Decision trigger |
Follow this regimented, repeatable approach to maintain grout integrity and reduce need for aggressive interventions.
Deep-Clean Methods: Baking Soda, Vinegar, Peroxide
Effective deep-cleaning leans on chemistry you can control: baking soda, hydrogen peroxide, and vinegar each break down soils and stains in different ways. Choose the method that matches your grout type and stain severity. Use four reliable protocols: (1) mix ½ cup baking soda, ¼ cup hydrogen peroxide, and 1 teaspoon dish soap into a paste, apply, wait 5–10 minutes, scrub with a toothbrush, then wipe with warm water; (2) sprinkle baking soda over grout, spray hydrogen peroxide until wet and bubbly, wait 5–10 minutes, scrub and rinse; (3) mix equal parts baking soda and white vinegar into a paste, apply, wait 5–10 minutes, scrub and rinse with warm water; (4) sprinkle Bon Ami or Comet, spray a 1:1 white vinegar/water solution, wait 5–10 minutes, scrub and rinse.
Test an inconspicuous area first. These deep clean ingredients are abrasive or acidic; avoid over-scrubbing delicate grout. After cleaning, perform grout sealing unless you have epoxy grout, which doesn’t require sealing.
Treating Specific Stains : Mold, Rust, Lime, Soap Scum
How should you approach specific grout stains? You identify the stain, choose a chemistry-targeted cleaner, apply under controlled dwell time, agitate, rinse, and dry. For mold treatment, use an alkaline or high-pH mold cleaner on damp corners and porous grout. Scrub with a stiff brush and rinse thoroughly.
For rust removal, select low-pH products or rust-specific formulations to dissolve iron deposits without etching tile.
- Diagnose: note color and location to match chemistry.
- Select: alkaline for mold, acidic for rust/lime, surfactant/mineral breakers for soap scum.
- Execute: apply, dwell, agitate, rinse, dry; use PPE and test small area.
Treat lime (chalky-white or pale green) with descalers that target mineral deposits. Remove soap scum with degreasing/mineral-blend cleaners and vigorous rinsing. After any treatment, dry completely. Consider resealing grout only if prior performance indicates vulnerability to staining and moisture intrusion.
Grout Sealing: When to Seal and Maintenance Schedule
When should you seal grout after cleaning? Seal grout once it’s fully dry after a deep clean: typically 24–72 hours depending on humidity and grout type. This timing is critical; apply penetrating or surface sealers only to cured cementitious grout. Epoxy grouts usually don’t require sealants.
Choose sealer by grout composition, location, traffic, application method, and budget. Penetrating sealers protect below the surface by depositing particles in pores. Surface coatings create a barrier over grout, while color sealers restore appearance while sealing.
For high-moisture zones and hot spots (showers, entryways), expect a stricter maintenance schedule: inspect annually and reseal if water no longer beads. For low-traffic floors, reseal every 4–5 years. Document product specifications and test a small area before full application.
Regularly monitor bead tests and visible wear to adjust your maintenance schedule and ensure optimal long-term protection.
Frequently Asked Questions
Can Grout Be Professionally Color-Matched and Recolored Permanently?
Yes, you can have grout professionally color matched and recolored permanently. Technicians color match existing grout and apply specialized pigments. They then seal with a high-quality color sealing system to lock in shade and protect against stains.
You’ll get durable, uniform results when pros prep surfaces, use compatible dyes or epoxy-based recolorants, and follow manufacturer cure times. Expect longer-lasting aesthetic correction than surface-only tinting or temporary coatings.
Are Steam Cleaners Safe for All Grout Types and Sealers?
No, steam safety varies; you shouldn’t assume it’s safe for all grout types and sealers. You’ll want to check sealer compatibility and grout composition before using high-temperature steam.
Porous or aged grout can deteriorate. Some sealers, especially water-based or acrylics, can soften or delaminate. Use controlled pressure and temperature settings, test a small inconspicuous area, and follow manufacturer guidelines or consult professionals to avoid irreversible damage.
How Long After Sealing Can Tile Be Exposed to Water?
You can expose tile to light water exposure after about 24 hours. However, full sealing cure typically requires 72 hours to 7 days depending on product and conditions. You should avoid heavy moisture, immersion, or cleaning for the full cure period.
Follow manufacturer specs: temperature, humidity, and ventilation affect cure time. Test a small area if unsure; if sealer feels tacky, wait longer before any significant water exposure.
Will Pets or Children Be Harmed by Common Grout Cleaners?
Yes, some common grout cleaners can harm pets or children if inhaled, ingested, or contacted. You should assume cleaner toxicity until you verify labels and MSDS. Choose low-toxicity, fragrance-free, and non-volatile formulations, and ventilate well.
Keep occupants out during application and drying. Rinse thoroughly, and store products locked. For sensitive households, use diluted solutions, enzyme cleaners, or seek professional services that prioritize pet safety and reduced chemical exposure.
Can Grout Repairs Be DIY or Require Professional Regrouting?
You can do many DIY grout repair tasks, but extensive damage needs professional regrouting. For small cracks, hairline repairs, or isolated missing grout, you’ll remove loose material, apply matching grout, and seal it yourself with basic tools.
If grout is crumbling across large areas, tiles are loose, or waterproofing has failed, you’ll need professional regrouting to fully remove old grout. This process includes reinstalling or replacing tiles and restoring underlying waterproof membranes to prevent recurring failures.
Conclusion
You’ve got the essential tools and routines to keep grout looking factory-new. Use the quick method for immediate results. Follow weekly and daily care to prevent buildup. Apply deep-clean techniques: baking soda, vinegar, peroxide, when stains persist.
Treat mold, rust, lime, and soap scum with targeted agents. Then seal grout as recommended to lock protection in. Stick to this maintenance cadence and you’ll minimize deterioration, reduce resealing frequency, and extend grout lifespan.