Robot Vacuum Brush Cleaning Schedule
You should check and clear your robot vacuum brush daily: empty bin, remove visible hair.
Perform a monthly deep clean: remove roll, clean end caps, clear bearings, wipe compartment, dry.
Do a full service every 5 to 6 months: replace filters, inspect wear lines, swap brush roll if needed.
Increase frequency for pets or allergies.
Never soak parts or use sharp tools.
Follow this cadence and the steps below to keep performance and avoid damage.
Quick Overview
- Clean brushes monthly for normal use; increase to biweekly in homes with pets or heavy shedding.
- Empty dustbin and remove loose hair or debris from brush grooves after every use or daily in high-traffic homes.
- Every 5–6 months perform deep maintenance: remove end caps, clean bearings, inspect wear lines, and replace worn rolls. After cleaning, dry all components fully before reassembly. Run a short test cycle to confirm smooth rotation.
- Track maintenance dates in your app or calendar and follow manufacturer guidance on lubricants, replacements, and safe tools.
Who This Cleaning Schedule Helps : And How to Use It
Who benefits from this brush-cleaning schedule and how should you apply it? You, if you own a robot vacuum and want consistent suction and brush performance, especially in homes with pets or occupants sensitive to allergies.
Apply the schedule by matching cadence to conditions: biweekly for heavy pet hair and carpeted areas; monthly for light debris or hard floors. Follow the prescribed sequence: inspect the roll, remove tangles, clean end caps and bearings, then fully dry components before reassembly to prevent moisture damage and bearing seizure.
Always power the unit off, use manufacturer tools, and handle parts per the model-specific notes for DEEBOT X11 OmniCyclone, Narwal, or iRobot Roomba variants. Adjust frequency per their guidance.
This routine minimizes hair buildup and debris that degrade brush efficiency and suction; it reduces allergen recirculation and extends motor and bearing life. Stick to the cadence and safety steps to keep cleaning performance optimal.
Cleaning Schedule At-a-Glance: Daily → Bi‑Annual Brush Tasks
Now that you know who benefits and how to apply the cadence, here’s a compact, action-oriented checklist covering daily through bi-annual brush tasks so you can keep performance consistent.
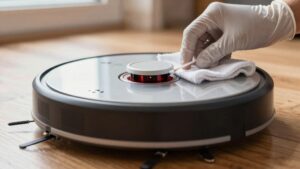
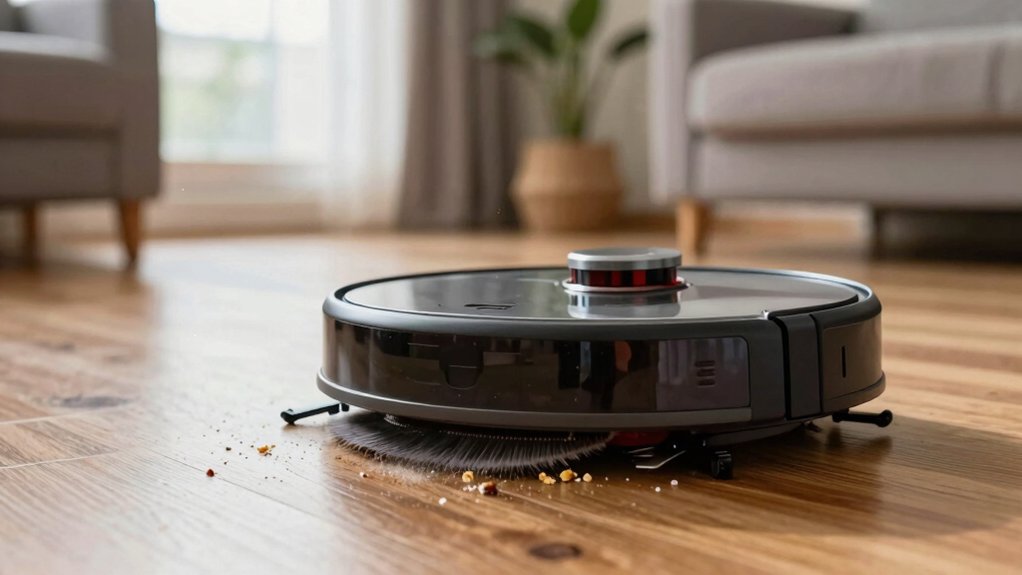
Daily: Empty the dustbin; check brush grooves and remove hair/debris with the provided cleaning tool or micro-brush, paying attention to metal axles. Wipe end caps. These steps maintain suction, reduce motor load, support pet care routines, and help with noise control by preventing imbalance.
Adapt daily frequency for homes with pets or high traffic. Increase checks to limit buildup and motor strain.
Bi-Annual: Power off, remove brush roll and end caps. Inspect for wear and clean brush roll, end caps, and the brush compartment thoroughly. Rotate and test extractors for free movement; reseat brushes with correct peg orientation. Replace the brush roll if wear or damaged bristles are detected.
Follow this cadence to sustain predictable performance, prolong component life, and minimize unexpected noise or failure.
Monthly Brush Cleaning: Step‑by‑Step Routine
A monthly brush cleaning keeps hair and debris from tangling the roll and choking airflow. So, remove the brush via the release tab, inspect both ends and axles for trapped material, and clear anything caught in end caps before proceeding to a deeper clean.
Start by removing loose debris with the manufacturer-provided cleaning tool. Cut and pull hair from bristles and extractors so spin bars rotate freely. Inspect the brush compartment and wipe with a damp microfiber cloth. If you rinse the brush, air-dry fully before reinstalling.
Check end caps and axles for fiber buildup and re-lubricate only per manufacturer guidance. Adopt a brushing cadence: set one calendar reminder each month, increase frequency for pets or heavy shedding, and log each service in a maintenance mindset to track performance gains.
After reassembly, run a short test cycle to confirm normal rotation and suction. This routine preserves airflow and suction without requiring deep repairs.
Deep Maintenance Every 5–6 Months: Filters, Bearings, and Brush Replacement
When should you schedule deeper maintenance? Every 5–6 months, or after heavy pet-shedding periods and low-use seasons, perform bi‑yearly maintenance to keep suction and mechanics optimized. Follow manufacturer maintenance tutorials or videos for accurate filter cleaning and procedure.
- Clean and replace: Remove and wash/replace the vacuum filter per guidance. Inspect brush roll flaps for the “Max Wear Line” and replace the brush roll when wear reaches that mark.
- Bearings and end caps: Clear hair and debris from bearings, end caps, and caster wheel to ensure smooth rotation and prevent resistance.
- Timing and records: Align service with reduced usage. Document steps and note warranty tips: Keep receipts and follow manufacturer instructions to avoid voiding coverage.
Apply dusting guidance to surrounding areas before reassembly. Work methodically with tools specified by the maker. Test run the robot and verify noise and rotation are normal.
What Not to Do: Mistakes That Damage Brushes or Void Warranties
You’ve done the deep maintenance, but knowing what to avoid is just as important to protect brushes and keep your warranty valid. Don’t clean while the robot is plugged in; you risk electric shock and damaging internal electronics, which creates warranty risk.
Don’t soak or over-wet brush rolls. Moisture degrades adhesives and bearings and shortens brush longevity. Avoid sharp tools; they nick bristles and damage end caps or axles.
| Action to Avoid | Consequence |
|---|---|
| Cleaning while plugged in | Electric shock; internal damage; warranty risk |
| Soaking brushes | Adhesive/ bearing failure; mold; reduced brush longevity |
| Using sharp tools | Cut bristles; damaged end caps/axles |
Don’t reassemble while parts are damp. Corrosion and mold follow. Also, don’t skip manufacturer maintenance intervals; ignored steps can void warranties and reduce suction efficiency.
Follow dry, tool-appropriate procedures and the schedule to maximize brush longevity and keep warranty coverage intact.
Adjust the Schedule for Pets, Allergies, or Heavy Use (What to Change)
How should you change the brush-cleaning rhythm for pets, allergies, or heavy-use zones? You’ll tighten intervals and shorten sessions: for pet care, clean brushes every 3–4 days to prevent hair buildup in bristles and gaps. For allergy relief, run more frequent weekly cleanings and include a high-suction or Max mode pass to pull fine particles. In entryways and kitchens, schedule daily or every-other-day brush maintenance and use 20–30 minute sessions to limit tangling.
- Increase frequency: pet hair and debris demand faster, consistent action to avoid clogs and motor strain.
- Add intensity: Max mode sweeps allergens better; follow with targeted brush inspection.
- Shorten cycles: frequent, brief sessions in heavy-use zones cut accumulation and simplify debris removal.
Also perform weekly checks of end caps, bearings, and brush grooves to maintain rotation and airflow. These adjustments balance performance, longevity, and occupant health without overworking the unit.
Tools, Tracking, and App Reminders to Make the Schedule Stick
Where should you keep your cleaning schedule? Keep it in two places: the robot’s app and a calendar you check regularly. Use the manufacturer-provided cleaning tool and a microfiber cloth every two weeks; more often with pets. Enable app reminders to prompt brushing maintenance on a recurring biweekly or pet-heavy cadence so tangles and suction loss don’t accumulate.
For tools tracking, log each session in the app: date, time, notes on end caps, bearings, and any replacements. During every maintenance session, inspect and clean end caps and bearings; confirm brushes rotate freely. Set a calendar reminder to inspect both main and side brushes. Only reassemble when components are completely dry to avoid moisture issues.
Use app notifications to store maintenance history and capture deeper-clean events. This combination of physical tools, systematic checks, tools tracking, and automated app reminders keeps the schedule consistent, minimizes downtime, and extends brush life.
Frequently Asked Questions
How Do I Clean a Tangled Brush Without Removing It From the Robot?
You can clean a tangled brush without removal by cutting and pulling debris while the brush stays installed. Power off the robot, flip it over, and use a seam tool or small scissors to slice through hair wraps. Then, pull strands out with tweezers or needle-nose pliers.
Rotate the brush manually to expose wrapped sections and clear bristles and bearings. After that, vacuum crumbs away. Recheck for remaining tangles and test brush spin before reuse.
Can I Use Household Cleaners on the Mop Core or Brush Housing?
You shouldn’t. Household cleaners can damage the mop core and brush housing, degrade seals, and void warranties. Use mild soap and water or manufacturer-recommended solutions. Apply sparingly and avoid bleach, alcohol, or abrasive cleaners.
For cleaning tips, remove detachable parts when possible. Gently wipe with a damp cloth and let components fully air-dry. Reassemble carefully. Regular light maintenance prevents buildup and preserves performance.
Will Warranty Cover Brush Damage From Pet Claws or Chewing?
Generally, no; warranty won’t cover brush damage from pet claws or chewing. You should expect cosmetic or user-caused damage like torn bristles or bent shafts to be excluded.
Check your manual for specific exclusions and any accidental-damage add-ons. To protect the brush, you’ll want to trim pet claws, supervise interactions, and use deterrents.
Document damage with photos and contact support. They’ll confirm if repair or replacement options exist under any extended plan.
How Do I Dispose of Old Brush Rolls and Filters Responsibly?
You should separate components and check local recycling options: Metal cores and hard plastics often go to municipal recycling. Foam, rubber, and mixed-material filters usually need safe disposal as general waste.
Remove batteries or electronic parts and recycle them at e-waste collection points. Seal used filters in a bag to contain dust before disposal. Label hazardous items per local rules and consult your municipality for specific recycling options and safe disposal procedures.
Can I Run the Robot on Wet Floors After Cleaning the Brush Roll?
Yes, you can run the robot on wet floors after cleaning the brush roll, but only if the model’s manual permits it. Check for water-sensitive motors or electronics. Ensure the brush roll is fully dry, and avoid puddles.
For your cleanup schedule, allow drying time and inspect seals.
Maintenance tips: wipe bearings, re-lubricate if recommended, and perform a quick test run to confirm no moisture-related issues before regular use.
Conclusion
Stick to this brush-cleaning schedule and your robot vacuum will run efficiently, avoid clogs, and last longer. Do daily quick checks. Follow the monthly brush routine and perform deep maintenance every 5–6 months (filters, bearings, and brush replacement).
Avoid common mistakes like using harsh tools or getting water into bearings. Scale up cleaning for pets or allergies. Use the right tools, track tasks, and set app reminders so maintenance becomes automatic and reliable.