Robot Vacuum Maintenance Schedule Checklist
You should empty the dustbin and rinse mop pads after every run. Wipe charging contacts daily and check sensors for obstructions.
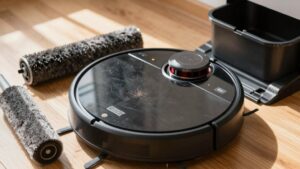
Weekly, inspect and tap or wash filters. Clear hair from the main roller and side brushes, and launder reusable mop pads.
Monthly, power off the unit to clean sensors, wheels, and contacts; log findings. Maintain the auto‑empty dock and swap bags as needed. Follow replacement intervals to retain suction: continue for detailed schedules and troubleshooting.
Quick Overview
- Empty the dustbin after every run, and reseal to restore airflow and maintain suction efficiency.
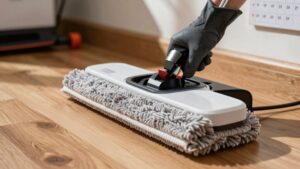
- Rinse and air-dry mop pads after each use. Launder reusable pads weekly.
- Wipe charging contacts and dock sensors daily with a dry lint-free cloth.
- Inspect and clear the main roller, side brushes, and wheels weekly for hair and debris.
- Perform monthly deep checks: clean sensors, inspect wheels, and replace filters/bags per schedule.
Daily Robot Vacuum Maintenance Checklist
Why empty the dustbin after every run? You’ll maintain peak dust collection efficiency and prevent suction loss or debris scattering that reduces cleaning effectiveness. After each cycle, remove and dump the bin into a trash receptacle. Then reseal and reinstall it to restore airflow paths.
Also, clean mop pads after each run to avoid transferring grime back onto floors. Rinse, wring, and air-dry pads before the next use. Wipe charging contacts on both robot and dock daily so charging connectivity stays reliable. Use a dry or slightly damp lint-free cloth and ensure surfaces are fully dry before docking.
Monitor noise comparisons subjectively: if your unit suddenly gets louder, empty the dustbin and check for clogging or loose debris causing atypical vibration. For navigation consistency, visually inspect sensors for obvious obstruction. Schedule deeper monthly sensor cleaning separately. These daily steps keep performance consistent, minimize wear, and reduce the likelihood of false faults during operation.
Weekly: Filters, Brushes & Mop Pads
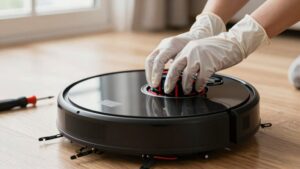
After you finish daily tasks, schedule a focused weekly check of filters, brushes, and mop pads to preserve suction performance and cleaning coverage. For weekly maintenance, start by emptying the dustbin; this supports filter efficiency and prevents resettling of debris. Remove and inspect filters for dust compaction. Tap or wash per manufacturer instructions and allow complete drying before reinstalling.
Examine the main roller and side brushes for hair, string, and lodged debris. Use provided tools to cut and clear tangles, and verify brush rotation free-play and attachment integrity. Inspect mop pads for soil accumulation, wear, or odor. Launder reusable pads following care labels and replace disposable or degraded pads to avoid streaks and grime transfer.
If your model reports maintenance via app alerts, reconcile those prompts with your visual checks and log replacements. Finally, scan the multi-function dock and charging area for debris during this weekly maintenance to prevent charging interruptions without delving into monthly sensor or wheel care.
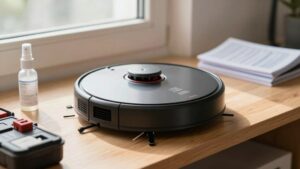
Monthly Deep Care: Sensors, Wheels & Charging Contacts
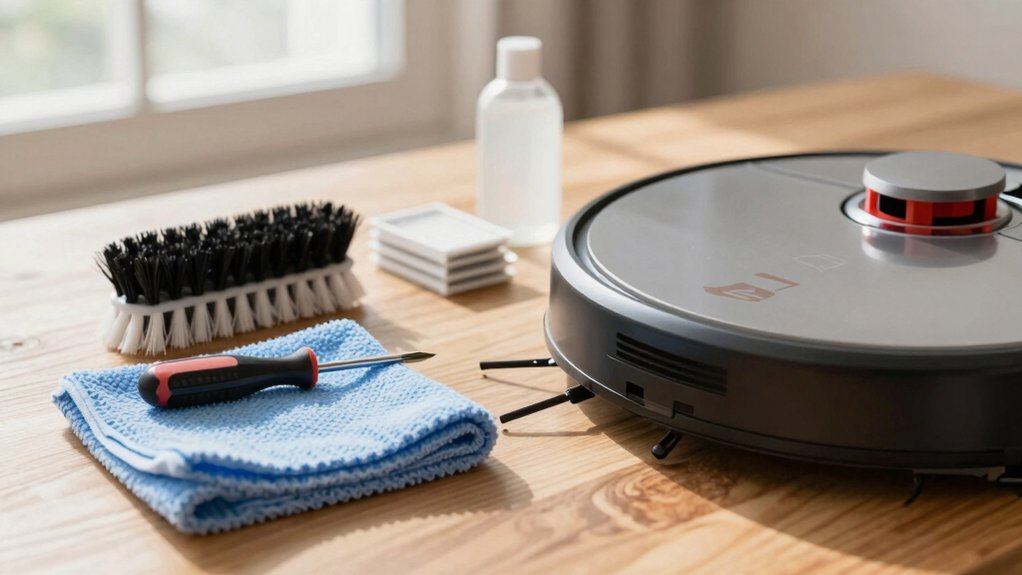
How will you keep navigation, mobility, and charging reliable? Perform monthly deepcare focused on sensors, wheels, and charging contacts. Begin a sensors inspection: Power off the unit, use a dry microfiber cloth to remove dust from cliff, wall, and optical sensors; avoid water or solvents. Scan signal transmission zones and clear any dust that could degrade connectivity.
Next, lift the robot and inspect drive wheels and wheel wells. Remove hair, fibers, and debris with tweezers or compressed air; rotate wheels manually to verify smooth operation. Check caster wheels for trapped material and lubricate only if manufacturer permits.
Wipe charging contacts on both robot and dock with a dry cloth to ensure low-resistance connections; realign dock if contacts show uneven wear. While performing monthly tasks, confirm the battery remains in a charging state to preserve health and readiness. Record findings and corrective actions in your maintenance log for trend monitoring and timely follow-up.
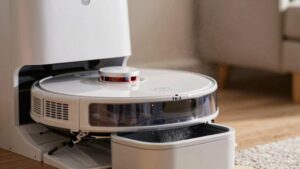
Maintain Auto-Empty & Wash Docks (Bags, Trays, Air Path)
While you’re checking sensors, wheels, and charging contacts, give the auto-empty and wash dock the same methodical attention to keep pickup and cleaning cycles reliable. Empty the dock’s dustbin every few weeks; with pets, replace bags more frequently to avoid overflow and loss of suction. Use manufacturer bags only; third-party bags can underperform and compromise air quality.
Perform an air path inspection at the dock-to-vacuum connection point each service: remove visible debris, check seals, and verify unobstructed flow to maintain efficient emptying. Remove and clean the mop-washing tray monthly; detachable trays simplify access and drying. Wipe dock sensors and charging contacts on a set schedule so the robot reliably locates and powers through auto-empty cycles.
Document each maintenance action and any parts replaced. If suction degrades despite clean paths and fresh bags, inspect the dock fan and consult manufacturer guidance before replacing components. Follow a strict routine to preserve performance and extend dock service life.
Replacement Schedule: Filters, Brushes & Mop Pads
When should you replace filters, brushes, and mop pads to keep peak performance? Establish a clear replacement schedule tied to your maintenance cadence and usage patterns. Replace disposable filters every 2–6 months; intervals depend on model and runtime.
If your unit uses washable filters, clean them every 1–3 months and ensure complete drying before reinstalling. Inspect main and side brushes monthly; replace them every few months or when bristles show wear, deformation, or loss of stiffness.
Replace mop pads every few months or sooner if fabric integrity or absorbency degrades.
Use manufacturer guidance as the primary source for interval specifics and track cumulative runtime or room coverage. Enable app notifications (when available) to receive accessory-life alerts and log replacements to refine your maintenance cadence over time.
Always use model-compatible parts and document dates and hours so you can adjust the replacement schedule based on observed performance rather than fixed assumptions.
Troubleshooting: Dirt Left Behind, Low Suction & Docking Issues
Troubleshooting dirt left behind, low suction, and docking faults starts with a systematic check of airflow, brush condition, and contact cleanliness. Empty the dustbin after each run. Inspect and clear the dust path and intake. Examine main/side brushes and filters for hair, debris, or wear that can reduce pickup.
Next, isolate the cause: confirm the bin and lid seal are secure and reseat or replace the filter if buildup persists. Check the intake for blockages and verify brush bristles and bearings rotate freely. Remove tangled hair and replace worn brushes. Measure suction qualitatively by feeling airflow at the intake; weak flow indicates a clogged filter, full bin, or damaged motor pathway.
For docking issues, clean charging contacts on both robot and dock. Remove debris from dock openings and ensure dock alignment and stable power. After each corrective step, run a short test cycle to verify pickup and successful docking. Document recurring faults for component replacement or professional service.
Model-Specific Tips: Pets, Washable Filters & App Alerts
How should you adapt maintenance for your specific model and household? Follow model specific tips: If you have pets, increase dustbin emptying frequency and replace dock bags sooner to prevent overflow and suction loss.
Check main and side brushes weekly for hair wrap; remove tangles and clean dustbin components after each run. Confirm whether filters are washable per manufacturer labeling before washing.
If filters are washable, rinse with water. Then ensure complete drying: 24 hours in a ventilated area to prevent mold; never reinstall damp filters. If filters are disposable, schedule replacements every 2–6 months based on use and debris load.
Enable app alerts and review them daily. They notify when accessories near end of lifespan and prompt timely replacements for filters, mop pads, and brushes. Use alerts to build a calendar: log replacements and set reminders aligned with pet-driven increased wear.
This methodical approach keeps performance consistent and reduces unexpected maintenance failures.
Frequently Asked Questions
Can I Run My Robot Vacuum on Multiple Surfaces Continuously?
Yes, you can run your robot vacuum on multiple surfaces continuously if it’s designed for multi surface compatibility and you manage expectations.
Check brush and wheel clearance, transition ramps, and sensor calibration for smooth running surface shifts. Monitor battery and schedule automatic returns for charging to preserve power management. Clean filters and brushes regularly to prevent clogs.
Follow manufacturer specs for continuous operation limits and replacement intervals to maintain performance.
Is It Safe to Use Third-Party Replacement Batteries?
You can use third-party batteries, but it’s not inherently safe. Third-party batteries vary in manufacturing safety and may lack proper battery regulation, increasing the risk of fire, reduced runtime, or damage.
You should verify certifications, match voltage/chemistry, inspect for quality, and buy from reputable vendors with returns. If you’re unsure, use OEM replacements or consult the manufacturer for approved third-party options to maintain safety and warranty compliance.
How Do I Store the Robot During Long Vacations?
Before leaving, fully charge the battery. Then power off the unit and remove the battery if removable. Store the robot in a cool, dry place away from direct sunlight and humidity.
Clean brushes, filters, and dustbin; secure loose parts. Use storing guidance: place on a stable surface, and cover with breathable cloth to prevent dust. For vacation care, recharge every 2–3 months if stored with battery installed to preserve battery health.
Will Essential Oils Damage Rubber Parts or Sensors?
Yes, essential oils can cause rubber damage and may harm sensors. You should avoid applying oils directly to bumpers, wheels, gaskets, or seals since solvents in oils swell, soften, or crack rubber over time.
Wipe spills immediately with a damp, lint-free cloth and mild detergent. Keep oils away from cameras, infrared sensors, and charging contacts. If contamination occurs, clean with isopropyl alcohol sparingly and test function before regular use.
Can the Robot Vacuum Operate in Extreme Temperatures?
Yes, but you shouldn’t. Extreme temperature effects can impair batteries, plastics, and lubricants; this reduces runtime and causes warping or brittleness. Sensor performance under heat degrades: IR and optical sensors drift, calibration shifts, and thermal noise increases, lowering obstacle detection accuracy.
Operate the unit only within manufacturer temperature ranges. Allow acclimation after temperature swings and avoid prolonged exposure to direct sunlight or freezing conditions to preserve reliability and safety.
Conclusion
You’ve got a structured plan that keeps your robot vacuum performing reliably. Stick to daily debris clearing. Empty the bin and check brushes weekly. Perform monthly deep care on sensors, wheels, and charging contacts.
Maintain auto-empty or wash docks per manufacturer guidance. Replace filters, brushes, and mop pads on schedule. Use troubleshooting steps for suction or docking faults. Follow model-specific tips for pets, washable filters, and app alerts to extend life and efficiency.