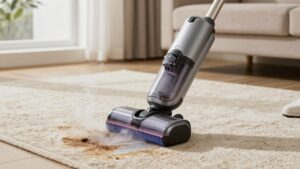
How to Remove Wrapped Hair From Robot Vacuum Rollers
Power the robot off and unplug it. Then flip the cover and press the tabs to open the roller compartment. Lift the bracket and note how the roller sits. Lift the right end out first.
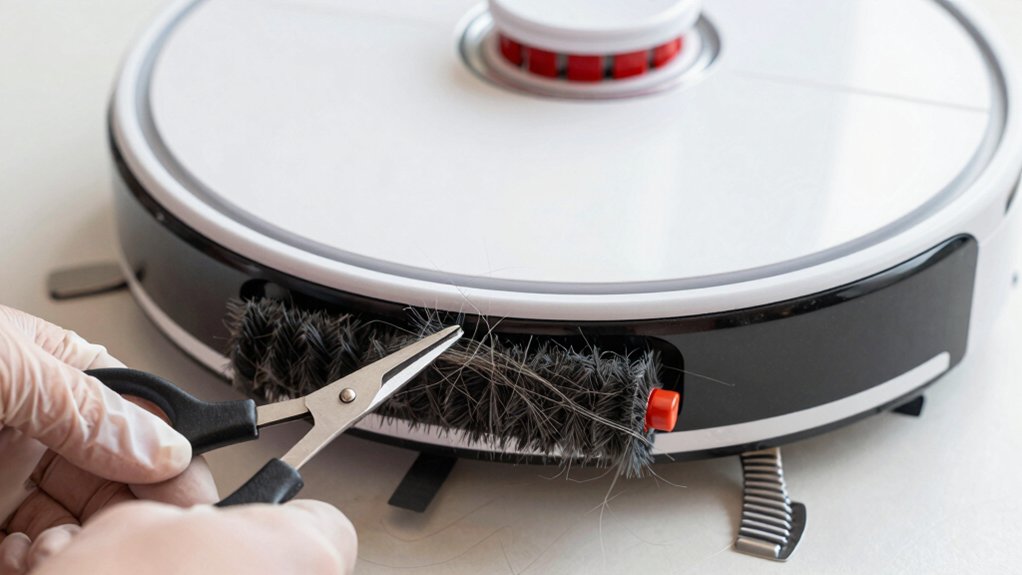
Use the built-in blade tool to make one steady cut along the roller groove while holding the brush steady as you slice through wrapped hair. Pry out loosened fibers and wipe the cavity clean. Return the blade to its holder. Reinstall the roller and snap the cover closed. Keep going for full steps.
Quick Overview
- Power off and unplug the robot, stabilize it, and ensure brushes cannot spin before starting maintenance.
- Open the roller compartment by pressing both plastic tabs and lift the bracket straight up to expose the roller.
- Note roller orientation and alignment markers. Then lift the right end first and slide the roller out without twisting.
- Use the built-in blade tool: slide it into the roller grooves and make one continuous downward cut to sever wrapped hair.
- Wipe grooves and brush ends to remove loosened hair. Collect debris, return blade to storage, and reinstall roller until it clicks.
Safety Check and Open the Roller Compartment
Ready to start? You’ll do a quick safety check first: power the robot off and unplug its charger so the brushes can’t spin. Confirm there’s no loose debris around the unit and that you’re working on a stable surface.
Next, open compartment access by pressing the plastic tabs on both sides to release the roller brush housing. Lift the plastic bracket up to expose the roller and keep the compartment cover open and accessible while you work.
As you inspect, follow basic maintenance tips: clear visible debris from the housing, wipe edges with a dry cloth, and keep small parts contained. Note orientation notes now: look at side corners and alignment markers so you’ll reinstall the roller correctly.
Don’t force parts; if the housing resists, recheck the tabs. These steps set you up to remove the roller safely and efficiently in the next section.
Remove the Roller Brush and Note Its Orientation
How do you remove the roller without stressing the bearings? Press the plastic tabs on both sides and lift the bracket straight up. That frees the roller pocket so you can access the brush.
Detach the roller by lifting the right side first, then the left. That sequence prevents bearing stress. Grip the roller near its ends, lift gently, and slide it out without twisting. As you remove it, note orientation: which end faces left or right and how the side corners sit in their slots. Mark or remember any asymmetric features.
Before cleaning, inspect the roller cavity for stray hair or debris that could impede reinstallation. Clear any obstructions so the brush will seat correctly.
When you reinstall, align the roller to the same orientation you recorded. Drop the left end in first if that’s how it came out, then the right, and lower the bracket until the cover clicks. Confirm the roller spins freely, and the housing snaps securely back into place.
Cut Wrapped Hair With the Built-In Blade Tool
Opening the top lid, you’ll find the blade tool labeled “mind to blade.” Slide it into the roller grooves and make a single downward cutting pass to sever hair wrapped along the brush’s length. Hold the roller steady with one hand; guide the blade along the full circumference, and keep the cut continuous so strands don’t snag.
If stubborn sections remain, repeat a focused pass rather than sawing. One deliberate cut per problem area prevents fraying.
After cutting, angle the blade to swipe out loosened hair clumps and dust from the grooves. This assists your clearing debris routine without disassembling further. Inspect the roller to confirm all long strands are freed. Short fibers can be picked out by hand or with tweezers.
Finally, wipe the blade clean and check for nicks as part of blade maintenance before stowing it back in its compartment. Collect and dispose of removed hair and dust promptly to avoid recontamination.
Clear Remaining Debris and Stow the Blade Tool
Once the long strands are cut, wipe along the roller grooves and the brush ends to lift out loosened hair and dust until the roller looks clean. Work methodically from one end to the other, using the blade tool’s flat edge or a cloth to clear debris from grooves and the axle. Collect all removed hair and dust into a container or trash bag so it won’t fall back into the robot.
Swipe the sides and ends of the roller brush to dislodge any fibers wrapped near the axle. If you find stubborn debris, re-scan the roller and re-cut remaining fibers with the blade tool; then wipe again. When the roller is free of visible debris, confirm no loose fragments remain inside the compartment.
Return the blade tool to its designated storage slot in the robot vacuum, making sure the cutting edge is fully covered and there’s no blade exposure. Stow blade securely to keep it safe and ready for the next cleaning.
Reinstall the Roller and Verify the Cover Clicks
Before snapping the cover back on, align the roller so its keyed ends match the initial side corners and slide it in gently until it seats without force. Then fit the cover by engaging the bottom noses first and pressing the top until you hear a clear click.
- Reinstall roller in the correct orientation, noting the initial side corners for precise cover alignment.
- Slide the roller into the housing until it sits easily; don’t force it—forcing can misalign bearings or end caps.
- Engage the cover’s bottom noses first. Then press the top down until you verify click; that audible snap confirms the latch has engaged.
- Gently pull the frame to confirm a flush fit and that neither roller nor cover loosens. Perform a final visual check to ensure the cover remains clicked into position.
This methodical sequence helps prevent rattle. It ensures smooth rotation and keeps hair from working back under the cover during operation.
Frequently Asked Questions
How Often Should I Clean the Roller to Prevent Hair Buildup?
You should clean the roller weekly to prevent hair buildup. If you have pets or long hair, clean it every 2–3 days. Make it part of a short routine: power off, remove the roller, cut and pull away wrapped hair, clear bearings and end caps, then reassemble.
Inspect brushes for tangles during each cycle. Deep-clean monthly to remove fine debris. That schedule keeps suction steady and prevents motor strain.
Can I Use Scissors Instead of the Built-In Blade Tool?
Yes, you can use scissors as a scissors alternative, but you should favor the blade tool usage supplied by the manufacturer. You’ll work more safely and precisely with the built-in blade tool; it is designed to avoid damaging brushes and bearings.
If you use scissors, cut hair in small sections. Hold the roller steady, and keep blades angled away from components. Inspect for residual strands and reassemble carefully.
Will Cutting Hair Damage the Roller Bristles or Bearings?
Cutting hair carefully won’t usually damage roller bristles or bearings if you use proper blade safety and gentle technique. You’ll avoid pulling or twisting the roller. Steady, small snips prevent bristle fraying and stress on bearings.
Use the built-in blade tool or a rounded-tip safety cutter. Support the roller while cutting, and clear debris frequently. If you notice stiffness, noise, or wobble afterward, stop and inspect for hidden damage.
Is It Safe to Wash the Roller Under Running Water?
Yes, it’s safe to wash the roller under running water if the manufacturer allows it, and you remove batteries or power components first. Use mild soap, rinse thoroughly, and dry completely before reassembly.
For washing roller care, follow the manual’s how often guidance; many recommend cleaning weekly or biweekly. Set a cleaning schedule based on pet hair and use: heavy shedding needs more frequent attention to keep performance optimal.
Do Wrapped Hair Issues Indicate a Motor or Drive Problem?
Wrapped hair usually doesn’t mean a hair motor vs drive concerns; it’s typically maintenance timing and debris build-up. You should inspect rollers, belts, and bearings for wear or resistance.
If hair keeps reappearing quickly or you hear grinding, you’ve got a motor or drive issue and should service it. Regular cleaning and scheduled maintenance timing prevent most problems. Document how often you clean and escalate to repair when performance or noise worsens.
Conclusion
You’ve now removed the hair, cleaned the roller, and stowed the blade tool, all while keeping safety in mind. Reinstall the brush in the same orientation and close the cover until it clicks to ensure proper fit.
Run a quick test to confirm the vacuum moves and brushes spin freely. Regularly check and clean the roller to prevent clogs and maintain suction; a little routine care keeps your robot running efficiently and prolongs its life.