Robot Vacuum App Mapping First Run Checklist
Charge your robot, update firmware, clear floors and open doors so it can reach every room, then start a mapping run: choose Quick Map for speed or Full Mapping for accuracy.
Watch the live map; pause if it stalls or misses areas. Resolve obstructions before resuming. Save and name the map right away, then add no-go/no-mop zones and tweak boundaries after a trial clean.
Follow the next steps to fine-tune and troubleshoot mapping issues.
Quick Overview
- Fully charge, update firmware, clear floors, and open all doors before starting the initial mapping run.
- Start mapping from the app or control panel and let the robot roam uninterrupted until it returns to dock.
- Monitor the live map for walls, room outlines, and missed areas. Pause if the robot stalls or gets stuck.
- Save and name the completed map immediately (e.g., “Ground Floor”) and verify room segmentation for accuracy.
- Add no-go/no-mop zones after saving. Fine-tune boundaries and remap if persistent gaps or errors appear.
Prepare Your Robot and Home for First-Run Mapping
Ready to map your home? You’ll begin First run mapping by confirming the robot’s battery is full, the firmware’s updated, and the vacuum’s powered on. These steps reduce failures by up to 90% in initial runs.
For efficient Home preparation, clear pathways: remove loose items, cables, and small obstacles. Open doors to every area you want captured. Start the mapping from the app or control panel and let the robot roam freely; its sensors collect layout data best when unobstructed.
Monitor the live map in-app to verify coverage and identify missed zones. Don’t save until the intended space is fully tracked. Prioritize high-traffic rooms first if you need partial coverage; however, aim for a single uninterrupted run to maximize mapping accuracy.
If the app prompts for firmware or recalibration before mapping, complete it. Skipping updates increases re-mapping time. Follow this checklist to make your first-run mapping fast, reliable, and repeatable.
Start Mapping: Quick Map vs Full Mapping
When you want a fast, usable map, choose Quick Map. It builds a cleaning map in about 3–5 minutes without requiring you to clear every room, letting the robot navigate around on-floor items. If you need a more detailed, highly accurate layout for room segmentation or no-go zones, run Full Mapping from a full-house clean. This allows the robot to thoroughly scan each room before returning to the dock to finalize and save the map.
You’ll pick quick mapping when speed and immediate scheduling matter. Choose full mapping when you prioritize accuracy for zones and virtual boundaries. Both use SLAM and sensors, then return to the dock to store the map.
| Option | Time | Best when |
|---|---|---|
| Quick Mapping | 3–5 min | You need a fast usable map |
| Full Mapping | Longer | You want room segmentation |
| Both | Depends | Map saved after dock return |
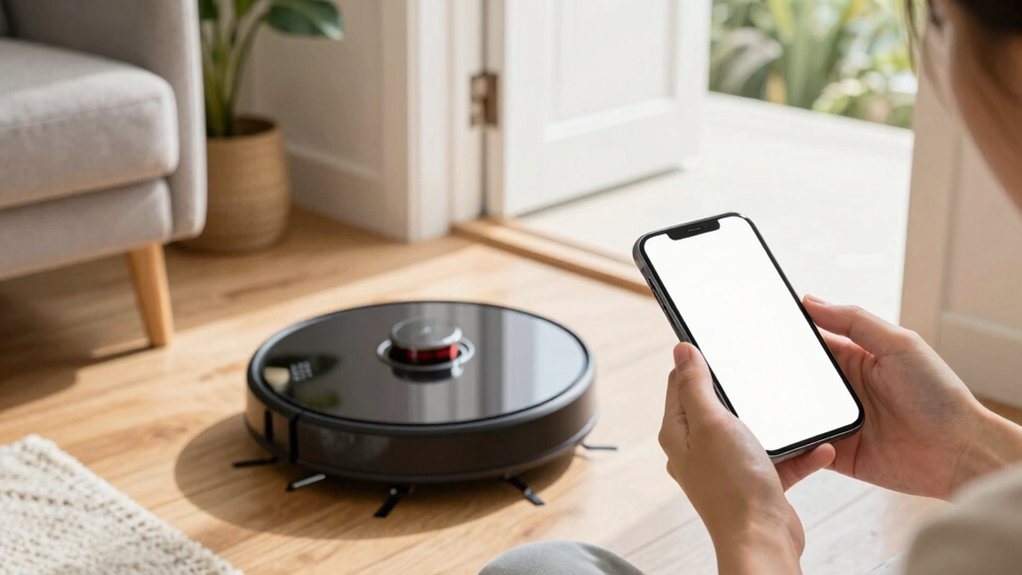
Monitor the Live Map and When to Pause
How’s the live map looking as the robot sweeps your home? Check the app continuously: confirm walls, room outlines, and obstacles render accurately. Prioritize rooms that matter most and use monitoring pauses when the map shows repeated blind spots, missed areas, or misinterpreted keep-out zones.
The app should display real-time progress and spinning sensors; if the feed stops changing, run real-time stall checks immediately. Pause mapping if the robot stalls, gets stuck, or fails to update after you move furniture. When you pause, note where the robot left off and resolve the obstruction: clear cables, adjust rugs, or re-position misplaced barriers—then resume from the same point to preserve continuity.
Use the live view to verify inclusion of all intended rooms and that no-mop or restricted areas aren’t treated as accessible. Data-driven pauses prevent corrupted maps and reduce repeat runs; treat monitoring pauses and stall checks as essential steps in the first mapping run.
Save, Name, and Organize Your First Map
What will you call this map, and where will you store it? That choice matters because a clear, saved map lets your robot run targeted, efficient cleanings without re-scanning. Save the map immediately after the initial run; verify rooms and zones match reality. Name it something descriptive (e.g., Ground Floor). That will make loading and scheduling faster and reduce errors.
Use the app’s manage maps feature to organize maps by level or area. Keep a backup copy and replace or rename maps as layouts change. Before relying on the map for zone cleaning, confirm all intended rooms appear.
| Action | Why it matters |
|---|---|
| Save map | Preserves layout for future runs |
| Name clearly | Distinguishes multiple floors |
| Organize maps | Speeds selection and scheduling |
| Backup copy | Lets you revert after changes |
| Verify rooms | Ensures targeted cleaning accuracy |
Prioritize accuracy: saving, naming, and organizing maps saves time and improves cleaning efficiency.
Configure No-Go and No-Mop Zones
Curious where your robot shouldn’t go or mop? Start by adding no go zoning and no mop zoning after the initial map is created. This protects furniture, pet areas, and carpets during future runs. Prioritize high-risk spots first: fragile décor, pet beds, and rugs. Use rectangular or polygon tools to block entrances or delicate zones. Data shows small, targeted blocks reduce reroutes and missed areas.
Observe the robot’s path on the first few cleans and fine-tune boundaries by millimeters until navigation is smooth. For mixed rooms, apply no mop zoning over carpets or wet zones while keeping vacuuming active elsewhere. Save and reuse the adjusted map so restrictions persist across subsequent cleanings on that floor. This ensures consistency and saves setup time.
Implementing these targeted restrictions improves coverage accuracy and prevents damage. Keep adjustments minimal and iterative: prioritize safety-critical zones; then expand if the robot still struggles.
Troubleshoot Common First-Run Mapping Problems
After you’ve set no-go and no-mop zones, the next step is handling mapping hiccups so your robot actually covers the whole home. Start by verifying the vacuum is powered, docked correctly, and running the latest firmware. Many first run mapping issues trace to outdated software or low power. Use the app’s new-map or full-house mapping option and watch the live map: don’t move the robot manually while it’s exploring.
If areas are missing, run the app’s Remap or zone-adjust tools and re-run mapping; that updates layout data without wiping labeled rooms. Pause mapping if you must; however, avoid interrupting the device for consistent scans. After completion, save the map, name rooms, and reapply no-go zones.
For persistent gaps, document where mapping failed and note any obstacles or reflective surfaces. Consult mapping troubleshooting guides or support with those observations; targeted data speeds resolution and reduces repeated remaps.
Frequently Asked Questions
Can I Map Multiple Floors With One Robot and App Account?
Yes, you can map multiple floors with one robot and app account in many models. You’ll prioritize multi floor mapping by running separate mapping sessions per level; saving maps to the same account.
Check specs: some robots limit saved maps or require manual charging placement. Avoid account sharing if you want exclusive control. However, limited account sharing can let others access maps.
Review storage limits and map-accuracy data before starting.
How Long Does the Saved Map Remain if I Reset the Robot?
If you reset the robot, saved maps usually get erased immediately. However, map retention varies by brand and cloud backup. You’ll lose local maps unless the app stored them in your account first.
Some makers keep maps for months or indefinitely under reset effects if cloud sync’s enabled. Prioritize checking your app’s settings and backup status. Additionally, export or save maps before resetting to avoid permanent data loss.
Will Mapping Work in Homes With Lots of Glass or Mirrored Surfaces?
Yes, mapping can work in homes with lots of glass or mirrored surfaces. However, you’ll face challenges from glass reflections and mirror interference. Prioritize placing the robot where it can get multiple non-reflective reference points. Run mapping in daylight for better sensor contrast and slow the robot’s speed if possible.
Data shows lidar/visual sensors cope better than IR. If problems persist, add temporary coverings or physical landmarks to improve map accuracy.
Yes, you can share maps with family accounts. You’ll grant access via the app’s sharing maps feature, and the system enforces cross device visibility so each authorized account sees the same floorplan and no conflicting edits.
Prioritize granting owner or editor roles based on needs; data shows shared maps reduce setup time and errors. You’ll manage permissions and revoke access anytime, keeping map integrity and privacy under your control.
Does Mapping Collect or Send Any Personal Location Data?
Yes, mapping may collect location-related data, but you control how it’s handled. You’ll want to prioritize data privacy: check settings for map storage options, anonymization, and local vs. cloud saves.
The app usually logs room layouts and coordinates to improve navigation and sharing; however, reputable vendors offer opt-outs, encryption, and limited retention. Review the privacy policy and toggle off cloud sync if you don’t want maps uploaded.
Conclusion
You’ve now set your robot and home up for a smooth first-run mapping: choose the quick or full map based on time and detail. Watch the live map to interrupt when needed, and use clear names plus organized floors or zones.
Configure precise no-go and no-mop areas to protect valuables and floors. If issues arise, follow the troubleshooting steps to resolve common sensor or connectivity problems quickly and get reliable, data-driven cleaning coverage every run.