How to Use a Carpet Cleaning Machine on Area Rugs
You’ll prep the room and rug, vacuum edges, and move furniture so you don’t re-soil cleaned areas. Pre-treat stains and allow dwell time.
Fill the clean tank with hot water and roughly ½ cup Rug Doctor cleaner per gallon; don’t add bleach. Attach tanks and handle, set Carpet mode, and make steady overlapping passes while holding the solution trigger.
Monitor and empty the dirty tank. Finish with rinse-only passes, then air-dry the rug. Continue for full setup and tips.
Quick Overview
- Clear the room, vacuum rugs thoroughly, and move furniture to the perimeter to work from corner to exit.
- Pre-treat stains and high-traffic areas; follow product dwell time before machine passes.
- Fill the clean tank with hot tap water and about ½ cup cleaner per gallon; avoid bleach or dyes.
- Work in steady, overlapping passes with Carpet mode. Apply solution while holding the brush trigger.
- Monitor and empty the dirty tank as needed. Finish with rinse-only passes; then air-dry tanks and store unit.
Quick Start: Rug Doctor Step-by-Step
Want a fast, reliable start? You’ll ensure the master power switch is ON and set the foldable handle for use or carriage. Remove the metal wire to lift the housing. Then fill the clean water reservoir with hot tap water and pre-mixed cleaner (about a half-cup per gallon). The unit holds roughly 1 to 1.5 gallons, so measure accordingly. Replace reservoirs and top after filling to enable proper circulation.
Begin in one corner and work toward the exit. Activate carpet mode by pressing and holding the brush/trigger while you move. Monitor the dirty water tank; you’ll see solution visibly lift into the clear top window as soil accumulates. Empty the dirty tank when full, then resume. Treat this as a focused, two word idea for setup and operation, not an unrelated topic about storage.
These steps give you a concise, technical workflow for immediate, reliable rug cleaning.
Prep Rugs and Room for Cleaning
Before you start, clear the room and vacuum the rug thoroughly so you can access edges and remove loose soil. Move furniture out or to the room’s perimeter to avoid re-soiling and to allow unimpeded machine passes.
Begin systematic pre cleaning by removing loose debris with a vacuum. This improves extraction efficiency and prevents circulation of grit into the machine. Inspect for high-traffic areas and stains. Perform targeted stain prep using the Rug Doctor pre-treatment spray on ground-in dirt, pet urine, or set-in spots. Allow dwell time per product instructions to break down soils.
Prepare solution separately: fill the clean water reservoir with hot tap water and add approximately a half-cup of cleaner per gallon, keeping total volume near one to 1.5 gallons. Power on the unit’s master switch and plan your route. Start in a corner and work toward the exit to avoid stepping on cleaned surfaces. This setup maximizes coverage and machine performance.
Assemble Rug Doctor Tanks and Handle
How do you quickly and correctly set up the Rug Doctor tanks and handle? Remove the metal wire latch to lift the housing for access to the assembly tanks. Lift straight up to expose the clean and dirty reservoirs. The clean water tank sits below and feeds the machine with fresh water, while the dirty water tank collects all used cleaning solution during operation.
Fill the clean tank per manufacturer’s directions (see next section). Then position both reservoirs back into their mounting points. Ensure each tank seats fully and the housing lowers without resistance. After filling, confirm both reservoirs are correctly placed back over the top before use. Snap the metal wire latch back to secure the housing.
Install the handle assembly by aligning its base with the machine’s slot and locking it into place. The handle should move smoothly and latch securely. Check the clear window on top; during operation you’ll use it to monitor dirt being lifted into the dirty water tank.
Mix Rug Doctor Soap and Fill
Ready to mix and fill, you’ll prepare the clean water tank with hot tap water and add Rug Doctor soap at the recommended ratio: about a half-cup of cleaner per gallon directly into the tank. Do not use bleach, dyes, or any other additives. You’ll follow the unit’s fill-and-go method: perform mixing soap into the reservoir before you attach it. Measure accurately to avoid excess suds or residue.
When filling water, keep the clean water tank on a stable surface and pour to the marked fill line. Verify the dirty water tank is empty and seated correctly before you replace the clean tank on the machine. The unit won’t operate if tanks aren’t aligned. Tighten lids and caps to prevent leaks during use.
Use hot tap water for optimal detergent activation, but don’t exceed temperature limits in the manual. After filling water and mixing soap, check for proper seals and a secure connection so the machine will deliver solution consistently as you proceed with cleaning.
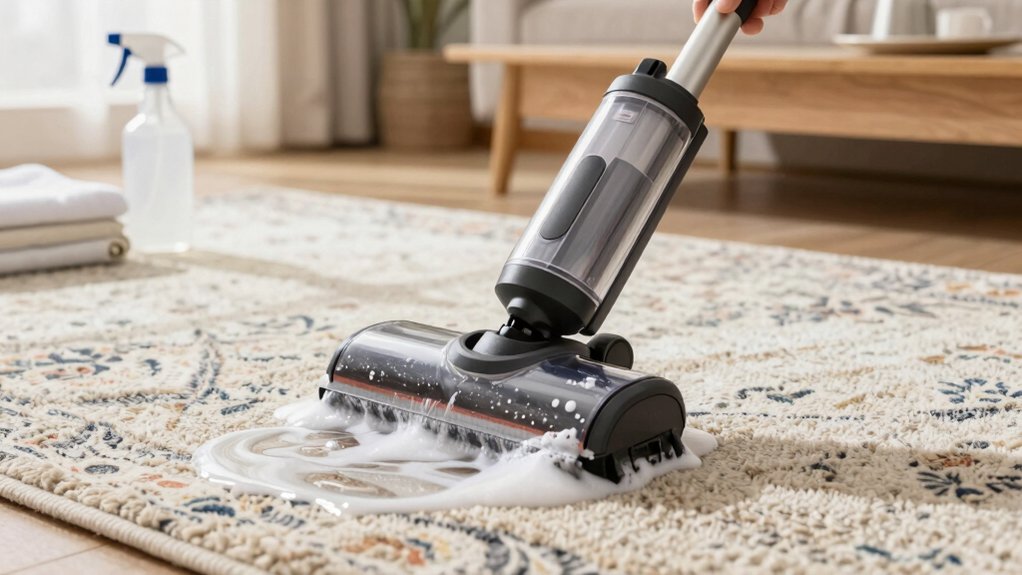
Clean the Rug: Technique and Path
Begin at a corner and work toward the exit so you never walk across cleaned areas. Set the machine to Carpet mode (top button) and press-and-hold the brush/trigger to apply solution continuously as you push. Maintain steady, overlapping passes for complete coverage and maximum extraction.
For this technique overview, plan your path before you start: identify the exit, mark straight lanes across the rug, and choose a logical turning point to minimize cross-traffic. Keep a firm, even pace and overlap each pass by about 30–50% so the brush picks up loosened soil and the vacuum extracts it efficiently. Use pre-treatment spray on concentrated spots or pet areas; agitate if needed. Then include those zones in your initial passes.
Watch the clear top window to confirm solution flow and visible soil transferring to the dirty tank. Adjust speed if extraction looks weak. Finish with one or two rinse-only passes without solution to reduce residue and promote faster drying.
Monitor Tanks, Refill, and Empty
Once you’ve completed your passes, keep an eye on the tanks and refill or empty them as needed to maintain suction and cleaning performance. You’ll monitor tanks continuously: the clean water reservoir feeds the pump and the dirty water tank collects used solution. Remove the metal wire to lift the housing for access. Then refill the clean tank and reseat both tanks firmly over the top.
| Indicator | Action |
|---|---|
| Clear window shows turbidity | Empty tanks when full of solution |
| Clean tank low | Refill before loss of suction |
| Frequent refills | Monitor tanks per room size |
Empty tanks promptly to prevent overflow and loss of suction. The dirty tank stores all used solution, so dump it into a sink or drain. Expect to refill multiple times per room depending on rug size and soil load. After refilling, ensure tanks are correctly placed to restore vacuum and solution flow.
Monitor tanks. Refill and empty tanks methodically for consistent cleaning performance.
Dry Rugs, Clean Tanks, and Store
Before you put the machine away, make sure rugs are fully dry and both the clean and dirty water tanks are emptied and dried to prevent musty odors and mold growth.
After cleaning, lift the tank housing by removing the metal wire. Inspect the dirty water tank to confirm it’s seated correctly; improper placement can spill used solution and slow drying.
Empty both tanks, rinse with plain water, and air-dry them separately. Never mix bleach or dyes, and use only Rug Doctor soap to avoid residue buildup.
Reattach reservoirs with the clear window visible so you can see dirt being lifted into the dirty water tank during future use. Fold the adjustable handle, switch the master power OFF, and store the unit in a cool, dry place with clean tanks secured in position.
Regularly following this routine ensures dry rugs, prevents mold, and preserves tank components and suction performance.
Frequently Asked Questions
Can I Use the Machine on Wool or Delicate Rugs?
Yes, you can, but cautiously. You’ll check wool safeties and label instructions first. Delicate fibers need low-moisture, low-heat methods. Use a gentle upholstery or rug attachment, reduced suction, and a pH-neutral, wool-safe detergent.
Test a hidden area for colorfastness and pile reaction. Don’t overwet; blot excess moisture and allow rapid airflow to dry. If unsure, consult a professional who specializes in wool and delicate-fiber care.
Will the Machine Damage Fringe or Tassels?
Yes, if you’re careless, a machine can damage fringe or tassels. Use fringe protection and delicate handling: switch to low suction, detach power brushes, and shield tassels with mesh or tape before cleaning.
Work outward from the rug body; avoid mechanical scrubbing on edges, and finish with gentle blotting. Test a hidden fringe section first. Stop immediately if fibers loosen or fray to prevent irreversible damage.
Can I Add My Own Cleaning Solution Instead of Rug Doctor Soap?
Yes, you can use your own cleaning solution, but you must follow manufacturer guidelines to avoid disallowed methods that harm the machine or rug. Use alternative cleaners formulated for extractors, pH-balanced, and low-foaming.
Avoid oils, bleach, undiluted detergents, or thick carpet shampoos. Test a small area for colorfastness, dilute per directions, and flush the machine afterward to prevent residue and mechanical issues.
How Long Before Walking on a Rug After Cleaning?
You should wait until the rug’s drying time finishes and the fibers feel completely dry to the touch. This typically takes 6–24 hours depending on fiber, humidity, and ventilation. For safety precautions, keep traffic off, place fans or dehumidifiers to accelerate drying, and avoid heat sources that can warp backing.
Test a corner before replacing furniture. If any dampness remains, delay use to prevent mold, odors, or fiber damage.
Is Professional Cleaning Ever Required Instead of DIY?
Yes, you’ll need professional cleaning when stains, odors, or fiber damage exceed DIY capabilities. Professionals use specialized equipment and chemical treatments that restore pile, remove embedded soils, and address pet or mold issues safely.
Evaluate the cost benefit: a higher upfront cost can prevent replacement and preserve warranty, saving money long-term. Choose pros for antique, silk, or heavily soiled rugs where DIY risks further harm.
Conclusion
You’ve prepped the room and rugs, assembled the Rug Doctor, mixed solution correctly, and cleaned using controlled, overlapping passes while watching the tanks. Keep an eye on solution and recovery levels; refill or empty as needed. Then finish with slow, low-moisture passes to extract as much water as possible.
Hang or elevate rugs to dry completely. Then rinse, clean, and dry the tanks before storing the machine. Follow manufacturer care for reliable future performance.