How to Clean Floors After Renovation Dust
You’ll start by vacuuming loose grit with a bag-equipped shop vac.
Then roll up construction paper and contain debris before wet cleaning.
Dust top-to-bottom with reusable microfiber tools, vacuuming them between areas.
Clean cabinets and drawers first.
Then wipe windows, shutters, and baseboards.
Use a Dupra or similar steam cleaner on tile; use the lowest safe steam on wood or laminate.
Let floors dry and finish with a final vacuum.
Keep going for step-by-step tips and tool choices.
Quick Overview
- Vacuum floors thoroughly with a bag-equipped shop vac before any wet cleaning to remove loose grit and bulk debris.
- Contain and remove settled dust by rolling up construction paper, vacuuming immediately after demolition, and repeating as needed.
- Use a reusable microfiber duster for corners and fixtures, vacuuming the duster between areas to avoid transferring dust.
- Steam-clean tiles or hard floors after vacuuming. Use the correct steam setting and let floors dry completely.
- Wipe baseboards, cabinets, and windows top-to-bottom with microfiber towels. Vacuum interiors first to prevent resettling dust.
Quick Cleanup Checklist for Post‑Renovation Spaces
Ready to get the dust under control? Start by vacuuming floors with a shop vac (use a bag if possible) to remove loose grit before any damp cleaning. This prevents spreading dust while you work. Roll and lift construction paper as you move through the room; this contains debris and minimizes disturbance.
Next, dust surfaces with a microfiber extendable duster. Between areas, vacuum the duster itself with the shop vac so you’re not redistributing particles. After thorough dry cleaning, steam clean floors to lift remaining residues and reveal a spotless surface. A water-filled Dupra steam cleaner on wheels works efficiently for this step.
Finally, wipe baseboards and corners after vacuuming and steam cleaning to catch fine dust left along edges. This checklist keeps post renovation dust management systematic: dry vacuum, contain debris, refresh dusting tools, steam clean, then detail baseboards for a complete, methodical finish.
Prep & Vacuum Strategy: When to Use a Shop‑Vac (Before, During, After)
You’ve already removed most loose grit and steamed where needed. Now focus on when to run the shop‑vac to keep dust from spreading and re‑settling. Your prep strategy begins with an immediate, bag-equipped shop‑vac pass after demolition to capture the bulk of airborne and settled debris. That vacuum timing reduces tracking and makes disposal cleaner.
| Stage | Purpose | Bag? |
|---|---|---|
| Before cleaning | Remove loose dust, prevent stepping on grit | Yes |
| During work | Capture dust after scrubbing/grinding | Optional |
| After cleaning | Pick up residual dust post-mop/steam | Optional/Yes |
Run a quick pre-clean vacuum as soon as possible. Repeat after heavy scrubbing or grinding to pick up loosened particles. Finish with a final pass once floors are dry to ensure no dust remains. Use a bag for initial and final passes to contain fine dust. During intermediate work, you can switch to inline filtration if frequent empties are needed.
Post‑Renovation Dusting Tools and Managing Reusable Dusters
When you’re tackling post‑renovation dust, reach for a sturdy, reusable microfiber duster, like the Oxo extendable model, to get into high corners, light fixtures, and other hard‑to‑reach spots without constantly replacing heads. Use reusable dusting tools rather than disposables to cut waste and ongoing costs while cleaning walls, ceilings, and fixtures.
Work methodically: clear one zone, dust top‑to‑bottom, then move on. After each pass, quickly vacuum the duster with a shop vac so you don’t transfer dust to the next area. Shake lightly between uses to dislodge coarse particles; then follow with the shop vac for embedded dust.
Reuse the same duster across rooms, but keep it clean by alternating shaking and vacuuming. This preserves electrostatic pickup and extends life. Pair your reusable duster with a vacuum‑assisted approach to maintain a cleaner work environment, reduce airborne dust, and ensure the tools stay effective throughout the post renovation cleanup.
Bathroom Cleaning Steps: Walls, Shower Glass, Tub, and Fixtures
How should you tackle the bathroom after dusting the rest of the room? Start by dusting walls as you move toward the bathtub, using a microfiber duster to pick up settled dust before any wet cleaning. This is key for efficient bathroom cleaning and effective post renovation dusting removal.
Next, focus the shower: spray a multipurpose cleaner like Mean Green on wet surfaces, scrub with an electric scrubber to lift grime, then switch to a soft brush for the shower glass door to avoid scratches. Keep the shower floor damp and continue scrubbing with the electric scrubber to remove embedded dirt.
After cleaning glass and walls, dry them with clean, dry microfiber towels to prevent water spots and recontamination. Finish fixtures and the tub by wiping with a towel and cleaner, rinsing as needed.
Avoid skipping vacuuming inside cabinets and drawers first; this ensures any loosened dust doesn’t resettle on freshly cleaned surfaces.
Wipe Cabinets, Drawers, Windows, and Baseboards the Right Way
Ready to finish the job? Start by using dusting techniques that prevent redistribution: run a microfiber duster over cabinet faces and drawer fronts to lift settled dust. Then, vacuum the duster exterior so you can reuse it without spreading particles. Next, open cabinets and drawers and vacuum inside with a shop vac. Follow with a towel and cleaner to remove fine residue.
Wipe windows with spray glass cleaner and microfiber towels for streak-free results. Dry glass before closing frames. Clean shutters and surrounding trim before moving to tub or fixtures to avoid blowing dust onto cleaned areas.
Dust and wipe baseboards last, working top to bottom to catch falling dust and prevent re-dusting surfaces you have already cleaned.
Focus on order: cabinets/drawers, windows/trim, baseboards. This sequence supports effective dust management and keeps sanding grit from returning to floors. Work methodically, use proper tools, and discard or clean towels between tasks.
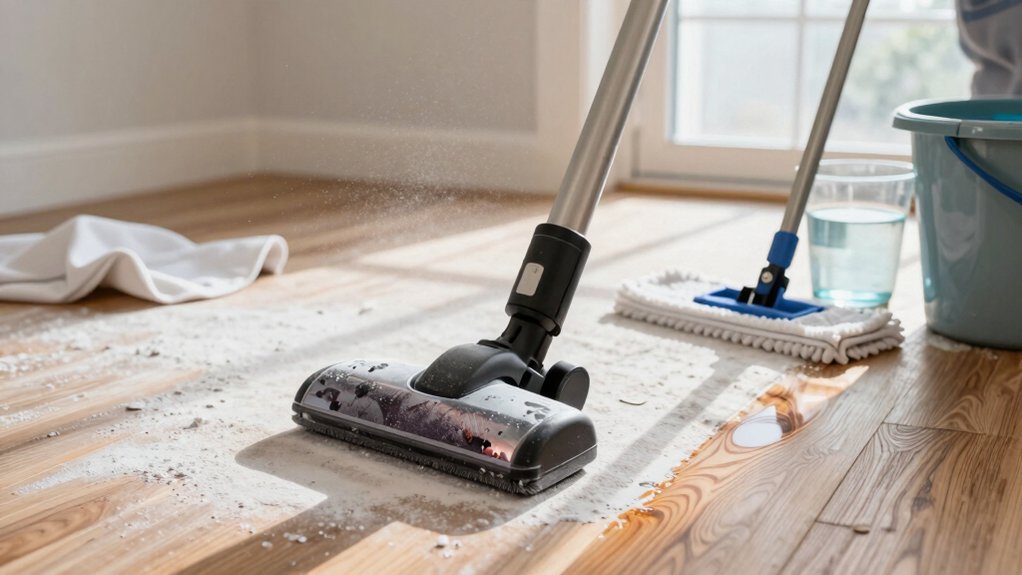
Steam‑Clean Floors to Finish: Tips for Tile, Hardwood, and Laminate
Want a truly dust-free finish? Vacuum thoroughly first to remove loose debris. Then use steam cleaning to lift fine dust from grout lines and between floorboards that vacuums miss. For tile, choose a Dupra steam cleaner with a filled tank and four wheels so steam spreads evenly. Move at a steady pace to avoid concentrating heat in one spot.
On hardwood and laminate, prioritize moisture control and reduced heat. Set the steam to the lowest effective level and test a small, inconspicuous area first. Keep the cleaner moving; don’t hover over seams or edges to prevent warping or delamination.
Work methodically across the room in overlapping passes. Then let floors dry completely. When surfaces feel just damp, wipe any remaining wet spots with a microfiber towel to prevent water spots on tile and protect wooden joints. Final inspection should reveal lifted dust and even dryness before returning furniture to the room.
Frequently Asked Questions
Can I Use Household Vacuum Instead of a Shop‑Vac for Renovation Dust?
You can, but you shouldn’t for heavy renovation dust. You’ll risk clogging household filters and spreading fine particles. A shop‑vac with HEPA or specialized filters handles dust containment and offers better vacuum safety.
If you must use a home vacuum, replace filters promptly, empty outside, wear a mask, and pre‑dampen surfaces or sweep coarser debris first. Prioritize equipment rated for fine dust to protect your vacuum and indoor air quality.
How Long After Renovation Should I Wait to Wet Clean Floors?
You can usually start wet cleaning 24–72 hours after renovation, depending on dust level and humidity. After renovation, inspect surfaces: if dust settles and coatings or paint smell are gone, it is safer to proceed.
For heavy dust or new paint, wait 48–72 hours. Use tack cloths and dry vacuum first. Then mop with mild detergent and minimal water. Timing ensures debris is removed and moisture will not trap dust or harm finishes.
Are There Safe Cleaners for Finished Hardwood After Heavy Dusting?
Yes, there are safe cleaners for finished hardwood you can use after heavy dusting. Pick pH-neutral, non-abrasive cleaners labeled safe for hardwood; dilute per instructions and test a hidden spot first. Sweep or vacuum thoroughly. Then mop with a well-wrung microfiber mop to avoid excess water.
Wipe spills promptly and avoid oil soaps or ammonia. Follow manufacturer care recommendations to preserve finish and prevent damage.
How Do I Remove Paint or Plaster Splatter From Floors?
You remove paint splatter removal and plaster splatter removal by softening the spots, scraping gently, and cleaning residue.
For fresh water-based paint, dampen, blot, then peel with a plastic scraper. For dried paint or plaster, score lightly, apply appropriate solvent: water for latex, mineral spirits for oil; warm water for plaster. Wait, then scrape with a plastic or wooden tool.
Finish by wiping with a damp microfiber cloth and drying promptly to protect the floor.
Should I Change Hvac/Air Filters After Cleaning Renovation Dust?
Yes, you should change HVAC/air filters after cleaning renovation dust. You’ll restore HVAC filtration efficiency, prevent dust recirculation, and improve air quality immediately.
First, inspect filters for visible dust. Second, replace disposable filters or clean permanent filters per manufacturer instructions. Third, vacuum around returns and check the system a week later.
Keep records of replacement dates and consider higher-MERV filters if renovations stirred heavy particulate.
Conclusion
Post-renovation cleanup isn’t magic; it’s method. Start with a clear plan. Tackle coarse debris with a shop-vac. Then move to systematic dusting from top to bottom, wiping cabinets, windows, and baseboards in overlapping strokes.
Clean bathrooms thoroughly. Rinse away residue. Finish floors with the right steam or mop method for tile, hardwood, or laminate. Take your time; reuse and maintain tools properly. You’ll restore a healthy, polished home ready to enjoy.