Avoidance Zones and No-Go Zones Setup Guide
You’ll open the Roborock app, select your robot, then tap Edit Map to place No‑Go Zones and Invisible Walls to protect hazards and restricted areas.
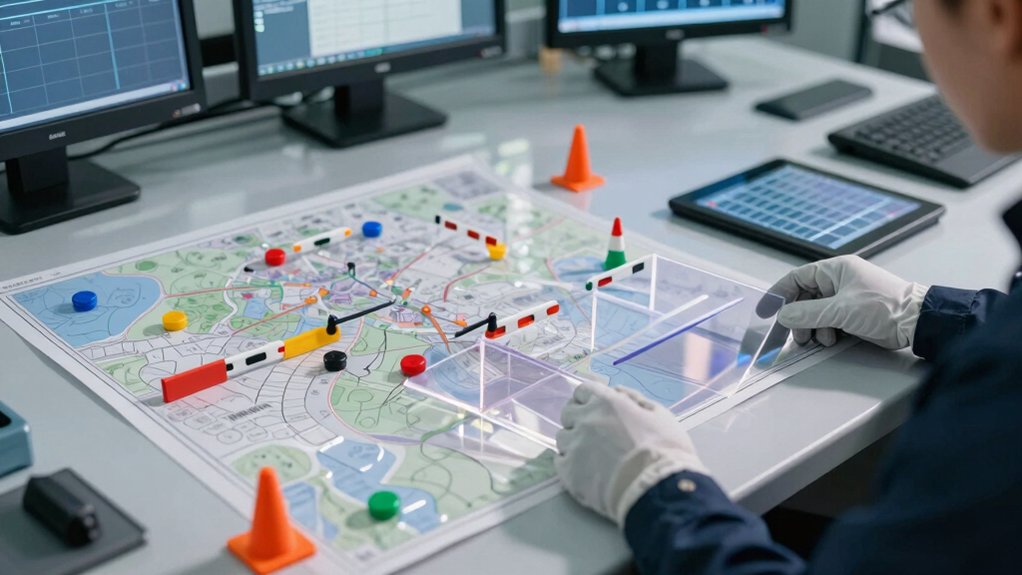
Draw rectangular No‑Go Zones with the plus sign, resize to fully cover the area, then switch to Invisible Walls to draw and rotate line barriers for doorways and narrow passages.
Save and visually verify alignment. Then run a short test pass to confirm enforcement; keep going to learn detailed tips and fixes.
Quick Overview
- Open the Roborock app, select your robot, and tap the map edit icon to access avoidance tools.
- Add No-Go Zones by tapping the plus next to No-Go Zone, dragging a rectangle, resizing, and confirming with the check mark.
- Create Invisible Walls by switching tools, tapping the plus, drawing and rotating a line to block doorways or narrow passages.
- Verify zones render as shaded rectangles and invisible walls as restricted lines. Then, save and reopen the map to confirm persistence.
- Fine-tune alignment; avoid unintentional overlaps. Relink the robot if save or connectivity issues prevent updates.
Quick Answer: Set Robo Rock Invisible Walls & No‑Go Zones
Want a quick, reliable way to keep your RoboRock out of trouble? Open the Robo Rock app, select your connected robovac, and tap the edit map feature in the upper-right corner to begin configuring zones. Choose Noo Zone to define No Go zones; tap the plus sign next to Noo Zone, drag and resize the rectangular area to cover the intended region, and confirm with the check mark.
For precise barriers, use Invisible walls: select the invisible wall option, tap the plus icon, and draw lines where you need precautionary separation. After you finish edits, return to the map view and verify that invisible walls render as restricted lines and No Go zones appear as restricted rectangles. Use invisible walls for small, targeted exclusions and No Go zones for larger off-limit areas.
Revisit and adjust boundaries as needed to maintain compliance with safety and operational standards. This will help minimize collision and trapped-state risks.
Set Robo Rock Invisible Walls (Draw Doorways and Barriers)
Now that you’ve placed No-Go Zones, switch to Invisible Walls to draw narrow barriers for doorways and tight passages. Open the Roborock app, choose your connected robovac, tap the upper-right edit map, and pick Noo Zone to access wall and zone tools. Select invisible walls, tap the plus icon, then draw and rotate the line to match the doorway or gap you need to block.
- Position the invisible wall along a precautionary path where access must be restricted; adjust length and orientation to eliminate accidental entry.
- Confirm placement so the app renders the invisible wall as a restricted line; keep it precise and avoid overlapping no go zones that could confuse navigation.
Save and review edits in the map view. Verify invisible walls appear correctly and that no-go zones remain intact before running the robot.
Follow this standards-driven process to minimize collision risk and ensure consistent map-based restrictions.
Add Robo Rock No‑Go Zones (Create and Size Rectangles)
How should you block off a specific area on your Roborock map? Tap the plus sign next to No‑Go Zone in the map editing screen. Then create a rectangle and drag to position it. Resize the rectangle to align precisely with the target region; this minimizes risk of accidental coverage or missed exclusion.
Ensure the rectangle fully encompasses the intended no‑go area before saving. Partial coverage is noncompliant with your exclusion intent.
| Step | Action | Verification |
|---|---|---|
| 1 | Tap “+” next to No‑Go Zone | Map shows editable rectangle |
| 2 | Drag to position | Rectangle matches layout edges |
| 3 | Resize and save | Check mark confirms change |
Review boundaries against the map layout to verify accuracy against user preferences and safety standards. Avoid treating this as an unrelated topic; record changes and use the check mark to save the zone so the robot will reliably respect the defined exclusion area.
Save and Verify Edits (Confirm Walls and Zones Take Effect)
After you finish placing walls and No‑Go Zones, return to the main map view and confirm every edit is rendered correctly: invisible walls should appear as restricted lines and No‑Go Zones as shaded rectangles, all precisely aligned with the physical layout.
You’ll perform a disciplined edit review and map verification before saving to prevent navigation failures or missed exclusions. Follow these steps to validate and lock changes:
- Visually inspect each boundary for alignment with doorways, furniture, and hazards; correct misplacements immediately.
- Save edits, then reopen the map to verify persistence; unchanged or missing restrictions indicate save errors.
- Run a short test pass or simulation (if available) to confirm the robot respects restricted lines and shaded rectangles.
Document any deviations, note timestamps, and repeat edits until map verification is consistent across sessions. This standards-driven, risk-focused workflow ensures your Robovac won’t enter hazardous or sensitive areas. It also reduces repeat troubleshooting.
Fine‑Tune & Combine Zones for Tailored Cleaning Paths
With your edits saved and verified, refine and combine No‑Go Zones and invisible walls to shape exact cleaning paths that keep the robot out of fragile or high‑traffic areas. You’ll add rectangular No‑Go Zones and linear invisible walls to define exclusions; drag edges and corners for precise edge alignment with furniture and thresholds.
Rotate invisible walls and adjust length to follow narrow passages. Confirm rotation correctness visually and by checking coordinates if available. Layer zones sequentially so exclusions don’t unintentionally block required cleaning corridors; use non‑overlap unless you intend an absolute exclusion.
After edits, review the map view to ensure each No‑Go Zone is bounded and every invisible wall is Linien‑straight and anchored to its intended location. Save, then re‑open the map to verify combined zones render correctly before initiating a cycle. If rendering differs, correct edge alignment or rotation and re‑save.
Maintain this verify‑edit‑save routine as a standards‑driven control to mitigate missed exclusions or operational risks.
Fix Map‑Editing & Connection Issues (Common Problems and Solutions)
Trouble connecting or saving map edits? You must treat connection and save failures as hazards to map integrity and user experience. Do not ignore “unrelated topic” errors that may mask a linking fault. Follow these decisive steps to resolve common issues.
- Ensure the Robovac is linked to the Robo Rock app before opening map editing. If the link fails, revisit the linking setup guide and confirm the device stays online.
- If the edit map option is missing, re-launch the app or reconnect the Robovac. Then re-tap the connected device to reveal No-Go Zone and editing tools.
- When saves fail or maps won’t render, verify app permissions and a stable internet connection. Then tap the check mark to confirm changes. If invisible walls do not display as lines or No-Go Zones as filled rectangles, close and reopen the map view.
Address these points methodically to minimize risk. Validate edits and restore reliable map editing for a consistent user experience.
Frequently Asked Questions
Can I Schedule Zone-Specific Cleanings on Different Days?
Yes, you can schedule zone-specific cleanings on different days. You’ll set up Scheduling zones, assign Day specific cleanings, and enforce Cleaning schedules to meet standards.
The system will send Zone reminders before each run so you can confirm access and remove hazards. You’ll monitor compliance, adjust times to reduce overlap risk, and log results for auditability.
Follow protocol to maintain consistent coverage and minimize safety or performance incidents.
Do Invisible Walls Affect Virtual Wall Accessories?
Yes, invisible walls don’t interfere with virtual accessories; they operate separately. You’ll rely on device firmware and standards to enforce each barrier, so conflict risks are low if you follow manufacturer specs.
Still, verify priority rules in your app: virtual accessories may be overridden by system-level invisible walls, or vice versa, depending on updates.
Test configurations after changes, document settings, and apply vendor-recommended safety tolerances to avoid coverage gaps.
Can Multiple Users Edit the Same Map Concurrently?
Yes, you can perform shared editing. The system supports concurrent collaboration but enforces strict controls. You will see real-time updates; however, conflicts can occur if edits overlap.
You will need to follow locking and versioning standards: claim edit locks for critical regions, commit changes promptly, and resolve merge conflicts per protocol. Audit logs capture who changed what and when. Treat simultaneous edits as a risk to manage, not an automatic fail-safe.
How Do Firmware Updates Change Zone Behavior?
Firmware updates change zone behavior by altering firmware behavior and zone dynamics through rule, timing, or sensor-processing changes. You’ll see modified exclusion timing, tightened safety thresholds, or altered reconfirmation intervals that affect risk exposure.
You must validate updates against standards, run controlled tests, and log deviations. If updates change action priorities or boundary calculations, revert or apply mitigations until compliance and predictable, safe zone dynamics are restored.
Will Zones Transfer if I Reset and Remap My Home?
Yes, zones usually won’t transfer automatically after a reset. You’ll need to remap and recreate them. Different map transfer methods vary by device and cloud policy; so verify whether your model supports importing saved maps or only fresh scans.
Reset consequences include loss of custom zones, schedules, and linked maps. To mitigate risk, back up maps where supported, document zone coordinates, and follow manufacturer standards for export/import before resetting.
Conclusion
You’ve now set invisible walls and no-go rectangles to keep your RoboRock out of risky areas. Verify each edit on the app and save the map so boundaries persist across runs and reboots.
Test with a short cleaning cycle to confirm the robot respects barriers. If it crosses them, re-open map editing and correct placement or restart the device per troubleshooting guidance.
Maintain clear, correctly sized zones to minimize collision, damage, or missed-coverage risks.