Auto-Empty Dock Maintenance and Cleaning Steps
Empty the dock dustbin regularly and inspect the inlet, gasket surfaces, and removable filter for compacted debris. Remove and clean the filter per the manual. Wash accessible plastic parts with mild detergent, rinse thoroughly, and dry completely to avoid moisture-related clogs.
Verify seals, latches, sensors, IR window, and charging contacts are clean and aligned. Run a brief pad-wash or empty cycle to confirm no leaks and correct seating. Continue for step-by-step checks, diagnostics, and troubleshooting guidance.
Quick Overview
- Remove the dustbin assembly, empty debris, and inspect inlet, chamber walls, and gasket surfaces for residue or damage.
- Wash accessible plastic parts and removable filters with mild detergent, rinse thoroughly, and fully air-dry before reassembly.
- Reinstall the dry filter and internal panels, aligning tabs and latches so the dustbin seats and latches securely.
- Daily: Check debris bag status, empty dustbin when full indicators appear, and wipe IR window, docking target, and charging contacts.
- Weekly: Inspect dustbin area and outer sensors for clogs; clean tanks and pads. Run a pad-wash cycle and verify no leaks.
Empty And Clean The Auto-Empty Dock Dustbin
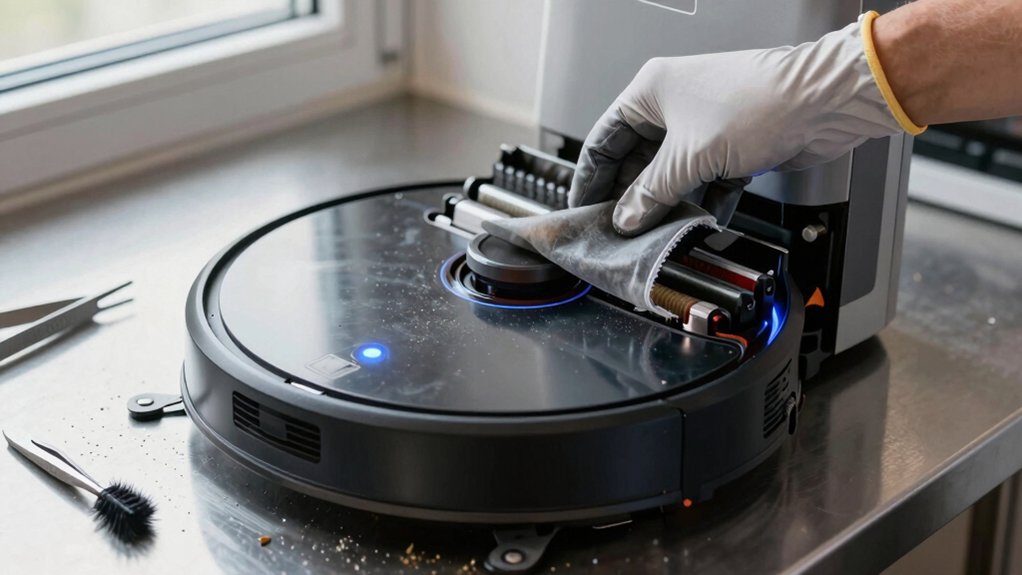
How should you handle the Auto-Empty Dock dustbin? You’ll open the dock following model-specific guidance; dustbin anatomy diagrams help. Remove the dustbin assembly and empty debris into a trash receptacle. Then inspect components: inlet, chamber walls, gasket surfaces, and the removable filter.
Remove the filter for separate cleaning per manual instructions. Wash accessible plastic parts with mild detergent; rinse thoroughly and dry completely. Moisture compromises seal integrity and can cause leaks during emptying cycles. Verify all ports and crevices are free of compacted debris before reassembly.
Reinstall the dry filter and any internal panels; align tabs and latches so the dustbin seats fully. Confirm gasket and lid surfaces show no distortion or residue that would reduce seal integrity. After reassembly, perform a visual check of engagement points and consult your model’s Onyx or S8 Pro Ultra CE manual for any torque or latch specifications before returning the dock to service.
Daily And Weekly Checks To Prevent Clogs
Why check the dock daily and weekly? You’ll prevent clogs that compromise design durability and reduce service calls.
Daily: Verify the Debris Bag status and assure the Debris Bag Drawer closes fully to maintain a proper seal. Empty the Dustbin when indicators show full or drawer resistance. Wipe the IR Window, Visual Docking Target, and charging contacts with a clean dry cloth to prevent sensing issues.
Weekly: Inspect and clean the Dustbin area; remove visible clogs; and confirm outer sensors are free of debris. Use the app to monitor dock performance, run diagnostic emptying checks, and act on alerts indicating potential clogs. If the Debris Bag Drawer reports clogging or the bag is full, replace the bag immediately.
Log observations and any interventions as user feedback to inform future maintenance intervals and validate design durability. Follow this systematic cadence to maintain emptying effectiveness and minimize unexpected failures.
Clean Tanks, Pad Washer & Filters
Alongside daily and weekly dock checks, you should regularly clean the clean and dirty tanks, pad washer, and filters to maintain fluid flow and prevent residue buildup. Open each tank using the pull tab, lift the latch, and rinse with warm water. Use mild soap and a sponge for stubborn debris. Then refill the clean tanks with fresh water and leave the dirty tank empty. Reinstall both tanks and confirm latches are fully closed.
Remove the pad washing roller and pad washing filter for inspection and cleaning. Wash the roller and filter under warm water; dry both completely before reinstalling. Wipe the pad washing basin and drainage port with a clean, dry cloth to remove trapped particles. Clean the liquid overflow basin with mild soap if residue is present; rinse and dry thoroughly.
Reassemble components securely and run a brief pad washing cycle to verify there are no leaks or drips before resuming operations.
Inspect Charging Contacts, IR Window, And Dock Seals
Before cleaning, power down the unit and press and hold the wheel switches to expose the charging contacts so you can access all contact points, the IR window, and the visual docking target. Inspect each for dust, grease, or residue that could impede electrical connection or optical alignment. You are inspecting charging and the IR window systematically: check contacts for corrosion, verify IR window clarity, and perform a dock seals inspection for debris that could prevent a tight seal.
| Component | Checkpoint |
|---|---|
| Charging contacts | Surface cleanliness, corrosion |
| IR window | Scratch-free, no film |
| Visual docking target | Alignment, obscuration |
| Dock seals | Compression, debris |
Use a clean, dry cloth; never spray liquids. Wipe contacts, the IR window, and seals. Verify blades and seal channels are clear. Allow all parts to dry fully before reinstalling to preserve electrical and optical function. If alignment or contact issues persist after cleaning, prepare notes for technical support.
Troubleshoot Poor Emptying And When To Contact Support
Now that you’ve inspected and cleaned the charging contacts, IR window, and dock seals, check emptying performance methodically: confirm the debris bag drawer is fully closed and the bag is seated correctly to prevent air leaks. Inspect the dustbin area and cleaning ports for obstructions or buildup that could impede suction. Review any Auto-Empty Dock error messages in the iRobot Home app, noting codes or descriptions.
If emptying issues persist, follow targeted troubleshooting steps and consult the dedicated troubleshooting article for suction and bag management guidance. Verify mechanical seating, clear visible blockages, and run a manual empty cycle while observing airflow and noise. Record any app error codes before escalation.
- Confirm debris bag drawer latches and bag orientation
- Inspect and clear dustbin rim, chute, and cleaning ports
- Run a manual empty cycle and observe suction and audible cues
- Cross-reference app error codes with troubleshooting steps
- Contact Roborock Support Center with model, serial, and observed behavior for repair guidance
Frequently Asked Questions
Can I Use Household Cleaners on the Dock’s Plastic Surfaces?
Yes, you can use some household cleaners, but you’ll check material compatibility first. You’ll choose mild, nonabrasive formulas; avoid solvents, ammonia, or bleach that can damage plastics.
For powered handling areas, disconnect power and avoid saturating electronics. Test cleaners on an inconspicuous spot, wipe with a soft cloth, then rinse and dry thoroughly. This systematic approach ensures cleaning is effective while protecting surfaces and mechanical components.
How Often Should I Replace the Dock’s Gaskets and Seals?
You should replace the dock’s gaskets and seals on a scheduled basis. Gasket longevity typically ranges 12–24 months under normal use; so set a seal replacement interval at 12 months for inspection and 24 months for proactive replacement. Inspect sooner if you see wear, cracking, or leaks.
Document findings; torque fasteners to spec, and use OEM parts. Maintain a log to adjust the gasket longevity estimate based on real-world conditions.
Is It Safe to Vacuum the Dock Inlet With a Handheld Vacuum?
Yes, it’s safe if you follow precautions. You should verify vacuum safety ratings, use a handheld vacuuming tool with low suction and a soft brush attachment, and ensure power is disconnected.
Avoid metal probes, moisture, and dislodging sensors or seals. Inspect inlet after cleaning for debris and damage. Log the procedure, wear PPE, and perform a functional test before returning the dock to service to confirm no faults remain.
Can Pets or Children Damage the Dock’s Sensors?
Yes, pets or children can damage the dock’s sensors if they tamper with or obstruct them. You should inspect sensor surfaces regularly. Keep curious pets and kids away during docking and secure loose parts.
For pet safety, avoid spraying cleaners directly on sensors and use only approved, noncorrosive wipes. If sensors misalign or fail, recalibrate per manufacturer instructions or contact support to prevent erratic docking. This ensures reliable operation.
Will Firmware Updates Affect Docking and Emptying Performance?
Yes, firmware updates can affect docking and emptying performance. You’ll see firmware implications in timing, motor control, sensor calibration, and error-handling routines. You should apply updates that resolve known bugs or improve algorithms; however, test docks afterward: verify docking alignment, suction/empty cycles, and sensor responses.
If you notice regressions, rollback or report logs to support. Maintain update records and follow vendor release notes for controlled deployment and troubleshooting.
Conclusion
Follow this routine to keep the auto-empty dock reliable: empty and wipe the dustbin after each full cycle. Inspect and clear the bin inlet and hose daily. Perform weekly checks for clogs in the transfer pathway.
Clean tanks, pad washer, and filters on schedule; rinse and air-dry components. Inspect charging contacts, IR window, and dock seals for dirt or corrosion. If poor emptying persists after these steps, contact support with photos and error logs for systematic diagnosis.