
How to Choose a Central Vacuum System for Your Home: A Buyer’s Decision Guide
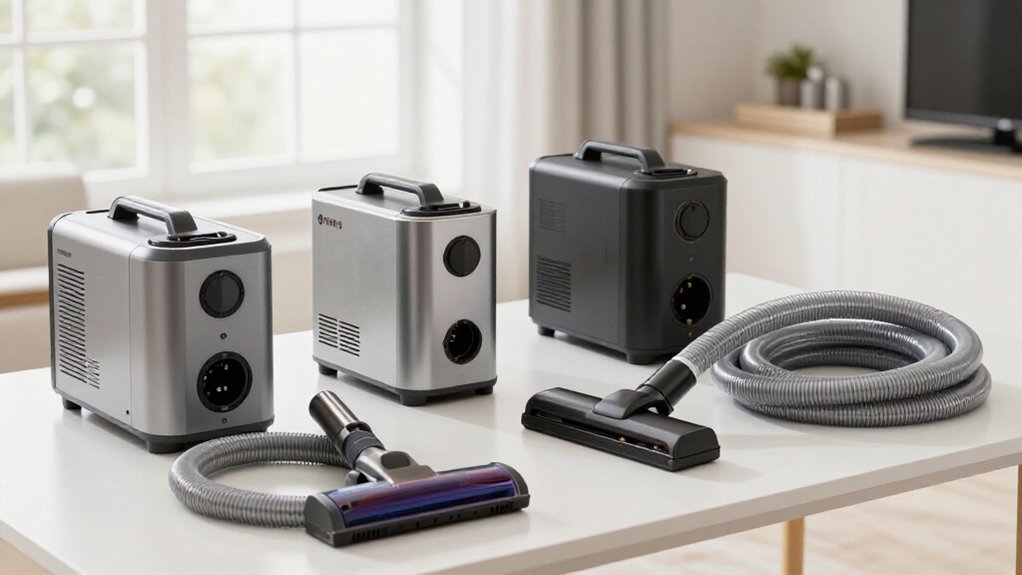
You’ll choose a central vacuum by matching its coverage to your home’s finished square footage, then add 20–30% for long runs, multiple floors, and layout complexity.
Prioritize a bagged, sealed system if allergies matter, with high-quality bags and at least 500 air watts.
Plan inlets within a 30–35-foot reach or consider retractable hoses for convenience.
Compare filtration, self-cleaning features, voltage, mounting, warranty, exhaust needs, and tools before deciding.
The details below help you finalize confidently.
Start With Square Footage Needs
Start by matching the power unit’s maximum coverage rating to your home’s square footage, then add a 20–30% buffer to offset suction loss from long pipe runs, multiple floors, and complex layouts. Use your actual finished area, not just the main floor. Choose a model whose published coverage exceeds that figure, because the farthest inlet typically experiences the greatest airflow drop.
For example, a 5,000-square-foot home should use a unit rated for roughly 6,000 to 7,000 square feet, or higher.
If your plan includes several floors, long hallways, or numerous inlets, treat the most demanding route as your baseline. Don’t size from the nearest inlet, where suction can seem stronger. Check the manufacturer’s coverage rating and compare it with your piping layout before buying.
Account for Allergy Sensitivities
If allergies are a concern, choose a bagged central vacuum with sealed disposal and high-quality filter bags that capture about 99.9% of particles, including fine allergens. Sealed removal limits your contact with collected dust when you replace the bag. Plan to change bags two to four times yearly, depending on use, so allergens don’t accumulate and filtration stays consistent.
Choose at least 500 air watts, with 550 to 650 or more preferred, to maintain suction throughout cleaning. Adequate suction helps lift fine debris instead of leaving dust behind to resettle. Although bagless or cyclonic models work, you’ll need to empty bins, which may release dust and allergens. If you compare one, confirm you can empty it outdoors and follow the manufacturer’s filter-cleaning schedule.
Plan Inlet Valve Locations
Once you’ve chosen filtration for allergy control, plan inlet valves so the hose reaches every area without excessive stretching or long pipe runs. Measure each hose route, keeping the farthest cleaning point within its 30–35-foot reach, plus a 5–10-foot buffer for furniture.
Place valves in central hallways or traffic paths, not behind furniture. Align valves vertically between floors to shorten PVC runs and reduce bends. Provide low-voltage wiring for electrified hoses.
| Home layout | Starting point | Placement priority |
|---|---|---|
| Under 2,000 sq. ft. | 1–2 inlets | Central coverage |
| 2,000–3,500 sq. ft. | 3–4 inlets | Major zones |
For larger or irregular homes, add an inlet per floor or high-use room. Include garage for vehicle cleaning, and verify stairways remain reachable from the nearest valve. Sketch locations before walls close.
Bagged, Cyclonic, Self-Cleaning
Choose a bagged system if you prioritize cleaner disposal and allergen control, since quality bags can capture about 99.9% of fine particles and need replacement only two to four times yearly. Cyclonic systems avoid bags by separating dust with centrifugal force, but they require more frequent canister emptying and proper venting.
Self-cleaning filters reduce buildup inside the canister or separators, helping maintain airflow, so compare each option with your household’s filtration and maintenance needs.
Bagged System Benefits
For allergy sufferers and pet owners, bagged central vacuum systems offer cleaner, lower-maintenance dust collection. High-quality filter bags can capture about 99.9% of particles, including fine allergens, so you can reduce what returns to your living space.
If you share your home with pets, the bag traps dander and debris without requiring frequent canister emptying. Depending on your household’s size and cleaning routine, you may replace the bag only two to four times yearly. That schedule keeps routine maintenance simple and predictable.
When full, the sealed bag helps prevent a dust cloud during disposal, making the task cleaner than manually emptying a dusty container. You should still check the fill level and keep replacement bags available, because availability affects convenience and ongoing cost too.
Cyclonic Filtration Performance
Cyclonic systems separate debris with centrifugal force, so they’re less dependent on disposable bags and can maintain airflow as the canister fills. You’ll empty the canister periodically and may need to clean its filter, so plan for contact with collected dust.
External venting is often preferable because fine particles can escape during disposal, especially in allergy-sensitive homes.
Compared with bagged filtration, cyclonic systems avoid recurring bag purchases and can offer substantial capacity for heavy debris loads. However, a bagged unit may provide cleaner, simpler disposal: bags can capture about 99.9% of fine particles and seal when full.
For a large home, compare canister size, emptying intervals, exhaust routing, and filter-access requirements. Choose the option that matches your cleaning frequency and tolerance for hands-on maintenance.
Self-Cleaning Filter Advantages
A self-cleaning filter reduces residue buildup, helping your central vacuum maintain more consistent airflow and suction between maintenance intervals. As dust accumulates, the filter sheds or clears particles instead of forming a restrictive layer. You’ll spend less time stopping to brush, wash, or replace a clogged filter, and your power unit can perform more steadily during longer cleaning sessions.
In a bagged system, it can help fine dust move into the bag rather than forming a restrictive coating. In a cyclonic system, it limits residue clinging to the filter after centrifugal separation, although you’ll still empty the canister and follow the manufacturer’s cleaning schedule. That’s especially useful when pets, carpeting, or heavy debris load the unit quickly.
Check access and replacement-filter availability before installation.
Choosing Your Filtration Type
Start with your maintenance priorities and indoor-air concerns when choosing among bagged, cyclonic, and self-cleaning filtration. Choose bagged filtration if you have allergies or pets: quality bags can capture up to ~99.9% of fine particles and seal when full, making disposal cleaner. You’ll pay for replacements, but you’ll touch less dust.
Choose cyclonic filtration if you don’t want bag costs. Centrifugal force separates debris, yet you’ll still empty the canister manually. Because fine-dust control depends on post-separation filtration and airflow, verify the filter design before buying.
Choose self-cleaning filtration if you want simpler upkeep. Automated cleaning reduces dust contact and helps maintain consistent suction as debris accumulates. For a larger home, prioritize more filter surface area and particle capture to manage heavier dust loads.
Retractable Hose Convenience
A retractable hose stores inside the wall, so you won’t manage a bulky coil and can start cleaning quickly at each inlet. With reach up to about 50 feet, you’ll handle less hose and may need fewer inlets for whole-home coverage.
Expect to pay about $400–$800 more per inlet, so choose this option only when your layout benefits from its extended reach.
Effortless Hose Storage
With a retractable central vacuum hose, you pull the hose from the inlet and return it inside the wall when cleaning is finished. You avoid tangles, carrying, and finding storage for a bulky 30–35-foot hose. Most systems provide up to about 50 feet of usable reach, so you can cover more area without leaving a hose bundle in a closet or hallway.
This setup gives your home a cleaner, built-in appearance and keeps floorcare equipment out of sight.
Plan each inlet around the hose’s actual reach, accounting for furniture, doorways, and floor layout. Retractable installations typically cost about $400–$800 more per inlet, so calculate coverage before committing.
You’ll pay more upfront, but you’ll gain simpler storage and less clutter without dedicating closet or hallway space.
Quick Cleaning Access
Beyond reducing storage clutter, a retractable hose makes short cleaning sessions faster: pull it from the wall inlet, clean nearby spills or traffic areas, then let it retract when you’re done.
For daily messes, this grab-and-go access can beat a conventional setup that requires you to retrieve a separate hose. A Hide-A-Hose system can extend up to about 50 feet, but inlet placement still determines whether you can reach kitchens, entryways, and other high-traffic zones efficiently.
Plan coverage before installation, especially in larger or multi-level homes. Expect to pay roughly $400–$800 per inlet beyond a standard fixed-hose setup. Weigh that premium against how often you clean small areas. If convenience drives your decision, retractable access delivers a faster response to everyday spills and crumbs.
Reduced Hose Handling
Retractable hose systems store the hose inside the wall, so you won’t need to carry, coil, or untangle it between cleaning tasks. When you open an inlet, you pull out only the hose length you need; after cleaning, suction draws it back into storage. This keeps floors and closets clearer and reduces the effort of moving a conventional hose between tasks.
Consider retractable storage for busy areas such as a kitchen or mudroom, where equipment gets frequent use and clutter quickly becomes inconvenient. Installation typically adds about $400–$800 per inlet, so compare that premium with the value of faster setup and easier storage.
Confirm that the installer provides compatible inlets, hose fittings, and service access. You’ll handle the hose while cleaning, but storage is automatic.
Flexible Whole-Home Reach
Automatic hose storage also expands your cleaning reach: Hide-A-Hose systems can extend up to about 50 feet from an inlet, letting you cover large rooms and distant areas without carrying a conventional 30-foot hose. Because the hose retracts into the wall, you won’t manage tangles, bulky storage, or repeated trips to retrieve equipment. Position each inlet along the routes you vacuum most often, and confirm the farthest points maintain consistent suction.
Expect added complexity and about $400–$800 per inlet compared with a conventional hose setup. Retractable systems make sense when you prioritize streamlined cleaning across open layouts or between distant areas.
Before installation, carefully map furniture, stairs, and high-traffic zones, then verify the installer can route the hose smoothly and service the mechanism later.
Confirm Voltage and Mounting
Check that the power unit matches your home’s electrical supply, commonly 120V or 240V, before ordering. Confirm the model’s voltage against the dedicated circuit and local electrical requirements, and don’t assume a standard outlet will work.
Mount the unit in a ventilated utility area, basement, or garage, leaving the manufacturer’s required clearance around motor and exhaust openings. Choose a solid wall or framing that can support its weight and vibration; use the specified hardware. Keep the power unit accessible for emptying, filter cleaning, and service.
If your home has multiple floors, a central location can simplify pipe routing and help maintain stronger suction at distant inlets. Before installation, verify pipe runs aren’t unnecessarily long or filled with sharp bends. Also plan safe access to electrical disconnect.
Compare Motor Warranty Lengths
Once the unit’s electrical and mounting requirements are confirmed, compare how long each manufacturer covers the motor. Central vacuum motor warranties typically span five to 15 years, but don’t judge a unit by its headline term. Check whether coverage includes the motor itself, overheating, and performance loss, rather than only labor or parts.
If you’re equipping a home or targeting 550–650 or more air watts, prioritize at least a 10-year motor warranty. Long pipe runs and cleaning increase workload, making coverage valuable. Read exclusions: improper installation, nonstandard inlet layouts, and skipped filter maintenance may void protection.
Ask who handles claims, whether motors remain available, and what documentation you’ll need. When two models offer similar airflow, the longer motor warranty gives you the safer choice.
Check Exhaust Vent Requirements
Your central vacuum’s exhaust design affects both indoor air quality and installation requirements. Determine whether your model vents outdoors, common with many cyclonic or bagless systems, or uses sealed internal filtration. If it requires exterior exhaust, confirm a practical route before installation begins. Check these details:
- Duct specifications: Follow the manufacturer’s required diameter, maximum run length, and power-unit or fan specifications. An undersized or restrictive path can reduce suction.
- Discharge location: Terminate the outlet away from windows, doors, and fresh-air intakes so dust and odors don’t re-enter your home.
- Airflow planning: Coordinate exhaust routing with inlet placement, especially the farthest inlet, and minimize bends to preserve efficient airflow.
Confirm the complete route before walls close, because retrofits can add labor and repair costs.
Verify Included Accessory Tools
After confirming the exhaust route, verify exactly which accessory tools come with the kit. Don’t assume the package suits your floors, rooms, or habits. Check these details before comparing prices:
- Confirm a 30–35-foot hose reaches every inlet, and verify the package includes enough wall-inlet fittings or outlet plates for your locations: typically one per 600–700 square feet and at least one per floor.
- Match the floor tool to your surfaces. Choose a hard-floor head, while wall-to-wall carpet or pets require an electrically powered nozzle or brush for pickup.
- Look for a crevice tool, dusting brush, and extension attachments for baseboards, stairs, vents, and ceiling corners. If allergies matter, confirm compatible bags, filters, or bagless components are included.
Also verify fittings are compatible, not proprietary.
Conclusion
Choosing the right central vacuum system starts with matching its capacity to your home, cleaning needs, and allergy concerns. Before you buy, map inlet locations, confirm voltage and mounting requirements, and verify exhaust options. Compare bagged, cyclonic, and self-cleaning designs alongside retractable hose convenience.
Finally, review motor warranty coverage and included tools so installation goes smoothly and daily cleaning stays practical, quiet, and reliable for years to come without unexpected replacement costs or service surprises.
