Robot Vacuum Won’t Charge? A 10-Step Troubleshooting Walkthrough
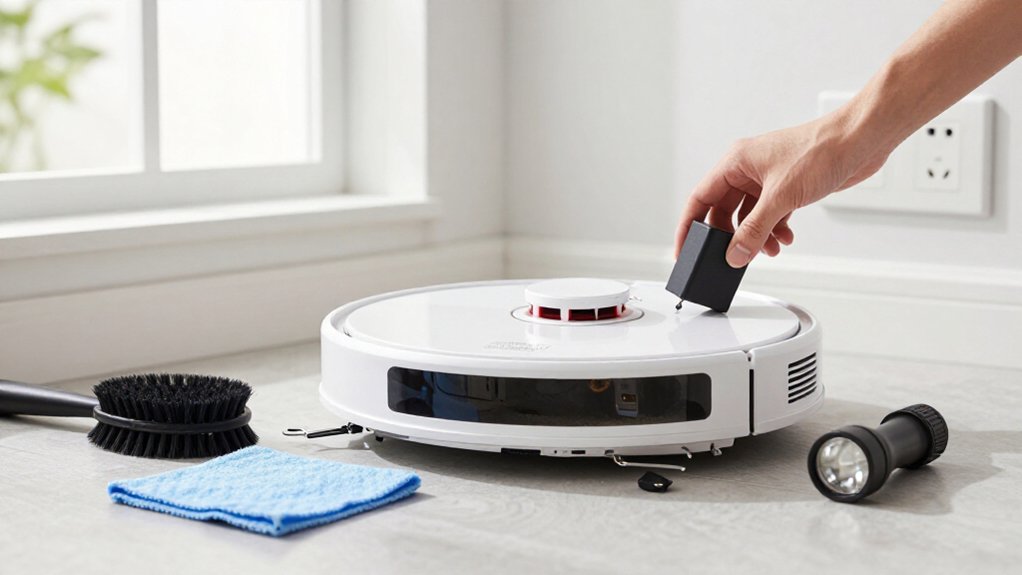
Start with the dock: test the outlet, secure the adapter and cable, and confirm the steady LED.
Unplug everything before inspecting both charging surfaces for oxidation, debris, pitting, or damage; clean them with a dry cloth or lightly dampened 70–99% isopropyl alcohol swab, then let them dry.
Power-cycle the robot, place it squarely on a level dock, and verify spring pins move freely.
Empty and reseat the dustbin, then confirm battery rises.
If not, continue below.
Check Dock LED Status
If the dock’s LED doesn’t illuminate when you plug it in, first test the wall outlet with another device, then verify that the power adapter and cable are firmly connected. Inspect the cord and plug for cuts, crushed sections, or melted insulation; don’t use damaged components. If the outlet works and connections are secure, disconnect power briefly, reconnect it, and observe the indicator.
A steady LED generally confirms that the dock has power and can support charging. A blinking LED commonly indicates that the robot isn’t making a proper charging connection. Remove the robot, position it squarely, and reseat it so its pads lie flat against the dock’s spring contacts. Watch the LED for several seconds. If it never changes, contact support for diagnosis.
Inspect Contacts for Oxidation
Oxidized charging contacts can interrupt the electrical connection even when the dock has power. Power down the robot, unplug the dock, and inspect both contact surfaces under good light. Look for green, blue, brown, or black films, dullness, powdery residue, pitting, or flaking. These defects can cause slow or intermittent charging.
- Wear nitrile gloves, then remove loose debris with a soft, dry brush.
- Wipe the contacts using a lint-free cloth or swab lightly dampened with 70–99% isopropyl alcohol.
- Let every surface dry completely; don’t spray liquid into openings or sensors.
- Don’t sand or scrape plating; contact the manufacturer if corrosion remains or metal is damaged.
After cleaning, let surfaces dry completely, reconnect dock, and check charging. Persistent corrosion requires manufacturer-approved contact or dock replacement.
Step 1: Set Robot on Towel
Remove the robot from the dock and place it on a clean, dry towel so its charging pads stay level and free of debris. The towel prevents debris and uneven support during inspection. Wipe the robot’s metal charging contacts gently with a soft, dry cloth to remove loose particles. If grime remains, dampen a cotton swab with a tiny amount of isopropyl alcohol; don’t saturate the contacts or let liquid enter openings.
Keep the robot stationary on the towel for several minutes. Confirm the contacts feel completely dry and show no wet residue before you continue. Then return the robot to the dock and check that it sits flush without rocking. Firm contact requires the robot’s pads to press evenly against the dock terminals.
Step 2: Test the Wall Outlet
Start by plugging the charging dock directly into a known-good wall outlet, not an extension cord or power strip. Confirm the outlet works by plugging in a lamp or phone charger. If that device stays off, check the circuit breaker and any wall switch controlling the receptacle; set the switch to ON.
Next, connect the dock and watch its indicator LED immediately. A dark LED suggests the dock isn’t receiving power, though consult your model’s manual for indicator behavior. Try another confirmed-working outlet if the first outlet fails the device test or the dock LED remains off or flickers. Ensure the plug fits firmly in the receptacle and dock socket. If the dock still shows no power from multiple outlets, suspect the dock itself.
Step 3: Power-Cycle the Vacuum
If the charging status appears stuck, unplug the dock from the wall, remove the robot, and power it off completely. Wait 10–15 seconds to discharge temporary state errors and clear a frozen charging indication.
Plug the dock back into the outlet and check its power LED. Don’t interpret a blink as proof that charging works. Turn the robot on, then place it flushly on the dock so its charging pads contact the spring terminals fully. If you moved or bumped the dock, return it to a position before replacing the robot.
Watch the robot’s charging indicator or app status for a change. If charging doesn’t begin, wipe charging surfaces with a dry cotton swab or isopropyl alcohol, let them dry, and repeat the power-cycle. Record any error code or unusual LED pattern.
Step 4: Run Dock Alignment Test
To test dock alignment, place the robot on the base so both charging pads contact the dock’s spring terminals squarely, without tilting. Confirm that the chassis sits flush against the dock, with neither side wheel nor raised corner supporting the robot. Check whether the indicator changes to charging.
After cleaning contacts, repeat test. Move the robot left, right, forward, and backward, pausing at each position.
Note the position where charging begins, then return the robot and verify that the indicator remains active. Test the base on a level surface; thick carpet or an uneven floor can prevent seating and may show charging without power transfer. If you move furniture or reposition the dock, repeat this alignment test, because even a shift can interrupt contact.
Step 5: Check Charging Pin Spring Action
With the dock unplugged, gently press each charging pin to verify that it moves freely and springs back firmly. Look for hair or dust between the spring terminals, since debris can restrict travel and create a false charging indication. Check each robot charging pad as well; it should be clean, flat, and free of pitting, burns, or corrosion.
Place the robot on the dock and confirm it sits flush, with the pads compressing the pins slightly. A raised or crooked position can reduce contact pressure. If a pin feels loose, sticks, fails to rebound, or shows heat discoloration, stop relying on cleaning: the dock’s contact assembly may be failing and likely needs replacement. Don’t force a damaged pin, because you could worsen the fault.
Step 6: Empty the Dustbin
Turn the robot off, remove the dustbin, and empty all debris, including hair and fine dust. Inspect the bin for compacted buildup that could restrict airflow and make the robot stop early or misinterpret operating conditions. Clean the filter area and any washable filter elements according to the manual; don’t reinstall washable parts until they’re completely dry. Wipe dust from the dustbin cavity because debris there can obstruct airflow or cover internal sensors.
Reinsert the bin and press it down until you hear or feel the latch click. A partially seated bin can interfere with sensor readings and normal operation near the dock. Empty the bin regularly after every few cleaning cycles if you have pets to prevent suction loss and incomplete runs altogether.
Confirm Battery Percentage Rises
Once the robot is seated squarely on the dock, verify that its battery percentage rises within 5–15 minutes. Confirm the dock’s power LED is illuminated, then check the app’s battery indicator or the robot’s icon. A measurable increase confirms charging has begun; a reading stuck at the same percentage indicates a fault.
If the percentage doesn’t rise, remove the robot and clean both charging surfaces with a soft, dry cloth. For oxidation or residue, use a cotton swab lightly dampened with isopropyl alcohol, then let contacts dry. Reseat the robot squarely and monitor it again. If charging starts only after repeated reseating, suspect intermittent contact at the spring terminals. If the level never rises, or drops while docked, investigate contact failure or battery degradation.
Test Adapter Output Voltage
If the battery percentage still doesn’t rise after cleaning and reseating the robot, test the adapter before inspecting the dock. Unplug the dock, set the multimeter to DC volts, and touch the probes to the adapter plug terminals—not the dock contacts. Compare the reading with the adapter label; multi-cell models specify 14–16 volts, but your label controls.
| Reading | Diagnostic meaning |
|---|---|
| Matches label | Adapter supplies power |
| Low or fluctuating | Adapter may be failing |
While measuring, wiggle the cable near its strain relief. Intermittent readings point to a damaged conductor or internal break. If you can measure dock-connector output and it matches the label, stop testing the adapter; investigate charging components instead. Don’t use an incompatible adapter, and avoid shorting the terminals with probe tips.
Replace Worn Lithium-Ion Battery
After you’ve cleaned the contacts and verified dock power, a worn lithium-ion battery is a likely cause of failed charging, especially after roughly two to three years or 300–500 charge cycles. Capacity may fall about 20% after 300–500 cycles, so the robot might dock yet fail to retain enough power.
First, check the battery temperature; let it cool and retry if it’s above the typical 0–40°C charging range. If your model supports safe removal, measure open-circuit voltage with a multimeter and compare it with the pack’s rating, often 14–16 V. A dramatically low or unbalanced reading supports replacement.
Install only an OEM-compatible pack with the exact voltage and connector. Don’t use a damaged or swollen battery; contact the manufacturer or a qualified technician instead immediately.
Conclusion
If your robot vacuum still won’t charge, retrace the sequence rather than guessing. Verify dock power, clean and align both charging contacts, then confirm the adapter’s output with a meter. Power-cycle the vacuum and watch whether its battery percentage rises.
If charging remains absent after these checks, replace the depleted lithium-ion battery with a compatible part. Should the fault persist, stop operating the unit and contact the manufacturer or a qualified technician for board-level diagnosis.