Robot Vacuum Poor Suction Troubleshooting
If your robot vacuum has poor suction, start with a 2-minute diagnostic: power it down, disconnect the airway, then run the unit and listen at the port to isolate airflow.
Check and clean pre- and post-motor filters, empty the bin, remove hair from brushes and bearings, and clear hoses and air tunnels. Inspect seals, gaskets, and brush end caps for wear.
If suction still fails, test battery runtime and motor noise. Continue for step-by-step fixes and service guidance.
Quick Overview
- Check and clean pre-motor and exhaust filters. Replace non-washable filters every 2–3 months or when visibly clogged.
- Inspect and clear the brushroll, bearings, and end caps of hair tangles and debris. Confirm the brush spins freely.
- Detach the hose/wand and run a 2-minute diagnostic. Listen at the port for strong airflow to isolate the blockage location.
- Examine hoses, air tunnels, seals, and dustbin interfaces for cracks, gaps, or clogs. Reseat or replace damaged seals.
- Monitor battery runtime and motor sound. Shortened runtime or motor revs with low suction indicate battery or impeller issues.
Run a 2-Minute Suction Diagnostic
Want to find whether the blockage is in the robot or its attachments? Start with a 2-minute diagnostic: unplug or remove the battery, detach the main airway, then reattach after testing. Hold your ear to the port for a quick port assessment. Strong suction at the port with attachments off points away from the main unit.
If suction is strong at the port but drops when you reconnect hoses, wands, or floor heads, inspect those attachments for blockages, damaged seals, or clogs. If you hear strong suction with the main unit disconnected but weak suction when connected, check the unit’s internal air pathways and seals. Clear obstructions and reseat seals.
Use the diagnostic drift idea to compare readings before and after reconnecting components so you don’t misattribute gradual loss of suction. This method tells you whether to focus on attachments or the main unit; it usually restores expected suction after clearing the identified blockages.
Check Filters to Restore Suction
Filters are often the simplest culprit, so start by removing and inspecting both the pre-motor and post-motor/exhaust filters for dust, hair, or compressed debris. Check dust filters visually: if you see compacted dust or visible blockage, cleaning or replacement is required.
If filters are washable, rinse under running water, squeeze gently, and let them air-dry completely for at least 24 hours before reinstalling to avoid motor damage. For non-washable filters, follow manufacturer intervals or replace every 2–3 months; shorten that for homes with pets.
After reinstalling cleaned or new filters, run the suction test across Quiet, Standard, and Strong modes and note any change. If suction improves, you’re done. If weakness persists, don’t stop here: inspect adjacent airflow paths and seals for obstructions or leaks that will still limit performance.
Regular filter checks keep suction consistent and prevent downstream issues.
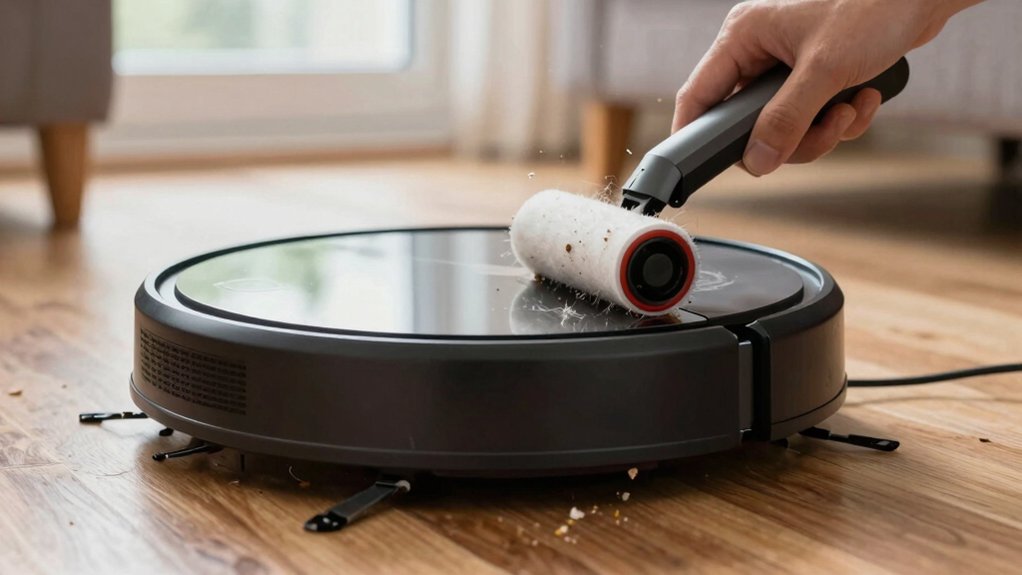
Remove Hair Tangles From Brushes and Rollers
If cleaning or replacing filters didn’t fully restore suction, check the brushes next. Hair wrapped around side brushes and the main roller adds resistance and cuts surface contact, which drops cleaning performance. Inspect both side brushes and the main roller for hair tangles. Use scissors to cut through wrapped fibers, then pull them free with your fingers or a cleaning tool. Remove embedded debris from brush bearings and end caps.
- Visually inspect brushes and roller for wrapped hair tangles; note left/right orientation before removal.
- Cut and extract fibers carefully. Then use a cleaning brush to clear embedded strands from bristles and bearings.
- After reassembly, hand-spin each brush to confirm free brush rotation and listen for rubbing or binding noises.
- Test suction on hard floors and carpet to verify restored pickup; repeat cleanup if performance is still impaired.
A tangle-free brush system minimizes wrap and maintains airflow. Regular checks prevent reduced suction from recurring.
Clear Hoses and Air Tunnels Quickly
How do you quickly confirm and clear airflow paths? Detach the hose and wand and inspect visually for blockages. Drop a coin into the hose end: if it doesn’t slide through, you’ve got a clog. Use a blunt, rigid tool to push debris out; don’t puncture the hose. Work methodically from the wand toward the main intake so loosened material moves out, not deeper in.
Next, check all air tunnels and the main intake for hair, dust, or debris. Remove obstructions with fingers, brushes, or compressed air. Clear any buildup around connection points. Verify dustbin seals and filters aren’t restricting flow at junctions; reseat or replace faulty seals and clean filters so they don’t act as bottlenecks.
After clearing hoses and tunnels, reassemble the unit and test suction at multiple power levels. Confirm airflow goes into the dustbin and out the rear exhaust: if it’s smooth, your clear hoses and air tunnels work properly.
Test Battery, Motor, and Seals for Suction Loss
Now that hoses and air tunnels are clear, check the powertrain and seals to find remaining suction losses. You’ll test battery health, inspect motor behavior, and verify seal integrity to isolate causes quickly. Start methodically and record results.
- Measure battery voltage and runtime under load: test battery when suction drops or runtime shortens. Recharge or replace if voltage sag or capacity loss appears.
- Run the vacuum at different suction levels and listen: if the motor revs but suction stays low, suspect internal motor strain, a damaged impeller, or air bypass past worn motor seals.
- Inspect visible gaskets, housing joins, and the dustbin interface for cracks or gaps. Press-fit mounts and compressed seals can fail and create measurable leaks.
- Use a vacuum gauge or simple suction test at the inlet versus downstream of suspect joints to quantify loss and pinpoint the exact motor seals or mounting point needing repair.
Follow results to decide between seal repair or motor diagnostics.
Replace Brushes, Filters, and Batteries: When and How
When should you replace brushes, filters, and the battery to keep suction consistent? Replace brushes and rollers every 6–12 months depending on use and pets. Worn bristles reduce cleaning efficiency and suction. For brush maintenance, inspect for fraying, hair wrap, and flat spots; remove tangles and spin the brush to check free rotation. Then, swap if damaged.
Swap filters every 2–3 months, sooner with pets, because clogged filters sharply drop airflow. When replacing, install a spare dustbin filter and new seals to preserve the sealed airflow design and prevent leaks that degrade suction.
If suction stays weak after cleaning and component swaps, perform battery replacement to restore motor power and runtime. Install the correct capacity (for example, Narwal Flow’s 6400mAh) per manufacturer instructions. Routinely inspect and replace worn rollers, brushes, and seals as part of scheduled maintenance to sustain consistent suction levels.
Narwal Flow vs. Other Brands: Suction and Maintenance Differences
Curious which vacuum will actually keep sucking well without constant babysitting? You’ll notice Narwal Flow’s sealed airflow design limits leaks that erode suction. This design allows it to hold steady across floors and as batteries age. Its self-cleaning filter and tangle-free brush reduce chores; thus, Narwal maintenance is mostly passive compared with rivals.
- Sealed airflow: Narwal maintains pressure; many competitors lose suction through open pathways and leaks.
- Self-cleaning filter: Cuts manual filter clearing; other models clog and need attention every 2 to 3 months.
- Tangle-free brush: Prevents hair wrap and keeps suction consistent; rivals often tangle and drop performance.
- Real-world reliability: Narwal aims for steady suction on carpets and hard floors; other brands can get noisier and weaker over time.
You’ll still perform periodic checks. However, Narwal minimizes routine intervention. When troubleshooting poor suction, focus first on airflow integrity and brush/filter function: these are areas where design differences matter most.
Maintenance Schedule: What to Clean and When
How often should you inspect and clean each part of your robot vacuum? Set a maintenance schedule and use maintenance reminders to keep suction consistent.
Empty the dustbin after every use to prevent airflow restriction. Clean or replace the main dust filter every 2–3 months. Wash washable filters and make sure they’re completely dry before reinstalling.
Check brushes and rollers for hair and tangles regularly. Conduct a targeted quarterly inspection and remove buildup immediately when you spot it.
Inspect the inlet, dust path, and exhaust area during each filter or brush check. Clear any blockages and confirm seals are intact.
Monitor battery health by recharging after each run and note runtime changes. If runtime shortens and suction weakens, plan battery replacement.
Log each action on a simple checklist or set calendar reminders so you follow the schedule without guesswork. This methodical routine minimizes suction loss and helps you spot wear before it degrades performance.
When to Call Service or Replace Your Vacuum
Why keep troubleshooting if your robot still has weak suction after thorough cleaning and parts checks? If you’ve cleaned filters, checked bearings, emptied the bin and suction stays poor, it’s time to weigh repair versus replacement. Aging motors, seals, or batteries can permanently reduce performance. If your unit’s in warranty, contact the manufacturer for professional service to avoid voiding coverage.
Stop and seek help immediately if you hear unusual noises, smell burning, see sparks, or experience repeated spontaneous shutoffs.
- Persistent suction loss after clearing blockages: request professional service, especially if in warranty.
- Unusual sounds, burning odor, or sparks: power down and get immediate professional service.
- Known design/component failures (sealed airflow, pump): use authorized service parts or replace the unit.
- Older models with worn motors or batteries: consider replacement if repair cost approaches new unit price.
Act methodically: document symptoms, check warranty, then choose authorized repair or replace.
Frequently Asked Questions
Can Low Suction Be Caused by Different Floor Types or Carpets?
Yes, different floor types and carpet density can cut suction. You’ll notice hard floors let air flow freely, so suction feels stronger. Dense or high-pile carpets restrict airflow and trap debris, reducing pickup.
You should check brush height, clean filters and rollers, and switch to a mode or attachment meant for carpets. If performance still lags, adjust height settings; consider a more powerful model for better carpet cleaning.
Can Clogged Sensors Affect Suction Performance?
Yes, clogged sensors can indirectly reduce cleaning effectiveness. You’ll see blocked sensors trigger safety modes or navigation errors that make the robot avoid areas or run inefficient paths; this reduces effective suction time.
Check and clean sensors regularly to prevent airflow restrictions from accumulating dust in intake paths. Use compressed air or a soft brush, clear debris around sensor housings, and test after cleaning to ensure normal operation and consistent suction.
Does Using Third-Party Filters Void My Warranty?
Yes, using third party filters can affect warranty implications. You should check your manufacturer’s terms: some brands allow equivalent aftermarket parts; others void coverage if damage stems from non-approved filters.
Document compatibility and keep originals. If you need repairs, be ready to prove the third party part didn’t cause the issue. When in doubt, contact support for clarification before installing aftermarket filters to protect your warranty.
How Do Extreme Temperatures Impact Suction and Battery Life?
Extreme temperatures reduce suction impact and accelerate battery degradation. Cold thickens motor oil and battery chemistry slows, lowering suction and runtime. Heat stresses cells, cutting capacity and lifespan. You should store and operate in recommended ranges.
Avoid charging in extreme heat or cold, and let the unit acclimate after temperature swings. Regularly check seals, filters, and battery health to mitigate temperature effects and maintain consistent performance.
Can Firmware Updates Improve Suction or Cleaning Routines?
Yes, firmware improvements can boost cleaning routines and sometimes suction performance by optimizing motor control, brush timing, and navigation. You’ll get better edge passes and targeted boosts on carpets; smarter route planning will also be achieved after updates.
Install official updates, restart the robot, and run a test clean to confirm gains. If suction’s still weak, check filters, brushes, and battery health: firmware helps, but hardware matters too.
Conclusion
You’ve walked through quick diagnostics, filter and brush checks, hose clearing, and battery and seal tests to find why your robot’s suction dropped. Clean or replace clogged filters, untangle hair from rollers, and clear air tunnels first. Swap worn brushes and batteries next.
Keep a regular maintenance schedule to prevent problems, and compare models if suction matters. If performance doesn’t recover after these steps, contact service or consider replacing the unit.