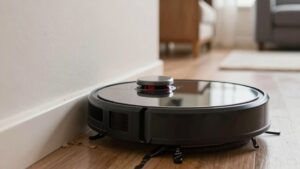
Robot Vacuum Not Charging Causes and Fixes
If your robot vacuum isn’t charging, first make sure the dock and power supply are plugged in and showing a steady light.
The robot’s power switch is on, and the unit’s power LED isn’t signaling an error.
Manually seat the robot to verify contact, and clean both charging pads with a dry cloth or alcohol swab if needed.
Check for a swollen or aged battery, firmware updates, and proper dock alignment.
Keep going, and you’ll find step-by-step fixes and diagnostics.
Quick Overview
- Verify power: Ensure the dock and charger are plugged in, powered on, and showing a steady power LED.
- Check alignment: Place the robot manually on the dock to confirm proper contact and consistent docking alignment.
- Clean contacts: Remove dust, film, or corrosion from robot and dock charging contacts with a dry cloth or isopropyl swab.
- Inspect battery and health: Look for swelling or reduced capacity. Plan battery replacement if runtime or health checks show degradation.
- Update and reset: Install firmware/app updates, reboot or factory-reset the robot, and seek professional repair for persistent motherboard or wiring faults.
Do This First: Quick Power Checks to Get It Charging Now
Wondering why your robot won’t charge? Start with simple power checks before diving deeper. First, confirm the robot’s on/off switch is actually on; a bumped switch looks like a dead battery. Check the robot’s power light: a steady glow usually means it has power, while a blinking light often signals a different power issue you’ll need to address.
Next, verify the charger and base station are plugged in and showing their own power light (green or blue). If the base has no light, troubleshoot the outlet or the base’s power adapter.
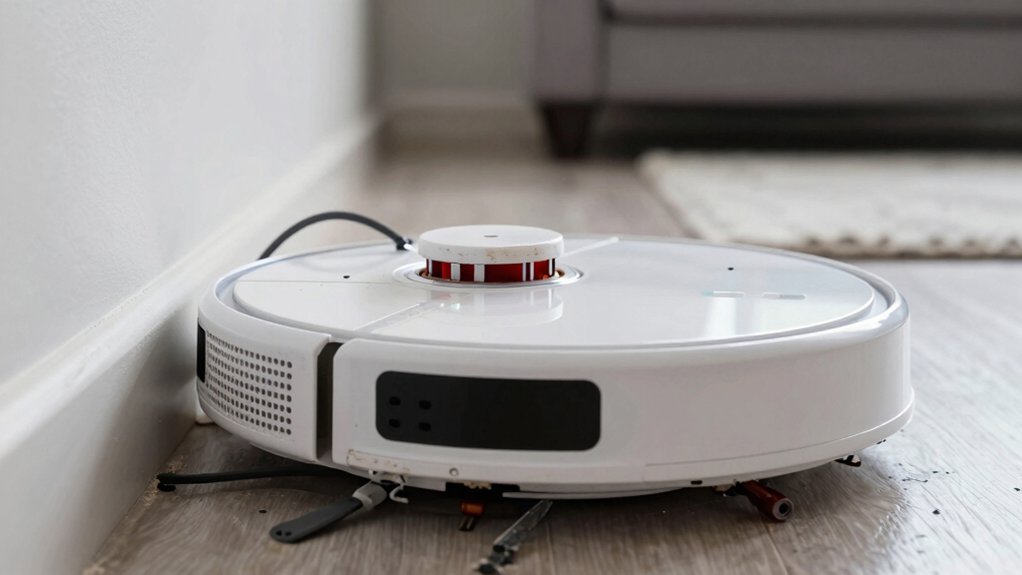
Inspect the base’s charging contacts for dust, film, or debris that could block a connection. Clean them gently with a dry cloth or isopropyl wipe. Finally, manually place the robot directly on the charger to confirm charging starts when proper docking alignment and charging contacts meet.
If those steps fail, move to deeper diagnosis.
Docking & Alignment for Robot Vacuum Charging
Docking & Alignment for Robot Vacuum Charging
How well the robot lines up with its charger makes a huge difference. Place it directly on the charging pad to confirm contact, then keep the pad and robot within about a finger’s thickness so the pins meet reliably. Manually seat the robot to verify it starts charging. Use docking etiquette: keep the charger on a stable, accessible surface and avoid moving it. For glass tables, install the charger underneath to improve alignment reliability. Mark a reference spot or stick a small marker on the floor or dock so the robot docks consistently.
Follow alignment tips: clear obstacles, keep the surrounding area level, and retrain the robot’s home position if available.
| Problem | Quick Check | Fix |
|---|---|---|
| No charge after docking | Is robot on pad? | Manually place on contacts |
| Misalignment | More than finger gap? | Reposition charger |
| Intermittent contact | Charger moved | Stabilize and mark spot |
| Glass table issues | Charger visible? | Mount underneath |
Clean Charging Contacts and Dock Surfaces
Once the robot’s docked correctly, check the charging contacts and dock surfaces for dust, film, or corrosion that can stop power flow. You should remove any visible dust buildup with a soft, dry cloth. If grime resists, use a cotton swab lightly dampened with rubbing alcohol to clean both robot and dock contacts. Then let everything air-dry fully before reconnecting.
Inspect closely for contact corrosion, scratches, or a thin film that could impair transfer. Surface damage may need more frequent cleaning or manufacturer guidance. Don’t press hard or use abrasive tools, which can worsen scratches and reduce conductivity. After cleaning, seat the robot on the dock firmly and watch the charging indicator. A steady charge light (model-dependent) confirms a good connection.
If charging remains intermittent after cleaning, note the symptoms and proceed to check the dock and power supply or contact support. Cleaning alone won’t fix a faulty adapter or internal charging circuit.
Check the Dock and Power Supply
First, make sure the dock and its power supply are actually getting power: The base should be plugged in, switched on, and showing a steady green or blue power light so you know the dock is live. If the light’s off or blinking, check the plug, outlet, and any surge protector. Inspect the dock for visible damage or dock corrosion at terminals.
Place the robot manually on the charger to confirm charging begins and that contacts meet properly. Verify the charger sits on a stable, level surface with alignment guides visible so the robot docks consistently.
Follow these quick checks:
- Confirm base and charger are plugged in, powered, and showing steady light.
- Look for dirt, film, or corrosion on charging contacts; clean and dry before testing.
- Ensure dock is undamaged and positioned within the robot’s path for consistent docking.
- Test manual dock; if charging still fails, note potential battery wear but don’t open the battery yet.
Battery Issues: Spot Swelling and Know When to Replace
If checking the dock and power supply didn’t solve the issue, inspect the battery for swelling; it’s a clear sign of internal gas buildup and imminent failure. You should power off and disconnect the robot before handling it. Look for a rounded or bulging battery pack that warps the chassis or misaligns charging contacts. That physical distortion often causes intermittent or total charging failure.
Replace a swollen cell promptly with a compatible unit. Most robot batteries last about 2–3 years, so declining runtime or frequent dropouts suggests replacement time. After installing a new battery, test charging. If problems persist, the fault may be motherboard or wiring related and needs professional service.
Handle the removed swollen battery carefully: follow manufacturer’s instructions and local regulations for safety disposal to avoid fire or environmental harm. Don’t try to puncture, compress, or reuse a swollen pack; replace it and follow proper safety disposal procedures immediately.
Reset, Update Firmware, and Reconnect the App
Having trouble getting the robot to recognize the dock? Start by performing a factory reset to clear any corrupted settings. This reset firmware action often fixes docking detection. Then re pair app to re-establish a clean connection between robot and phone.
Use the app to:
- Check for firmware updates and install them to resolve docking/charging bugs.
- Verify battery health; a degraded battery can still prevent charging even after resets.
- Follow on-screen prompts to reconfigure dock alignment and connection settings.
- Run a full charge cycle while monitoring current and warnings in the app.
After updating or resetting, watch the app for consistent charging current and any error messages. If the robot still won’t dock, avoid hardware-level fixes here. Instead, repeat the reset firmware and re pair app steps once more, ensuring your phone and router aren’t blocking communications before moving to deeper diagnostics.
If Charging Still Fails: Next Diagnostic Steps and Repair Options
Wondering what to try next when the robot still won’t charge? Start by checking battery health: degraded cells can stop charging even if the charger seems fine. Clean contacts on the robot and dock, verify the base is powered and positioned. Then, try a software reset or firmware update to rule out glitches.
| Step | Action | Expected result |
|---|---|---|
| 1 | Clean contacts & check dock power | Secure connection, possible charging |
| 2 | Reset/update firmware | Robot recognizes charger if software issue |
| 3 | Inspect battery & runtime | Confirm poor battery health |
If charging still fails after those steps, consider battery replacement timing. Replace if runtime is significantly reduced or cells age. If a new battery doesn’t fix it, inspect internal wiring and motherboard for faults. At that point, weigh repair cost versus full replacement; major motherboard issues often make replacement more practical.
Preventive Maintenance to Keep Charging Reliable
After you’ve checked batteries, contacts, and firmware, keep charging reliable by following a short preventive routine you can do every few weeks. Preventive maintenance keeps the dock-to-robot connection solid and avoids common charging issues.
Inspect and clean charging contacts on both the vacuum and base; use 91% isopropyl alcohol on a lint-free cloth and dry completely. Keep the base on a stable, level surface and confirm docking alignment so the robot seats fully.
Implement this simple checklist:
- Wipe contacts on robot and dock; remove debris.
- Verify dock placement and clear surrounding obstructions.
- Run a battery health check and note capacity decline.
- Update firmware via the manufacturer app; reboot the dock if available.
Also, protect charging components from hazards like pet urine and moisture. Replace batteries when health checks show significant degradation. Do this routine regularly to preserve charging reliability and avoid unexpected failures.
Frequently Asked Questions
Can Extreme Temperatures Prevent My Robot From Charging?
Yes, extreme temperatures can prevent charging. You should keep your robot and dock within the manufacturer’s recommended range because extreme temperatures degrade batteries, disrupt charging compatibility, and trigger safety cutoffs.
If it won’t charge, move them to a moderate room, let the battery acclimate, then retry. Check for firmware updates and inspect contacts for damage. If problems persist, contact support to confirm charging compatibility and battery health.
Will Aftermarket Batteries Void My Vacuum’s Warranty?
Yes, using aftermarket batteries can void your warranty. You should check the warranty terms and manufacturer policies before installing third-party cells.
If a fault is traced to an aftermarket battery, the maker can deny repairs or replacements. For troubleshooting, document the issue, keep originals, and contact support first.
Consider authorized replacements to avoid warranty implications and ensure compatibility, safety, and proper charging behavior.
How Do I Tell if the Charging Port Is Physically Damaged?
Check the port visually and with diagnostic routines: Unplug and power off. Inspect for bent pins, debris, corrosion, or burn marks. Wiggle the plug to see if the connection is intermittent.
Use a multimeter if you’re comfortable and follow safety considerations; remove the battery or isolate power first. If readings are inconsistent, pins are damaged, or the connector feels loose, the port is physically damaged and needs professional repair or replacement.
Can a Software Update Permanently Disable Charging?
Very unlikely: a software update rarely permanently disables charging. You should check whether the update altered charging safety limits or battery health reporting. Bugs can stop charging until fixed.
Try a firmware rollback or reinstall first; then calibrate and run battery diagnostics. If problems persist after rollback, it’s probably hardware or battery failure, not the update. Keep backups and only apply trusted firmware to reduce risk.
Is Wireless Charging Available for My Model?
Check your manual; most models don’t support wireless charging unless explicitly listed. You’ll need specific charging dock compatibility.
If your model supports wireless charging, confirm the dock’s protocol and alignment specs. Then test charging with known-good power. If it won’t charge, swap docks or try a firmware update.
If still failing, contact support for replacement dock compatibility or service. Don’t force adapters that might damage the battery.
Conclusion
If your robot vacuum won’t charge, don’t panic. Start with the basics: confirm the dock is plugged in, aligned, and clean. Then inspect contacts and the power supply. Watch for battery swelling or short runtime as signs it needs replacing.
Reset, update firmware, and reconnect the app before moving to deeper diagnostics or pro repair. Regular contact cleaning, proper docking space, and scheduled firmware checks will keep charging reliable and extend battery life.