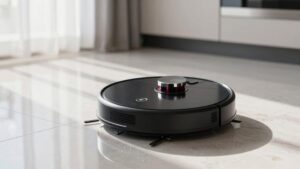
How to Clean Robot Vacuum Filters Safely
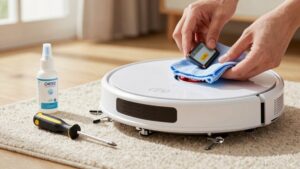
Check your manual to see if the filter is washable or disposable. Then power off and remove the dustbin before pulling the filter out.
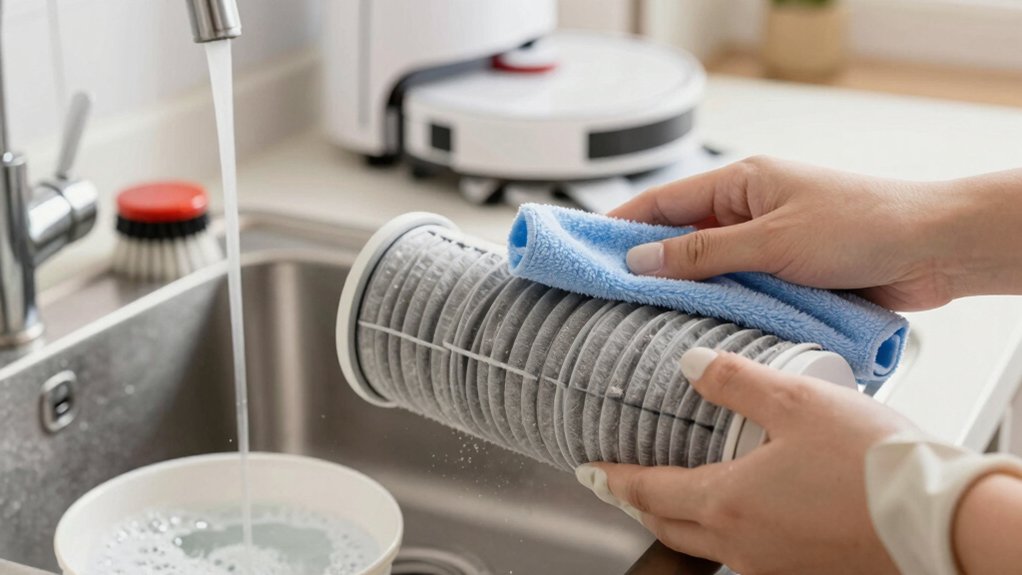
For washable foam, mesh, or specified HEPA, rinse under lukewarm water (no soap), tap out debris, and air-dry completely (24–48 hours) before reinstalling.
For non-washable paper or HEPA, dry-brush or use low-pressure air. Replace if torn, odorous, or suction still lags. Follow model guidance for replacement intervals to keep performance optimal and learn specific steps next.
Quick Overview
- Power off the robot and remove the dustbin before touching the filter to avoid damage or accidental operation.
- Identify filter type (washable foam/mesh vs non-washable paper/HEPA) using your manual before cleaning.
- Rinse washable filters under lukewarm running water (no soap). Gently shake off debris, then air-dry completely (24–48 hours).
- For non-washable paper or HEPA, use a soft brush or low-pressure compressed air; never use water.
- Replace filters if torn, misshapen, persistently odorous, or suction remains weak after cleaning.
Is the Robot Vacuum Filter Washable or Disposable?
Wondering whether your robot vacuum filter can be washed or needs replacing? You’ll first check the filter type and your model’s manual: some filters are washable filters (often foam or certain HEPA variants) while others are disposable filters and must be replaced.
If you have a washable HEPA, rinse it with lukewarm water, let it air-dry completely, then reinstall. Foam pre-filters are usually washable too; wash with warm water and mild detergent, rinse thoroughly, and dry fully before use.
Paper or pleated filters are generally disposable filters: don’t soak them, and plan to replace them when dirty. Non-washable HEPA filters should be dry-brushed or gently blown with low-pressure air; replace if cleaning doesn’t restore airflow.
Always follow model-specific guidelines: washing the wrong type can damage filtration, reduce performance, or void your warranty. When in doubt, consult the manual or manufacturer for the correct filter care.
Quick Answer: When to Clean vs Replace a Filter
How do you know whether to clean or replace your robot vacuum filter? Check performance first: if suction drops or dust collection worsens, clean the filter.
For washable foam or reusable cartridges, rinse and fully air-dry before reinstalling. For non-washable paper or many HEPA variants, dry-brush or blow with low-pressure air. Clean at least once a month or 2 to 3 times weekly in dusty or high-pet homes.
Replace the filter when it’s torn, misshapen, heavily worn, or still emits persistent odors after cleaning. This is especially true if fragrance control attempts, such as air fresheners near the bin, don’t help.
HEPA filters in many models need replacement every 2 to 3 months with heavy use. Disposable paper filters are usually single-use. Always follow the manufacturer’s guidance: model-specific recommendations override general rules.
When cleaning no longer restores performance or structural integrity, replace the filter to maintain suction, allergen capture, and reliable dust collection.
Remove the Dustbin and Take Out the Filter (Step‑by‑Step)
Now that you know when cleaning won’t cut it, start by powering off the robot and unplugging it from the dock. Remove the dustbin using the model’s release latch. Dustbin removal is usually one smooth motion. Hold the bin steady over a trash can to avoid spills.
Locate the filter inside the dustbin or canister. Some models have a primary filter plus a pre-filter; note their positions for correct reassembly. Grip the filter frame and perform filter removal by pulling straight out. Don’t force angled movements that could damage seals. Tap the filter gently over the trash can to dislodge loose debris. Work outdoors or near ventilation if possible.
If your manual indicates the filter is washable, you’ll rinse it later. Otherwise, replace per the manufacturer’s schedule. Before reinserting, ensure the filter housing is clean and dry. Slide the filter back into its slot until it clicks. Then reattach the dustbin and return the robot to the dock.
How to Clean Washable Robot Vacuum Filters (Foam, Mesh, Washable HEPA)
Want to keep washable filters performing at their best? Rinse foam, mesh, and washable HEPA under lukewarm running water: no soap. Gently shake or tap over a trash can to remove loose debris. Use a soft brush or the manufacturer’s cleaning tool to lift finer particles.
Check the filter for damage. If it’s torn, wobbly, clogged after cleaning, or smells persistent, replace it to protect suction and filter durability. Air-dry filters completely in a well-ventilated area. Never use a clothes dryer or microwave. Foam and mesh can take up to 24 hours to dry fully.
Verify your model’s guidance before washing: only rewash filters the manufacturer confirms as washable. Be aware that wash frequency depends on use and environment; higher traffic and pets require more frequent cleaning. Follow these steps each wash to prolong life and maintain performance without risking compromised filtration.
How to Handle Non‑Washable and Disposable Filters
If you’ve been rinsing washable foam, mesh, or HEPA filters, the next step is handling filters that aren’t meant for water. Treat non-washable and disposable filters differently: never submerge them. Use a soft brush or a low-pressure burst of compressed air to remove surface dust and hair. Work outdoors or over a trash bin to avoid redistributing fine particles indoors.
Check the manual to confirm washability and the model’s replacement interval. Disposable paper filters are usually single-use or have a strict limited number of cleanings; replace them when they clog or per the manufacturer’s schedule. For non-washable HEPA, avoid water entirely: brush and air only, then inspect for damage or persistent odor. If cleaning can’t restore suction or you see tears, replace the filter.
Follow disposal guidelines for dust containment and recycle if the manufacturer specifies recyclable materials. This keeps performance and indoor air quality reliable without risking filter degradation.
How Long to Dry Filters, Reassemble, and Test the Vacuum
How long should you let a cleaned filter dry before putting it back? Let it dry completely: drying time is critical to prevent mold and odors. Foam and many non-washable inserts usually need about 24 hours. HEPA and multi-part filters often take 24–48 hours depending on material and airflow. Place filters in a well-ventilated area, using a fan or natural air; don’t use high heat like hairdryers or clothes dryers.
Before reassembly, inspect each filter and the housing for tears, warping, or heavy wear. Replace damaged filters. Reassemble only when every component is bone-dry and fits flush; reassembly caution saves motor damage and poor sealing. Seat the filter correctly, click the dustbin back in place, then run a short test cycle to confirm suction and normal operation.
If you notice odd smells, rattles, or weak suction, power down and recheck seating and dryness before further use.
Troubleshooting Common Filter Problems (Odors, Tears, Poor Suction)
When your robot starts smelling musty, losing suction, or you spot tears in a filter, tackle the issue methodically: Start by removing and inspecting the filter and housing for dampness, holes, or warping. If simple cleaning didn’t fix odors, soak the filter in a 1:1 water-vinegar or baking-soda solution, rinse, and dry completely. Replace it if the odor persists.
For tears damage, replace the filter immediately. Do not reuse torn or thinned media. If suction is poor, clean or swap the filter first. Then check the dustbin and brush roll for clogs. Ensure the filter seats properly; a warped or ill-fitting filter will reduce performance.
| Problem | First Step | Next Action |
|---|---|---|
| Odors | Soak & rinse | Dry fully; replace if smell remains |
| Tears damage | Replace filter | Check for debris in housing |
| Poor suction | Clean/replace filter | Clear dustbin and brush roll |
Always confirm filters are bone-dry before reinserting to prevent mold and persistent odors.
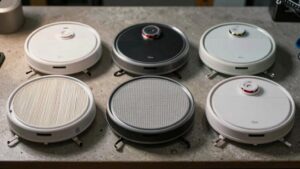
Maintenance Schedule and Model Tips (DEEBOT, Roomba, Roborock)
Wondering how often you should clean or replace filters across different robot brands? For maintenance scheduling, follow each maker’s guidance: DEEBOT filters need cleaning every two weeks with water and must be completely dry before reinsertion. Replace them every 3–6 months or after about 120 hours on some Narwal models. Washable foam or certain HEPA filters can be rinsed with lukewarm water and air-dried; non-washable HEPA must be dry-brushed or gently blown with low-pressure air.
For Roomba, rely on replacement rather than repeated washing: Swap paper filters every 2–3 months depending on use. For Roborock models, mirror DEEBOT care where filters are washable; otherwise, use dry cleaning and replace per the manufacturer interval.
If you live in a high-dust or pet-heavy home, increase cleaning to 2–3 times weekly. Schedule a full filter replacement whenever odors persist or suction drops. These model specific tips keep performance optimal and extend your robot’s lifespan.
Frequently Asked Questions
Can I Vacuum the Filter With a Handheld or Compressed Air Can?
You can, but you shouldn’t blindly. You’ll risk damaging delicate filter fibers by vacuuming; high suction can pull apart pleats and reduce filtration.
Using a handheld on low power and a soft brush attachment is safer. Compressed air caveats: it can force debris deeper or shred the media, so use short, gentle bursts from a distance if you must.
When in doubt, soak or replace per manufacturer guidance.
How Often Should I Replace Brush or Pre‑Filter Components?
Replace brushes every 6–12 months and pre‑filters every 3–6 months, depending on use and pet hair load; that answers your question directly. For discussion ideas, track runtime, hair buildup, and reduced suction to set maintenance timing.
Inspect monthly, clean brushes and pre‑filters, and note wear or bent bristles. If performance drops or components look worn, replace sooner. Keep spare parts handy to avoid downtime.
Are Aftermarket Filters as Effective as OEM Filters?
Aftermarket vs OEM filters can match performance; however, you’ll want to check fit, material, and filtration rating.
Aftermarket options often cost less and sometimes use comparable HEPA media. Yet, poor fit or lower-quality foam reduces suction and lets dust bypass the seal.
Choose reputable brands, read particle-capture specs, and verify compatibility with your model. If you need guaranteed fit and warranty support, stick with OEM filters.
Can Cleaning a Filter Void My Vacuum’s Warranty?
Yes, cleaning a filter can void your vacuum’s warranty if you ignore manufacturer instructions. Check the manual for warranty implications and allowed cleaning methods. Use only recommended cleaning techniques, solvents, or replacement intervals. Avoid washing non-washable or aftermarket filters unless specified.
Document your maintenance (dates, methods, parts). If unsure, contact support for guidance to protect coverage and respect any cleaning limitations the manufacturer sets.
How Do I Dispose of Used Disposable Filters Responsibly?
You should seal used disposable filters in a plastic bag to trap dust. Then check local guidelines for whether they’re regular trash or special waste; this minimizes exposure and cross-contamination.
If your area offers textile or small-appliance recycling, use that to reduce environmental impact. Avoid burning or composting; that harms air and soil. Label bags if they contain allergens.
Consider switching to washable filters to reduce long-term waste and environmental impact.
Conclusion
Keep filters clean to keep suction strong and air healthy. Check whether yours is washable or disposable; then follow the manufacturer steps: remove the dustbin, take out the filter, gently tap or brush away dry debris. Wash only if labeled washable.
Let parts fully air-dry (24 hours) before reassembling, and replace disposable or damaged filters on schedule. Troubleshoot odors, tears, or poor suction promptly. Regular, model-specific maintenance extends life and improves performance.