Robot Vacuum Height Clearance Measuring Guide
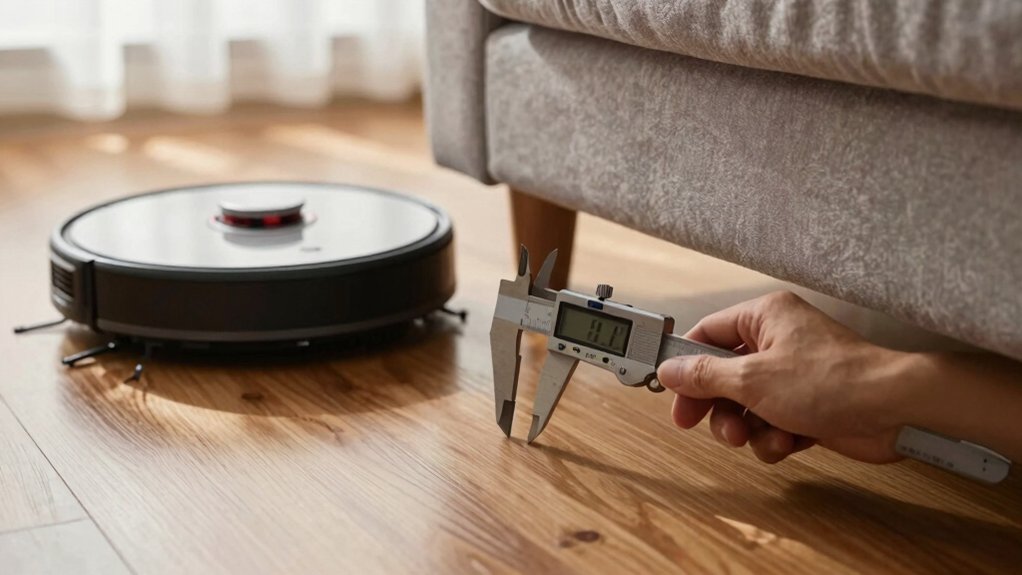
Measure the lowest under-furniture clearance at multiple points with a rigid ruler or caliper and record the minimum. Subtract the robot’s labeled height, then add at least a 5 mm safety margin for sensors and dynamics. Confirm the lowest point is greater than robot height plus 5 mm.
Also measure dock lid-open and tank removal heights and front/side dock clearances. Test thresholds and simulate 20 mm obstacles. Keep measurements and test notes handy if you need more guidance.
Quick Overview
- Measure vertical clearance at multiple low points under furniture with a rigid ruler or caliper and record the lowest reading.
- Subtract the robot’s labeled height from that lowest clearance and add at least a 5 mm safety margin.
- Verify clearance by physically testing the robot under furniture. Check sensors and moving parts for effective height changes.
- Measure dock footprint and lid-open height; allow 30–50 cm front clearance and ≥10 cm side clearance for docking.
- Test threshold crossings: measure height, shape, and width. Simulate obstacles and document failures to guide ramps or model changes.
Measure Robot Vacuum Height and Dock Clearance
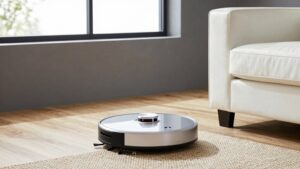
Wondering if your robot will actually fit under that sofa? You’ll measure the floor-to-bottom clearance and compare it to the robot’s maximum height, keeping at least a 5 mm (0.2 in) safety margin. If the vacuum’s rated height is ≤100 mm (3.94 in), it generally clears most sofas and beds. Note some LDS models reach 100–105 mm (4.0–4.13 in). Account for dynamic sensor bulges that can increase effective height during operation.
For docking, measure forward and lateral clearances: provide 12–20 in (30–50 cm) in front of the dock and ≥4 in (10 cm) each side. Verify dock height and lid articulation; some stations, like an Omni Station, require substantial vertical space when open. For example, open-lid ~662 mm, recommended total clearance ~850 mm.
Don’t confuse dock clearance checks with unrelated topic or unrelated discussion points. Keep measurements focused on physical fit and operational clearance.
Measure Furniture Clearance for Robot Fit
How tall is the gap under your furniture, and will your robot actually clear it? You’ll measure vertical clearance with a rigid ruler or caliper at multiple points across the underside to ensure measurements accuracy. Record the lowest reading; that establishes the minimum internal height the robot must fit.
- Measure floor-to-bottom at several locations with a caliper or rigid ruler to detect slope or obstructions.
- Subtract the robot’s labeled height from the lowest clearance and add a safety margin of at least 5 mm (0.2 in) to allow for sensor lift and dynamic motion.
If the robot’s maximum height plus margin exceeds clearance, select a lower-profile model or modify the furniture. Validate with physical testing: run the robot under the furniture to confirm it passes smoothly. Sensors and moving parts can alter effective height compared to specs.
Be pragmatic: rely on measured data and real-world tests rather than trusting labels alone.
Account for Lid‑Open and Tank‑Removal Clearances
Why measure with lids and tanks open? You need the worst-case vertical profile: dock plus robot plus any raised covers. Measure the dock with its lid open; lid open height can add several centimeters and is often the deciding factor when fitting stations into cabinets. For tank removal, verify the clearance required to lift the water tank straight out. Some systems need roughly 270 mm additional vertical space for easy extraction.
Use the X10 Pro Omni as a reference: its combined clearance for robot, dock and tank removal approaches 850 mm. Practical checks report an Omni Station lid open height around 662 mm. When you plan a placement, add robot height, lid open, and tank removal allowance to get the maximum needed. Physically test by opening the lid and lifting the tank in the intended spot. If any restriction exists, reposition the station or modify the enclosure to avoid interference during routine maintenance.
Measure Thresholds and Predict Crossing Success
After you’ve confirmed lid and tank clearances, check the floor level changes the robot will face next. You’ll measure each threshold’s height, shape, width and surface to estimate threshold crossing probability. Compare the tallest measured value to the vacuum’s rated obstacle clearance and apply a safety margin: suggest +5 mm. Note texture and edge geometry: rounded or beveled edges and narrow transitions improve success; abrupt, wide steps reduce it.
- Measure highest threshold height and compare to robot obstacle clearance plus 5 mm margin.
- Record threshold shape (rounded, beveled, abrupt) and width; prioritize narrow, tapered profiles.
- Note surface materials (carpet vs. wood/tile) since traction affects climbing ability and crossing consistency.
Test one representative crossing in place. Observe stalling, wheel slip, or clean traversal; adjust route or add a ramp.
Use these data to decide if hardware upgrades, ramps, or route restrictions are necessary for reliable threshold crossing.
Which dimensions matter most when you plan robot movement through a real home? Diameter, clearance height, and dock footprint are primary. Diameter governs turning radius and corridor fit; round models ease multi-direction navigation but can snag in corners. Therefore, measure doorways and chair clusters against the vacuum’s width.
Clearance height needs at least 5 mm more than the robot’s height so it reliably passes under furniture. Ground clearance and wheel travel determine threshold- and rug-crossing capability; verify vertical travel against common lips and runners.
Dock footprint and dock height constrain placement flexibility in small spaces. Ensure front clearance (12–20 inches) and side clearance (≥4 inches) for maintenance access without violating your layout.
Use these physical checks to validate theoretical algorithms: they may plan optimal paths, but the robot still obeys hard dimensional limits. Factor in aesthetic considerations when choosing docking sites so functionality and home appearance coexist without compromising navigation.
Dock Placement Rules and Minimum Clearances
Where should you position the dock so your robot can reliably return, recharge, and be serviced? Place it against a flat wall with 12–20 inches (30–50 cm) of unobstructed front clearance so the robot aligns and the sensors get reliable measurements accuracy for docking routines. Keep at least 4 inches (10 cm) clear on each side to permit maintenance access and avoid lateral interference.
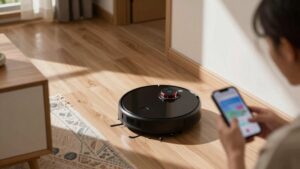
Ensure overhead space lets any lid or carrier open fully for routine servicing. Confirm the spot has strong 2.4 GHz Wi‑Fi so charging and mapping status remain synchronized.
- Front clearance: 12–20 in (30–50 cm) unobstructed for path and sensor calibration.
- Side clearance: ≥4 in (10 cm) per side for access and minor adjustments.
- Overhead: Unobstructed clearance to open lids/compartments for maintenance access.
- Connectivity: Stable 2.4 GHz Wi‑Fi at dock location to preserve mapping and status reporting.
Position with these rules to minimize repeats of moving the dock during weekly service.
Match Size to Your Home: Apartments, Families, Pets (Practical Outcomes)
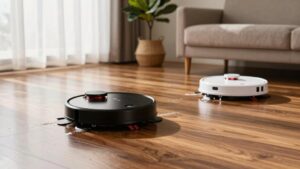
How tall should your robot be to work reliably in your space? For apartments, pick compact robots under 100 mm (4 in) so they clear most furniture and avoid bulky docks or ramps. Measure couch and cabinet clearance and add 5 mm margin. The robot height plus 5 mm must fit cleanly.
If you have a family, prioritize larger bins and robust threshold handling. Aim for 100–105 mm tall units that balance under-furniture access with rug and door transitions. Look for models engineered for repeated threshold crossings and higher debris loads.
Pet households benefit from low-profile robots (≤100 mm) with large dustbins or stronger suction to manage hair while still fitting under couches. For split-level or frequent threshold crossings, choose robots with greater ground clearance and larger wheels to handle 1.6–2 cm transitions without stalling.
Skip two word discussion ideas or nonessential topics during selection. Focus on measured clearance, bin capacity, and threshold specs for practical outcomes.
Quick Decision Checklist and Troubleshooting Steps
You’ve picked the right size and features for your home; now use this quick checklist to confirm fit and troubleshoot common issues before unpacking. Verify furniture clearance is at least 5 mm (0.2 in) greater than the robot’s maximum height. Measure door thresholds and carpet edges. Most robots handle ~2 cm (0.8 in). Models with larger wheels or stronger motors may exceed that but require real-world testing. Account for dynamic sensors that can change effective height during operation.
- Measure clearance: confirm > robot height + 5 mm at all low points.
- Test thresholds: simulate 2 cm obstacles; note failures and consider higher-wheel models.
- Check specs: validate max clearance, battery life expectations, and any sensor notes.
- Troubleshoot: if it catches, block transition, adjust ramp, or choose higher-threshold design.
Also assess noise levels during a trial run. If problems persist, contact support with measured values and observed behavior.
Frequently Asked Questions
Can the Vacuum Operate on Carpeted Stairs or Multi-Level Homes?
Yes, you can use it on carpeted stairs and in multi-level homes only if the model lists vacuum compatibility with stairs and provides adequate stair clearance sensors.
You’ll need a vacuum that detects edges, supports stair clearance thresholds, and has compatible suction/brush settings for carpet. For multi-level use, you’ll transport or manually move it between floors unless the unit has mapped multi-floor navigation and specified stair-compatible features.
How Do I Measure Clearance for Accessories Stored Beside the Dock?
Measure the accessories storage clearance by placing the dock with its accessories in their intended positions and using a ruler or caliper to record vertical and lateral gaps.
Check dock side shelving spacing for tool handles, charger cords, and replacement parts. Keep at least 2–3 cm horizontal clearance and 5–10 mm vertical tolerance beyond the tallest accessory.
Verify movement paths, cable routing, and easy removal access to prevent interference with docking or sensors.
Will Humidity From the Station Affect Nearby Wooden Furniture Long-Term?
Yes, prolonged humidity impact from the station can damage wooden furniture. You should monitor relative humidity near the dock; sustained elevations above ~60% promote swelling, warping, mold growth, and finish degradation.
Use a hygrometer to log conditions. Keep vents directed away from wood, and allow airflow or a small dehumidifier if needed. Short intermittent dampness usually won’t harm sealed surfaces, but persistent moisture will cause long-term deterioration.
Can I Place the Dock in a Corner With Angled Walls?
Yes, you can place the dock in a corner with angled walls, but ensure proper alignment and clearance. Position the dock so sensors have unobstructed approach paths. Angled corners can deflect return trajectories; therefore, test docking repeatedly.
Maintain recommended clearances laterally and in front. Avoid recessed or obstructed corner walls that block signals. Secure the dock on a flat surface to prevent drift. Verify consistent successful docks before finalizing placement.
Are There Electrical Outlet Height or Cord-Routing Requirements?
Yes. You should mount the outlet at a height that aligns with the dock’s plug: typically 4–12 inches above floor so the cord sits straight without strain.
For cord routing, run the cable along baseboard channels or behind furniture to avoid kinks and tripping hazards. Secure it with clips or adhesive raceways. Keep the route clear of heat sources and crossing walkways. Allow a small service loop for easy dock removal and maintenance.
Conclusion
You’ve now got the measurements that matter: robot height, dock footprint, furniture underclearance, lid/tank open room, and threshold heights. Use a tape measure and test clearances before buying. Match diameter and clearance to doorways and room layouts. Allow extra height for maintenance actions.
Position the dock on level ground with recommended side and front space. If your robot snags, remeasure, adjust furniture, or choose a slimmer model to ensure reliable navigation.