How to Protect Sealed Hardwood Floors From Moisture
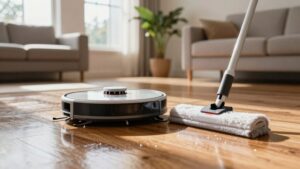
Protect sealed hardwood by controlling moisture sources and monitoring conditions: wipe spills quickly with a damp microfiber cloth. Use protective pads under furniture; run exhaust fans for cooking and showers. Keep indoor RH at 35–55% with a hygrometer and dehumidifier. Inspect seams and transitions for gaps.
Install a vapor barrier over concrete or below-grade spaces when indicated. Follow manufacturer sealing and recoat schedules. Keep checking conditions and tests so you’ll learn practical barrier, testing, and installation steps next.
Quick Overview
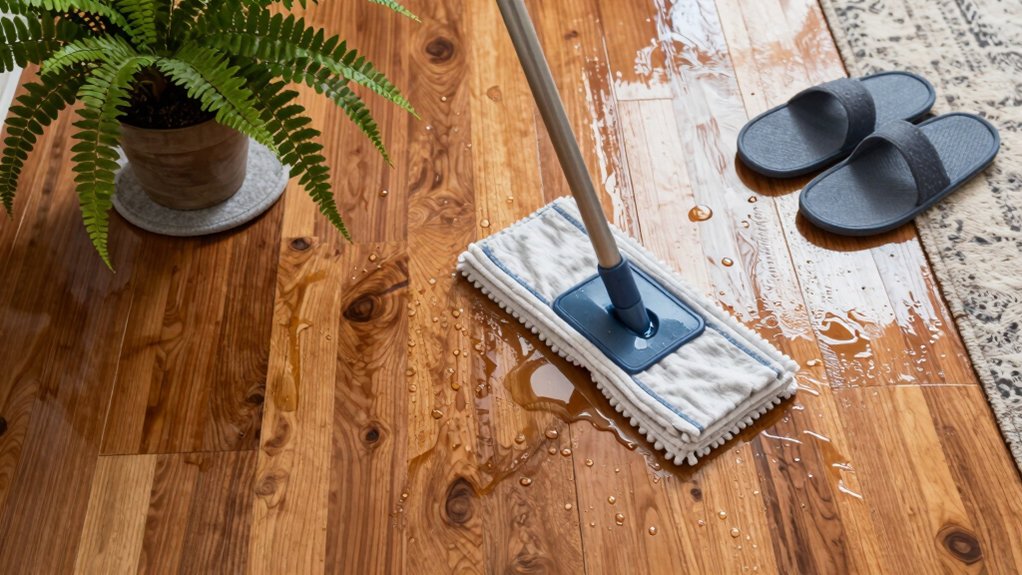
- Wipe spills immediately with a damp microfiber cloth to prevent liquid penetration and finish damage.
- Maintain indoor relative humidity between 35–55% with hygrometer monitoring to minimize wood movement.
- Use protective pads under furniture and lift heavy items when moving to avoid scratches that invite moisture.
- Install a breathable moisture barrier or seal concrete subfloors and repair seam gaps before flooring installation.
- Test slab moisture (RH probes or calcium chloride) and follow manufacturer moisture limits before glue-down or nail-down installs.
Protect Sealed Hardwood Now: 6 Quick DIY Fixes
Want to stop moisture from ruining your sealed hardwood? You can act now with six quick fixes that give immediate moisture control and long-term protection. First, wipe spills immediately using a damp, not wet, microfiber cloth so liquid won’t seep into seams or edge gaps.
Second, place protective pads under furniture and lift instead of dragging heavy items to avoid micro-scratches that trap moisture. Third, use a breathable moisture barrier or کرaling sealant on concrete subfloors: this is essential in basements or below-grade spaces to block rising damp.
Fourth, schedule periodic re-sealing or re-coating per manufacturer recommendations to keep the barrier effective. Fifth, inspect seams and transitions regularly; repair gaps promptly with manufacturer-approved sealant.
Sixth, maintain a consistent indoor humidity target of 35–55% to minimize wood movement and preserve the finish. Follow these pragmatic steps routinely, and you’ll fortify sealed hardwood against common moisture threats without costly interventions.
Understand Indoor Humidity: Sources and Effects
Those six quick fixes will help, but long-term protection depends on controlling indoor humidity because wood constantly exchanges moisture with the air. You need to understand sources: cooking, showers, laundry, houseplants, leaks, and poor ventilation all add moisture that plumes into flooring and raises relative humidity.
Seasonal swings during summer spikes and winter drying from heating force the wood to swell and shrink repeatedly, producing cupping, gaps, finish stress, and eventual splitting if extremes persist.
Keep RH in the 30–50% band. Sustained levels above 60% increase mold risks and warping, while below 30% causes excessive drying. Monitor with a reliable hygrometer placed away from direct vents and windows so readings reflect typical room conditions.
Addressing dust sources such as HVAC filters and tracked-in dirt reduces particulate buildup that can hide moisture pockets and accelerate finish wear. Maintain consistent climate control and ventilation, fix leaks promptly, and use dehumidification or humidification as needed to stabilize the indoor environment and protect your sealed hardwood.
When You Need a Moisture Barrier for Hardwood Floors
If you’re installing sealed hardwood over concrete, in a basement, or any below-grade space, you must use a moisture barrier to stop vapor from migrating into the wood and causing cupping, adhesive failure, or mold. You also need a barrier when the subfloor smells musty, shows past moisture damage, or when measurements exceed your adhesive or finish tolerances: that’s the moisture barrier rationale.
Choose type by subfloor compatibility and installation method so the system performs long-term.
- Concrete slab: polyethylene sheeting or liquid-applied membrane sealed at joints
- High RH or prior damage: specialized vapor-retarder underlayments
- Wood subfloors: vapor retarders designed for nail-down or floating installations
- Heated or elevated slabs: products rated for temperature and future moisture shifts
Always prepare and dry the subfloor; seal seams, follow manufacturer instructions, and confirm the barrier matches your flooring method (floating, glue-down, nail-down). Proper selection and installation prevent failure and extend floor life.
How to Test Slab Moisture: Quick Tests and RH Probes
After you’ve selected and installed the proper moisture barrier, you need to verify the slab’s current moisture condition before laying sealed hardwood. Improper readings or skipped tests are a common cause of failures. Start with quick tests: the plastic sheet (ASTM) and calcium chloride (ASTM F1869) give rapid screening. The plastic sheet shows vapor drive visually; the calcium chloride quantifies moisture in pounds per 1,000 sq ft. This way, you’ll know if mitigation or specific adhesives are required.
For definitive results, use RH probes: drill to the specified depth, insert probes, seal the holes, and allow 24 hours for equilibration before recording readings. RH testing reveals in-situ relative humidity, which directly informs allowable adhesive moisture limits and whether sealers or moisture mitigation are necessary. Remember that elevated slabs often dry over time and differ from on-grade slabs with compromised vapor barriers. Therefore, interpret results by slab type. Use both methods as complementary tools to select compatible adhesives and mitigation strategies.
Which Barriers Actually Work: Films, Liquid Epoxies, and Underlayments
Which barrier you pick can make or break a sealed hardwood installation, so choose deliberately. You’ll weigh barrier efficacy and installation compatibility against subfloor type and project timeline. Films, liquid epoxies, underlayments, and traditional vapor retarders all work, but differently.
- Polyethylene films: simple vapor barrier over concrete; slows moisture vapor movement when seams are sealed.
- Liquid-applied epoxies: cure to an impermeable layer; some rapid-set formulas resist 100% RH for fast-track jobs.
- Specialized underlayments: combine physical separation with moisture protection. They are useful where both cushioning and barrier properties matter.
- Asphalt-saturated felt (vapor retarder): reduces upward moisture on wood subfloors; compatibility varies with floating, glue-down, or nail-down methods.
Match the barrier to slab or wood subfloor, installation method, and climate. Follow manufacturer guidance on seam sealing and cure requirements. Choosing the right product up front preserves finish integrity and prevents future moisture failures.
Prep, Install, and Troubleshoot: Choosing, Applying, and Next Steps
Ready to install sealed hardwood that actually lasts? Begin by testing slab moisture with RH or calcium chloride tests. If readings are high, plan mitigation like epoxy-based moisture barriers rated Level 1–3 to reduce pressure from ~25 psi to as low as ~3 psi. Choose prep barriers matched to your subfloor: plastic sheeting for concrete, vapor-retarders for wood, and compatible with your installation method (floating, glue-down, nail-down) and climate.
Prepare the subfloor; seal seams, let the barrier cure fully per manufacturer directions, then install primers or underlayment required by your system. Use rapid-cure or low-odor options if enclosed spaces could trap moisture. Follow product-specific instructions for mixing, coverage, and recoat windows.
During install, monitor ambient RH and slab moisture. If adhesion fails or cupping appears, stop and retest moisture; then apply additional mitigation. For troubleshooting, document test results and contact the product tech rep. Do not proceed until moisture and adhesion meet manufacturer limits.
Frequently Asked Questions
Can Sealed Hardwood Be Refinished Without Removing Existing Finish?
Yes, you can often refinish sealed hardwood without fully removing the existing finish. You’ll assess adhesion and sand lightly to dull the surface. Choose refinishing options like recoating with compatible polyurethane or water-based products.
Avoid heavy layering without proper prep; finish layering should be limited to recommended coats and sanding between them. If finish adhesion is poor or damage is deep, you’ll need to strip to ensure a durable, even result.
Will Indoor Plants Significantly Raise Floor Moisture Levels?
No, indoor plants won’t usually raise floor moisture substantially unless you overwater or have many large pots without trays. You should place waterproof saucers, use well-draining soil, and avoid sitting wet pots directly on sealed hardwood.
Monitor humidity with a hygrometer. Keep indoor relative humidity between 35–55%. Check for spills promptly, lift plants occasionally to air floors, and consider trays or risers to prevent prolonged moisture contact.
Are Pet Accidents More Damaging Under Sealed Floors?
Yes, pet accidents can be more damaging under sealed floors because moisture sensitivity means liquids can wick into joints or underboards before you notice. You should clean promptly and use enzymatic cleaners. Lift boards if saturation occurs.
Beware sealant off gassing after fresh applications, which can affect indoor air quality; ventilate and allow cures fully. Inspect seals, reapply durable coatings, and keep pets groomed to reduce frequent exposure.
Can Radiant Heat Systems Cause Long-Term Moisture Issues?
Yes, radiant heat can cause long-term moisture issues if you don’t manage humidity and moisture migration. You’ll accelerate seasonal shrinkage and gaps when floors dry too fast. Trapped subfloor moisture can promote cupping or mold.
Control indoor relative humidity, use appropriate underlayment and vapor barriers, and follow manufacturer temperature limits. Monitor moisture levels during installation and operation to prevent persistent problems.
Do Sealants Off-Gas Chemicals Harmful to Occupants?
Yes, some sealants can off-gas chemicals that raise off gassing concerns and affect occupant safety. You should choose low-VOC or water-based products, ventilate during and after application, and keep vulnerable people away until odors fade.
Follow manufacturer cure times. Use respirators if recommended, and consider third-party certified finishes (Greenguard, FloorScore). Testing indoor air for VOCs helps verify safety and gives you peace of mind.
Conclusion
You’ve got practical steps to protect sealed hardwood from moisture; act now. Monitor indoor humidity, fix leaks, and use area rugs or pads in high-risk spots.
Test slab moisture before installing and choose proven barriers: vapor-retardant films, liquid epoxies, or proper underlayments based on results. Prep surfaces meticulously, follow manufacturer instructions during installation, and troubleshoot early if you see cupping or discoloration.
Stay proactive, and your floor will stay sound and attractive for years.